Winter Project - Attic office
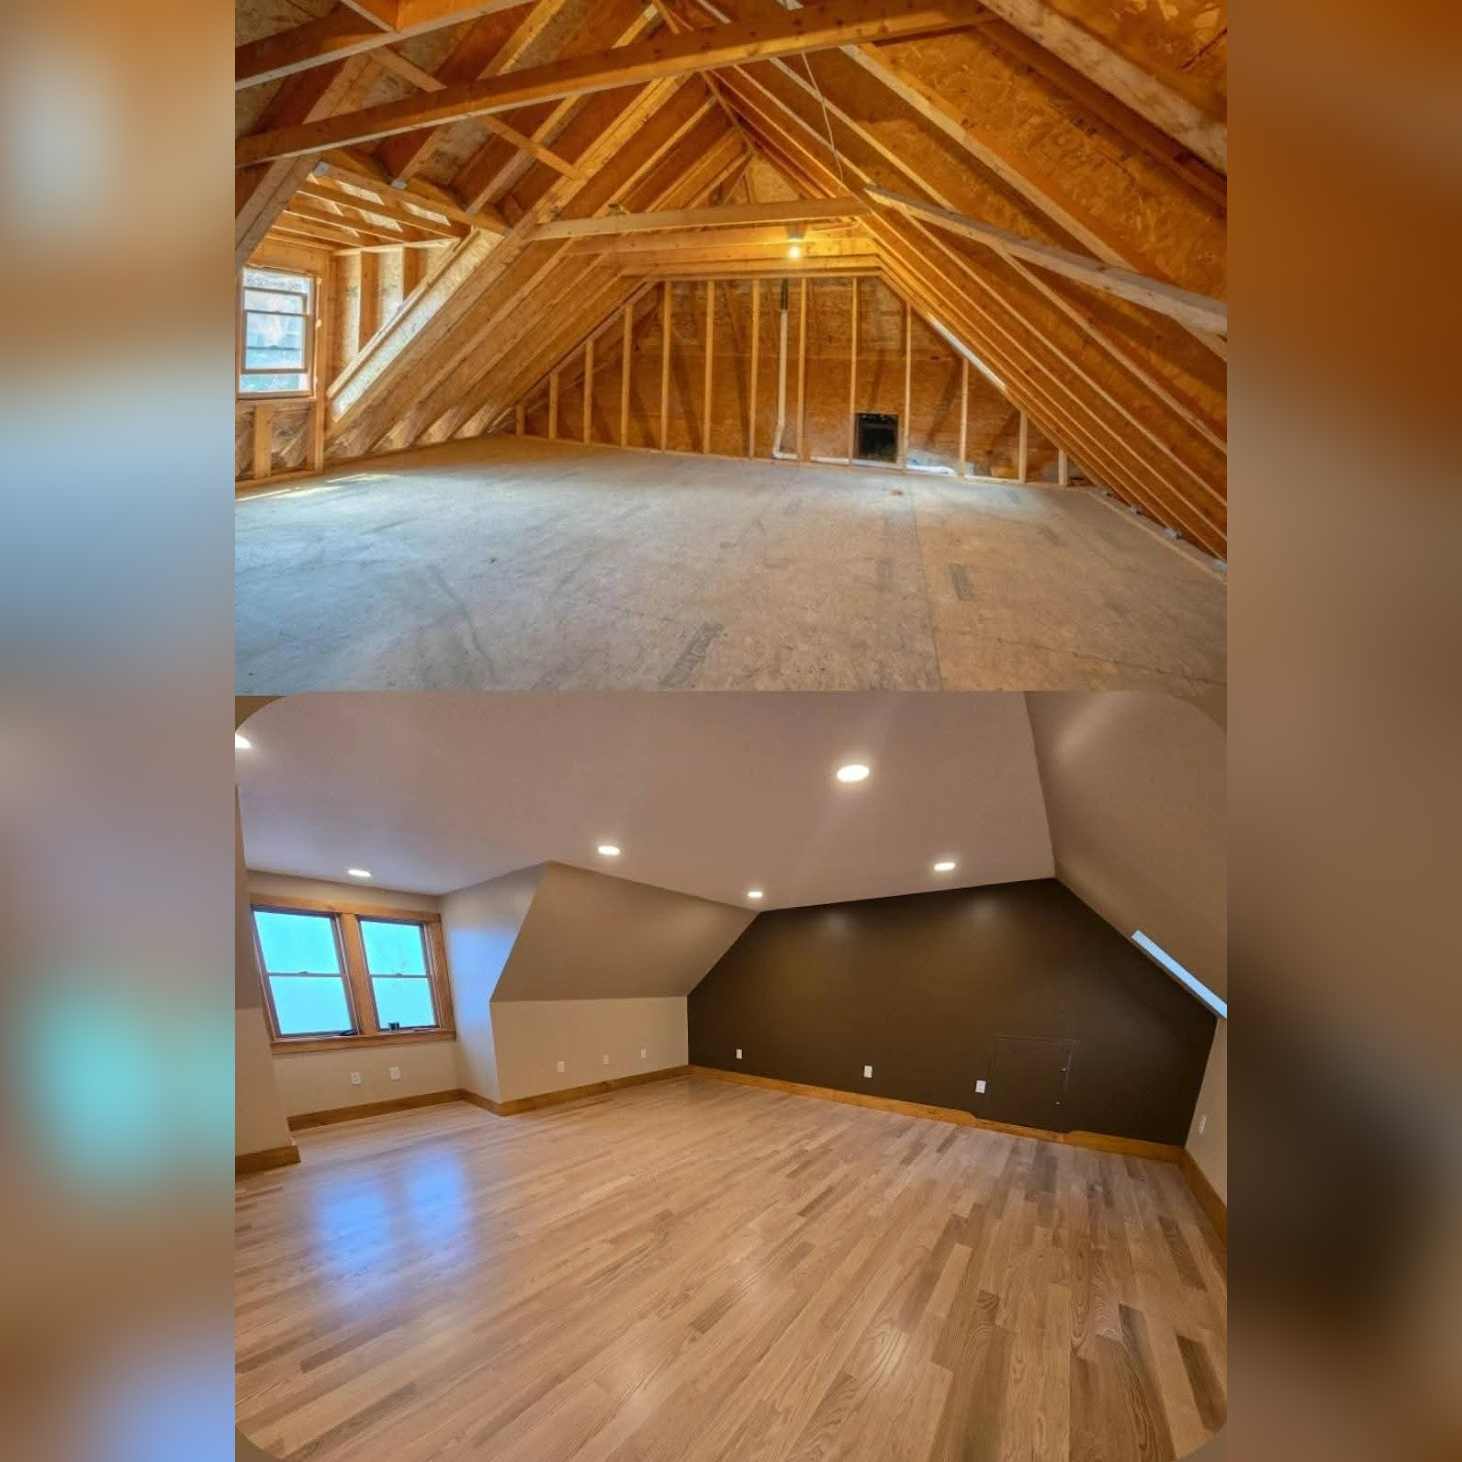
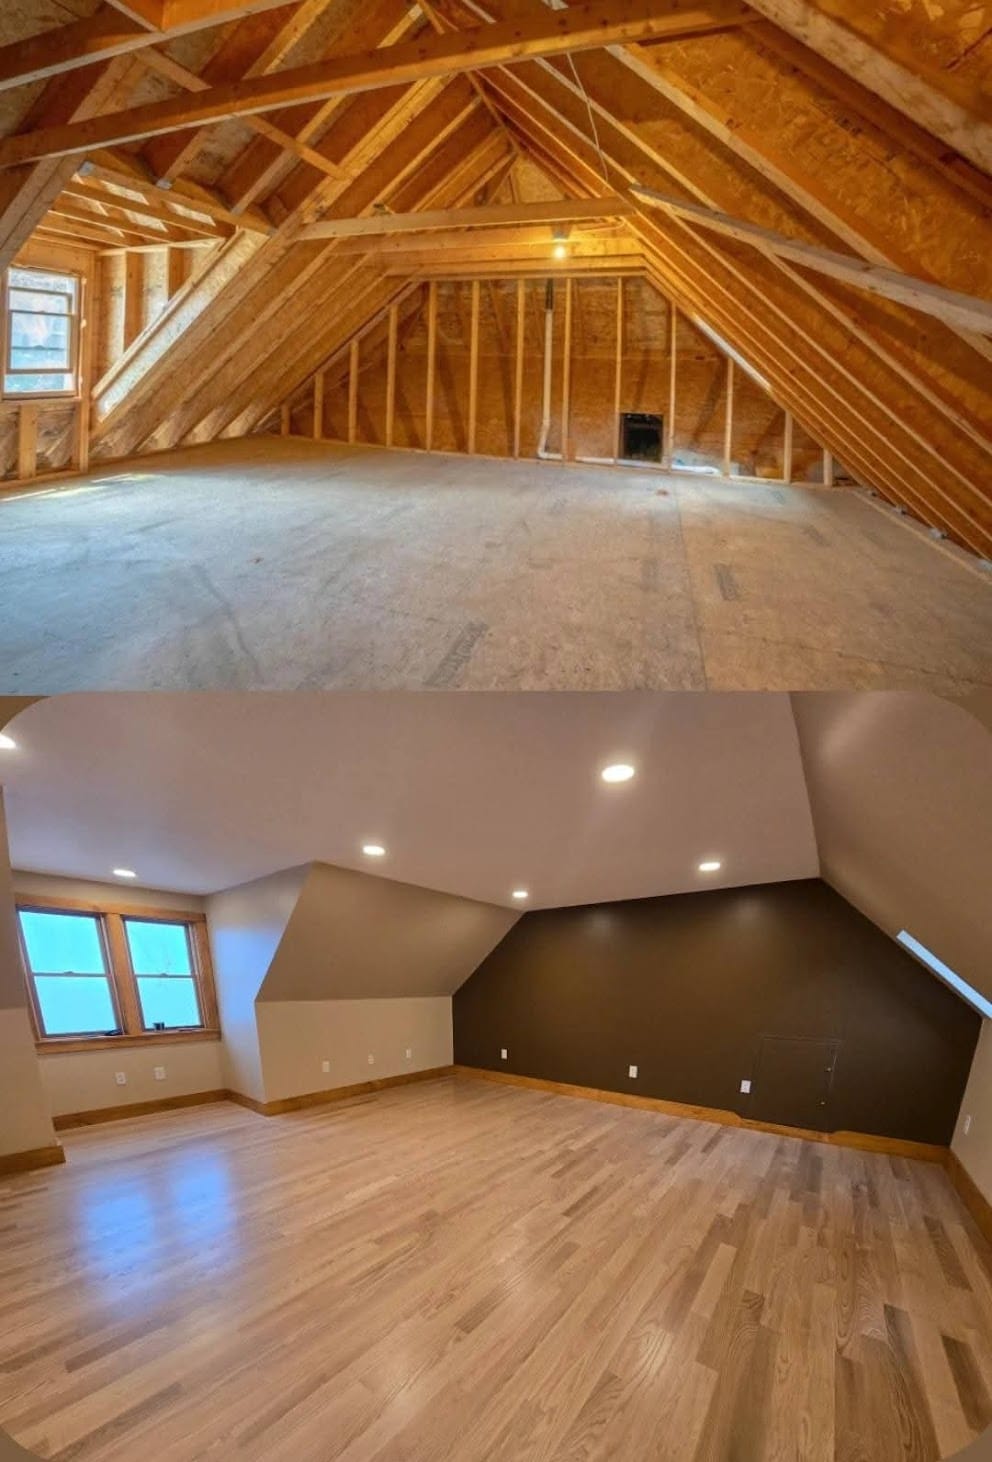
When we purchased it, our home had a ~400sqft area in the attic with sturdy subfloor, a couple of skylights, and windows. I immediately made mental plans to finish it and finally got around to it. I'd never framed anything beyond a couple of chicken coops and also had never hung or finished drywall - this was a major learning experience.

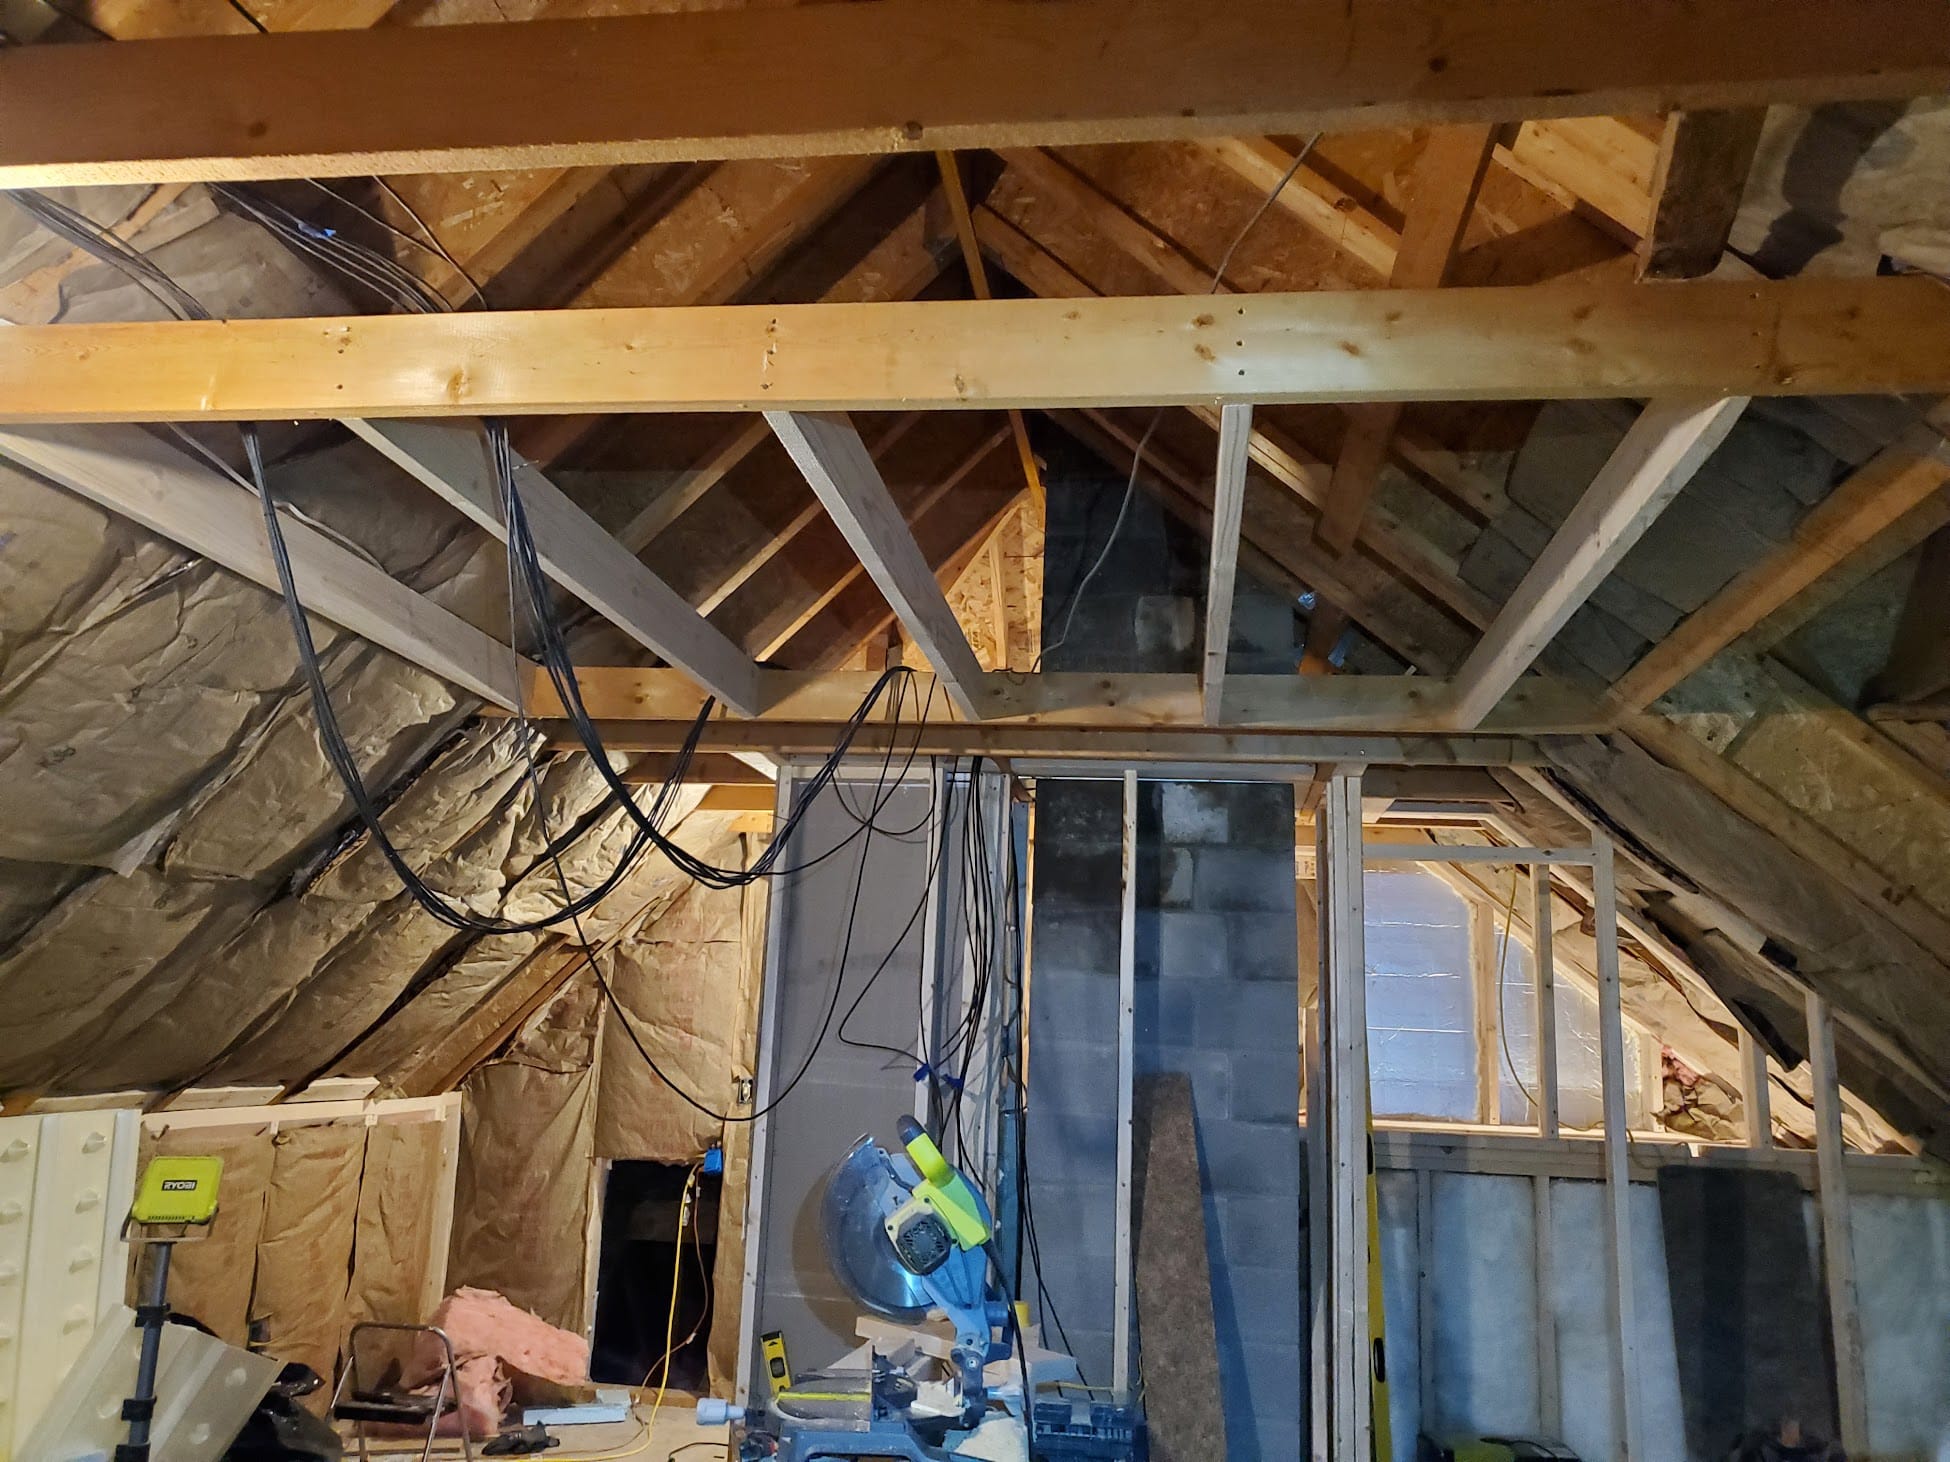
This project began last winter with the framing of the knee walls. The back wall on the right in the photo above already had some studs at 24OC spacing, so I chose to stick to it rather than have a mixture of 16OC and 24OC. To maximize space for insulation, I framed everything including the knee walls with 2x6s. To make a smooth transition between the roof knee walls, my Dad and I ripped top boards at an angle with a circular saw. Before I got too far with framing, I ran 2 20A circuits and terminated a couple of outlets to give me power to work.
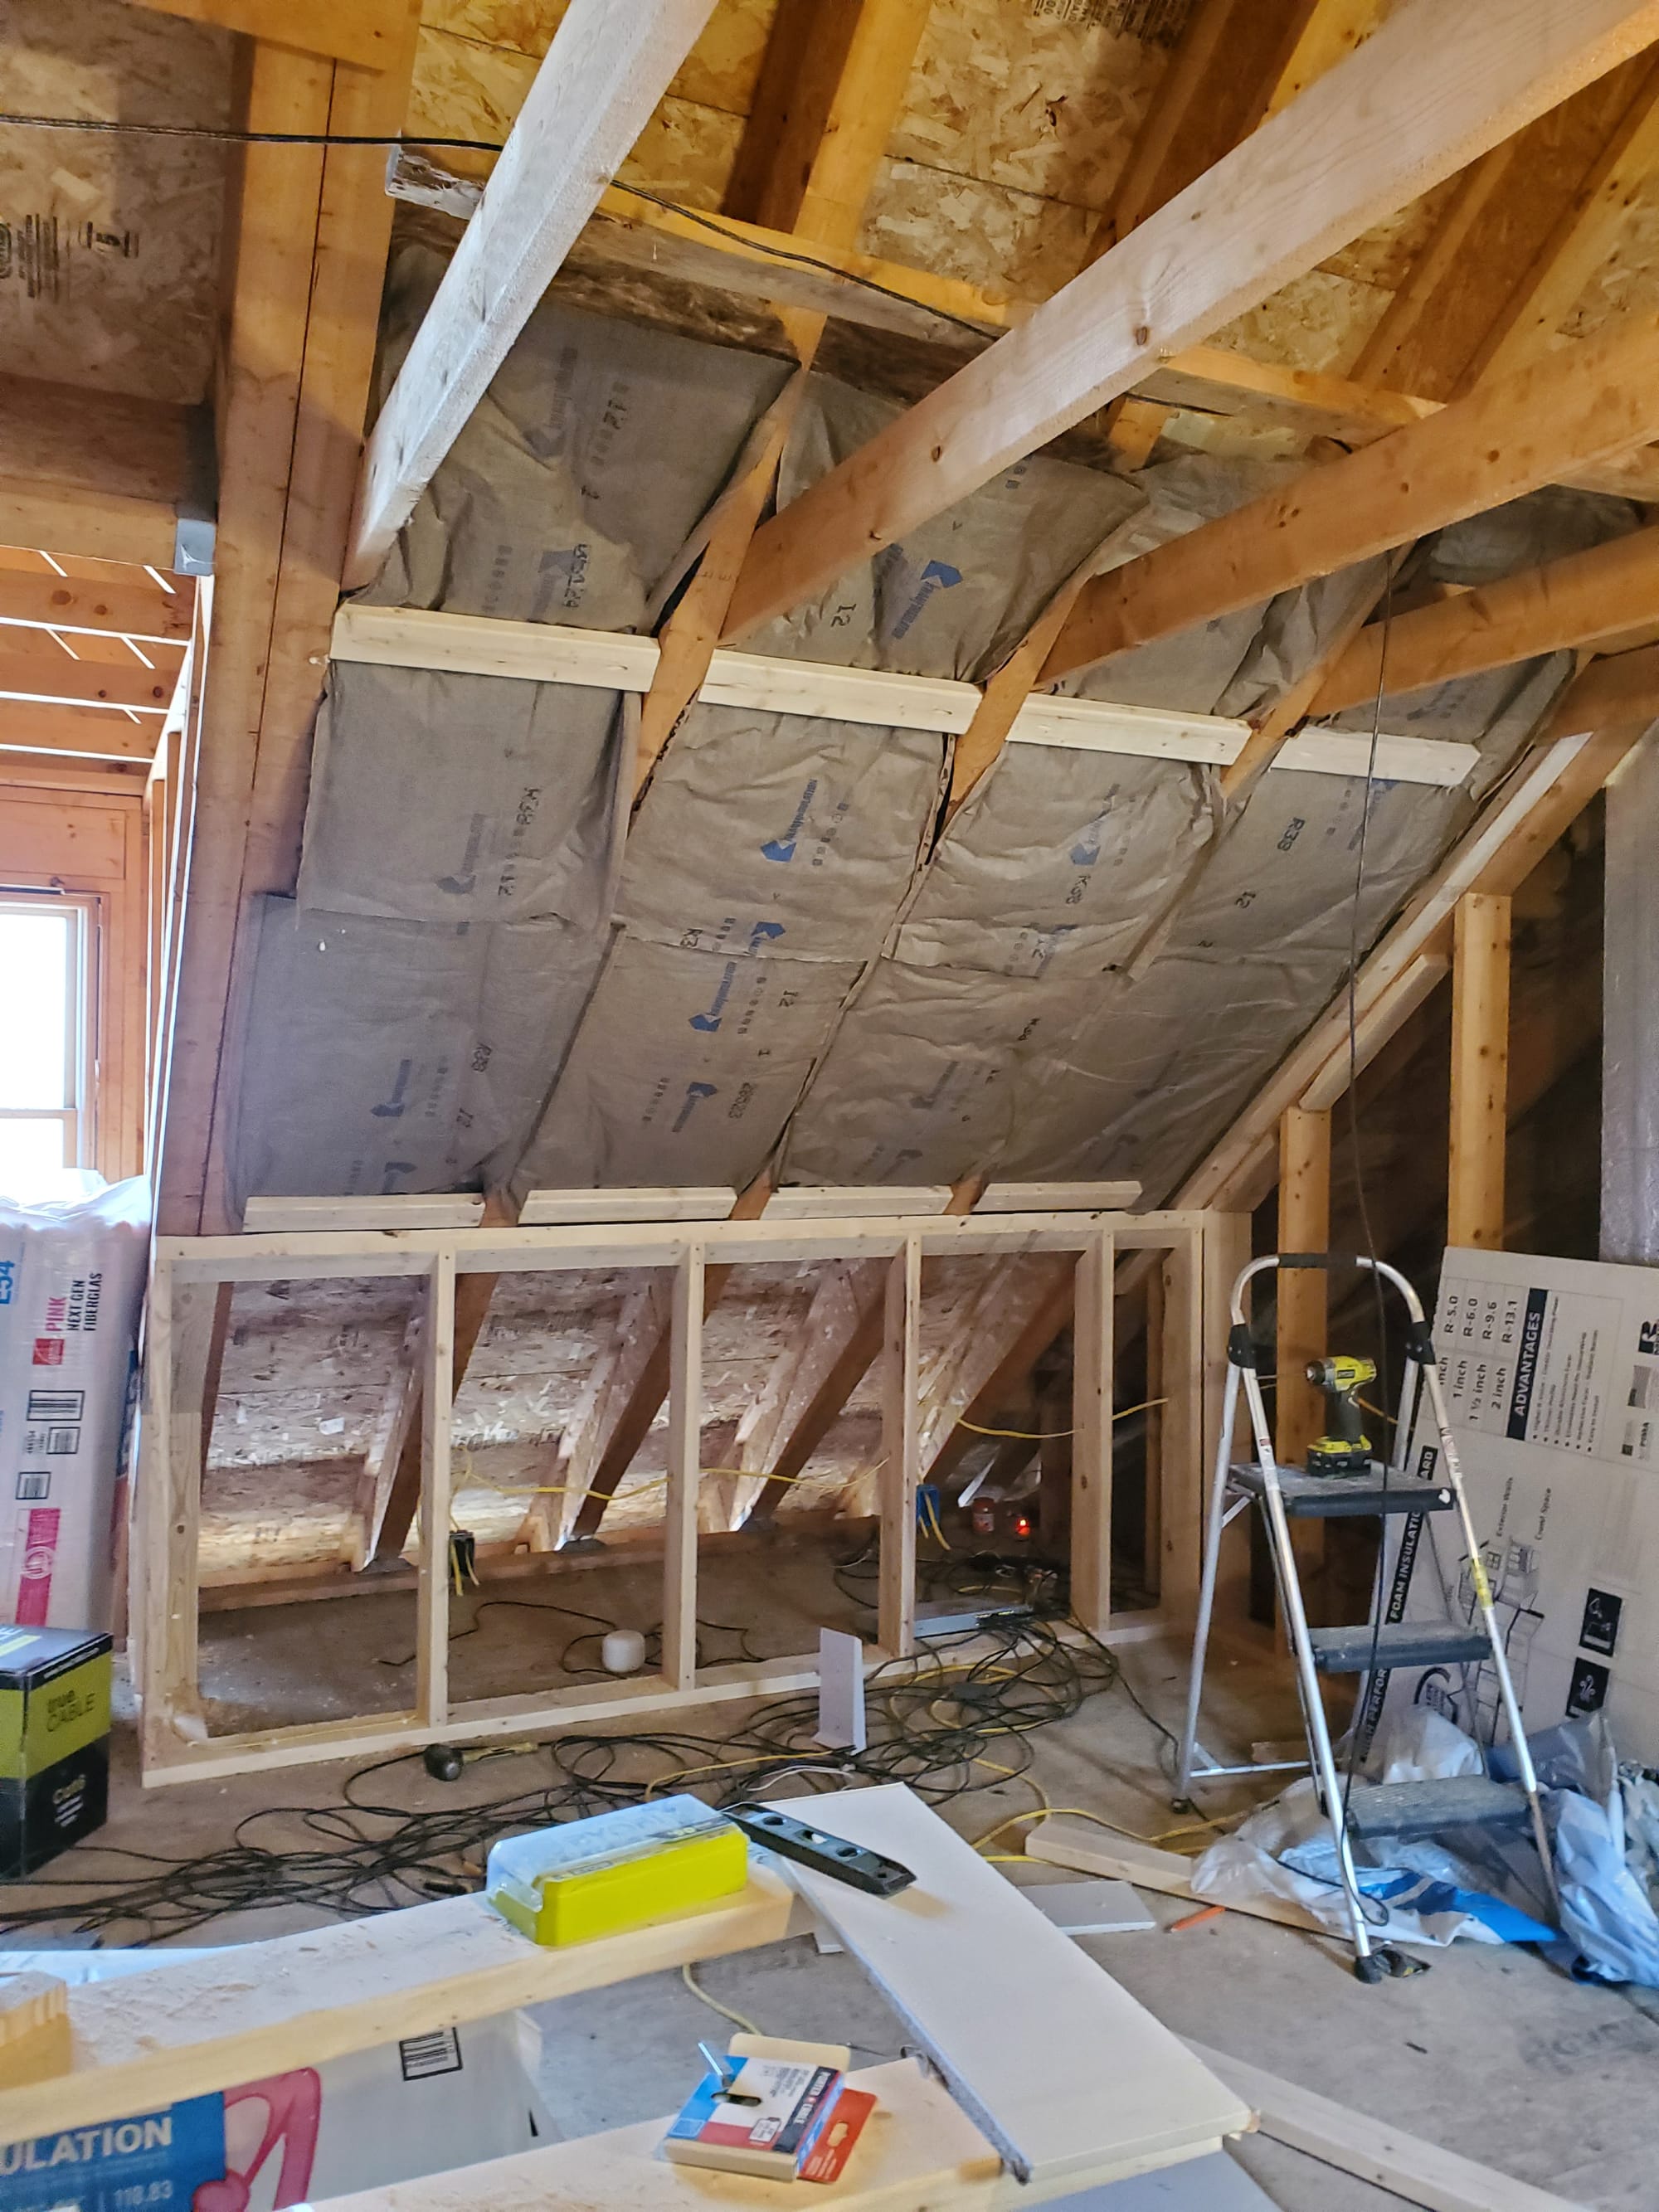
Not really having any concept of how I was going to hang the drywall early on, I added lots of blocking along the way. The additional framing on the end walls + the knee walls went up fairly quickly. I also framed in two closets, one a more traditional closet and one a small open closet to house a network rack + some gear. Most of the room had existing roof cross members, with the exception of the middle. I ran these in the opposite direction, as I had no place to land them on the right side with the window opening area. I added many additional vertical support pieces, tying to the roof rafters, to sure up the entire ceiling.
I hung the drywall in the network closet first and painted it so I could hang the rack. This allowed me to run cat6 cables to a bunch of jacks I had planned in the room. In addition, I installed two 12 port patch panels outside the room, one on either end, so I could easily add WAPs/cameras in the future without having to get wires into the room.

After framing was complete, insulating was the next task. I took 1" sheets of EPS and used plastic head nails to attach it to the back of the framing all the way around the room. I taped the seams and spray foamed any gaps, like at the corners. My goal was to provide a tight air seal and prevent air from washing through the fiberglass kraft faced insulation I installed in the stud bays. This provided ~R26 in the walls.

On the portion of the ceiling up against the roof rafters, I installed foam baffles and r38 kraft faced fiberglass insulation. On the roof proper, I stapled r30 kraft batts up in the stud bays and then rolled unfaced r30 in top of it in the opposite direction for a total of R60. Last winter, I added R30 on top of existing R38 in the rest of the house, so this roughly matched.

With insulating complete, I moved on to drywall. I opted to hang 5/8" fire rated for both ceilings and walls - I thought it would be better with the 24" OC framing and significantly decrease ambient sound levels. Due to its weight and working mostly alone, I picked up a drywall hoist - this made the entire job much easier. As I went along the ceiling, I cut holes and installed Phillips Hue 6" slim downlights - these are the rolls royce of canless lights, integrate well with home assistant, and canless were a must in my quest to keep the room airtight.

With a couple of tweaks to high and low spots as I went along (I ran an electric planer across a few ceiling studs in particular), drywall progress nicely. To cut in the electrical boxes, I picked up a blind box locator which really sped things up and kept my cuts clean. I could only fit 8 foot sheets up the stairway but I hung the largest pieces I could to minimize joints and subsequent finishing. In doing so, I ended up with quite a few waste scrap pieces. For butt joints, I made DIY butt-board with scrap OSB + shims to pull the joints in and make them easier to fill +float.

Sanding and mudding took a good week and produced ungodly amounts of dust. I picked up a special shop vac filter to avoid spewing the super fine dust everywhere throughout the house.

I bought a table saw, watched a couple videos, and trimmed the windows out in pine. I went on to stain this to match the baseboards.

I spent a couple of days priming and painting - I used kilz 3 primer on everything, topped with 2 coats of Behr Dynasty in Beige + an accent wall in dark brown. Behr didn't appear to sell a ceiling flat in the Dynasty line so I stepped down to the Maruqee line for that portion.
After painting was wrapped up, it was time for flooring. I bought unfinished white oak hardwood from a local lumber yard at ~4.75/sqft. I had looked at pre-finished to save time but didn't like the micro-bevels. Hardwood in general, kept dry, should outlast the house. I picked up a flooring nailer and a brad/finish nailer. After the first couple of rows, I was able to swap over to the flooring nailer and really start making progress. I left an expansion gap all around the edge.

The flooring went down in a few evenings.

Next, I rented an orbital sander from home depot and went through various grits, starting at 36 and finishing at 120 as I remember. It took an entire day and made even more dust than the drywall.
I did quite a bit of research on flooring coatings and decided on several Bona products in a satin sheen. I started with 2 coats of Bona Classic Seal. I did the second coat later in the day of the first coat to avoid having to mechanically abrade. I then screened by hand with a 220 grit pole sander before top coating with 2 coats of Bona Traffic HD. I applied both with a microfiber roller on a pole rather than using a squeegee - despite reading some horror stories, it went on very easily. Advertised coating cover was fairly accurate and I used ~2 gallons of product, 1 per coat.


With the end in site, I picked up a bunch of high grade pine boards and cut, sanded, stained, and installed them. I trimmed out the closet door and hung a pine door there, stained to match. I also stained the pine window trim I installed earlier.

With that, the basic room was complete!

We picked up a large used sleeper-sectional. a few weeks later to provide seating + server as an auxiliary guest space - getting this up the stairs proved extremely difficult and took half the day + removing a portion of the stair door trim (I didn't measure and just assumed it would fit up the stairs - bad move). I also moved in my hobby work desk, ad old Hon that's traveled 3 states with us from my Dad's old office.

For my work desk, I picked up a butcher block slab, cut it to size, stained + finished with polyurethane, and installed it on top of a dual motor standing desk frame . I also added a whiteboard and a new chair with polyurethane roller blade wheels rather than a traditional floor mat.

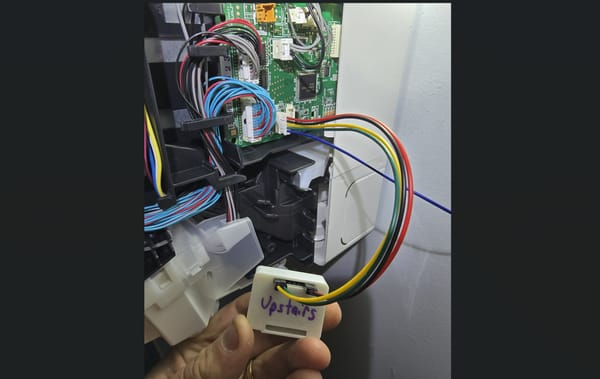
During framing, next to the closet, I added blocking to support a TV mount. During drywalling, I added a recessed box with cat6 cables back to my network rack and an outlet, all in prep for perfectly fitting a 75" TV with no visible cables.

Finally, with summer fast approaching and the moderate spring temperatures on their way out, I needed some HVAC. Like with the TV, during framing, I added blocking to support a minisplit head above the couch. I installed a 12k btu R410A Gree Sapphire. I followed the exact same process I did with my first minisplit install. This time around, with tariffs in place, the gree branded units were a little cheaper than the rebranded Alpine home air units so I opted to buy one of them from efireplacestore instead.

Learning from my first install, I sunk the pad down into the ground a bit and installed plastic blocks underneath the unit, giving me enough room to fit all my tools on the service valves without cutting an access slot in the plastic pad. When I was finished I back filled the entire area with 1.5" stone. Like my other unit, this is protected by the deck overhand. I had no issues with snow build up in front of the bedroom unit during the winter and plan to install at least one other minisplit in this location. I back filled this entire area with 1.5" stone.

This was an immense, multi-craft project that took many months to complete but added significant, quality square footage to our home.