Budget Mitsubishi HyperHeat WiFi Controllers
My Dad recently had a couple of M-Series Mitsubishi H2i Hyperheat minisplits installed. He had an existing one compressor, two indoor head system he's been heating with for years (one in living room on main floor and one in basement in family room). With the current tax incentives and Efficiency Maine incentives (plus some old stock R410A units from his supplier rather than the new R32/R454B models) he got the hyperheats installed for less than I paid for my Gree Sapphire units alone (I installed them myself). He filled in the rest of the house with a 9K head + compressor for a bedroom on the main floor and a 12K head + compressor in an upstairs bedroom.
The gree and mitsubishi hyperheats are both high performance units capable of providing heat year round, even in the frigid Maine winters (both units are rated to heat relatively efficiently down to -20F or so). Comparing apples to apples, the 12K units have very similar rated specifications. I pulled all of this data from the NEEP database: Mitsubishi H2I. Gree Sapphire.
| Mitsubishi 12k H2i | Gree Sapphire 12k | |
| HSPF/HSPF2 | 12.5 | 14.0 |
| SEER/EER | 26.1/13.8 | 30.5/15.3 |
| COP at min output 47F | 3.87 | 5.42 |
| COP at min output 5F | 2.83 | 4.23 |
|
COP at max output 47F |
2.68 | 2.93 |
|
COP at min output 5F |
2.21 | 1.91 |
The Gree units appear to be a little more efficient at moderate temperatures and the Mitsubishi holds higher COPs down at lower temperatures. Both are excellent and I'd imagine averaged over a winter, provide nearly identical performance.
Both units come with IR remotes to control them. The Gree comes with an on-board wireless controller. It's a little finicky and the OEM Gree App is just passable, but there is a home assistant integration and after initial configuration, I've had virtually no issues controlling my 4 units. The integration even allows for using external home assistant-provided temperature sensors, which can be helpful in certain layouts where the on board temperature sensor doesn't accurately represent the room's temperature.
Rather unbelievably for 2026, the Mitsubishi units don't come with any form of smart control out of the box. There is an official Mitsubishi WiFi interface module you can buy, but they are nearly $200/per. Furthermore, the Kumo cloud app gets awful ratings, despite Mitsubishi seemingly having a robust under-the-hood unit control protocol. My Dad has been remotely controlling his two existing units for years via Sensibo Sky IR blasters. These have been reliable, but are expensive at $100/per and don't provide feedback of the actual run state of the unit (although he's never had an issue with commands making it to the minisplits). I set him up with home assistant using an RPI4 I had hanging around a few years back. The Sensibo integration has worked quite well.
I set out to do something better (and cheaper) this time around. I found this great ESPHome project, MitsubishiCN105ESPHome. These guys decoded the Mitsubishi serial protocol typically used for external hard wired remotes (and also used for the OEM wifi module) via the CN105 connector on the control board and built an ESPHome project that can be run on ESP8266/ESP32 boards.
To build this, I needed a couple of components. I bought a CN105 to dupont connector from Aliexpress. This connects to the Mitsubishi CN105 port on the minisplit board and has standard dupont connectors on the other side to connect to standard pins. For the dev board, I had some Wemos D1 minis hanging around from an old project and opted to use them. I read in the github comments some people had issues with certain D1 mini clones and voltage regulation, but I've had good luck with these particular boards in other projects and decided to give them a shot. Being small, I figured I could sneak it in the minisplit housing somewhere.
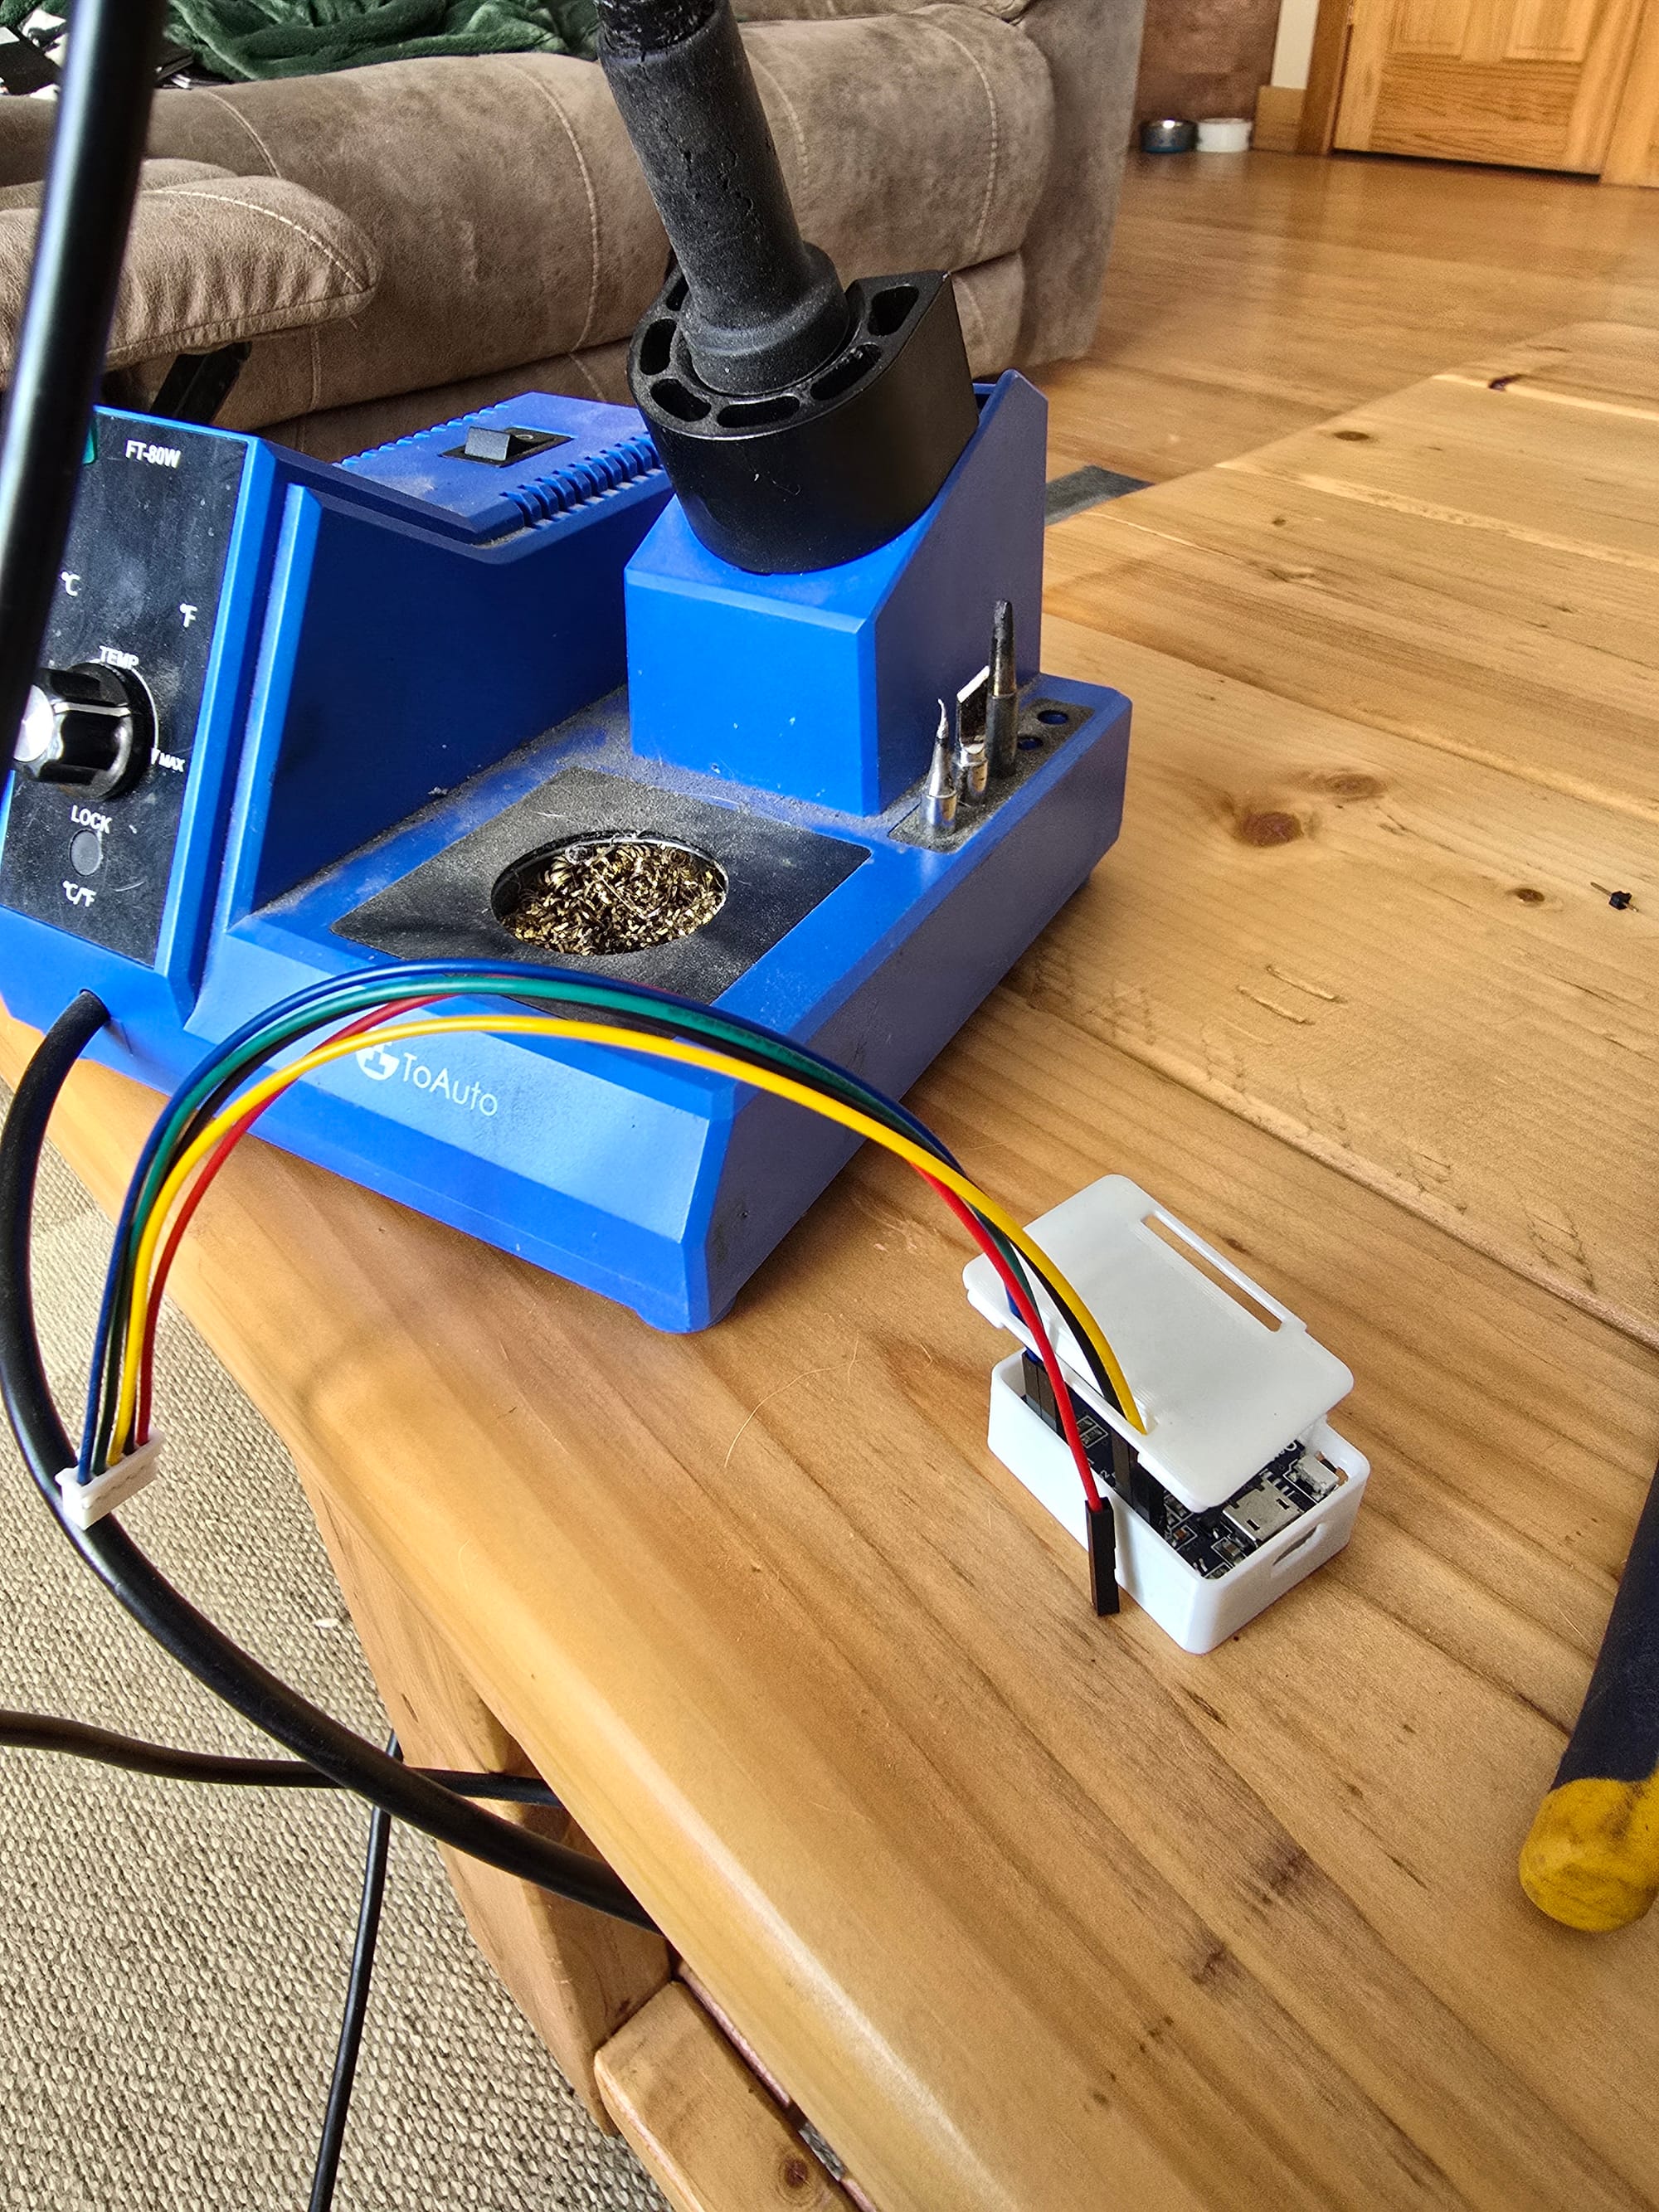
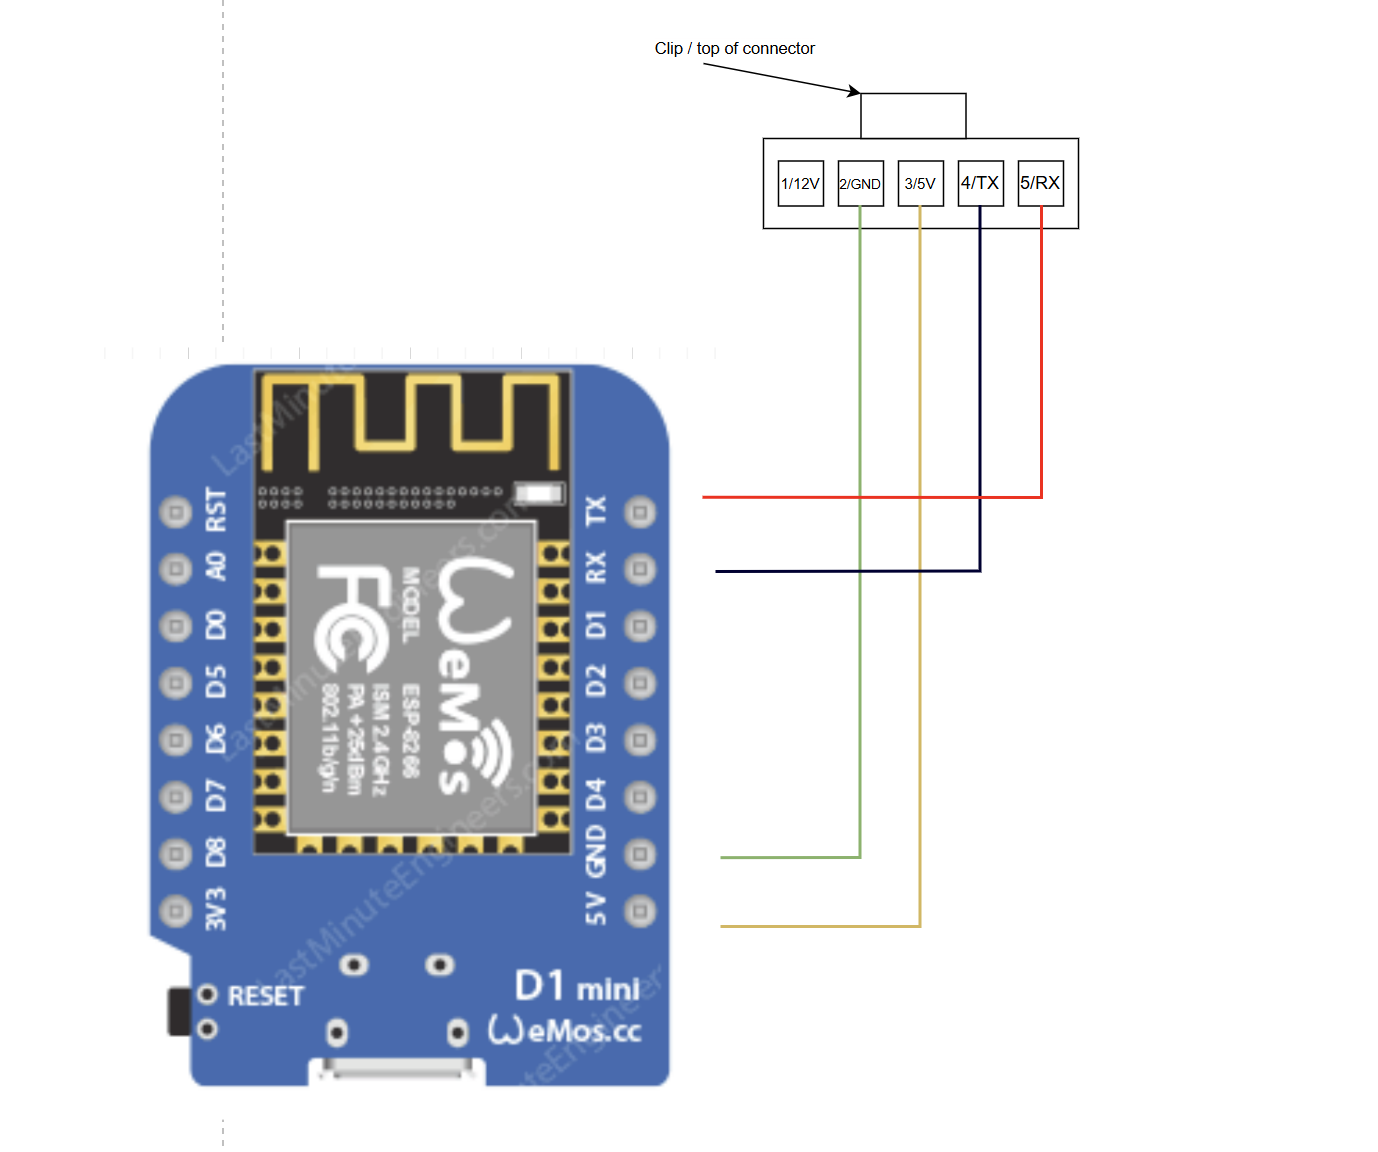
I 3d printed a case I found on thingiverse that left the pins exposed such that I could connect the dupont connectors. The CN105 connector has +12V, +5V, ground, TX and RX. +12V is unused, +5V and 0V power the esp8266. TX on the dev board goes to RX on the CN105 and RX on the dev board goes to TX on the CN105. The below image is from the "demo board" section of the readme.

The ESP8266 IO pins are officially rated for 3.3V, but unofficially they handle 5V just fine. The LM3940 and resistors/capacitors are for converting between 5V (on the Mitsubishi side) and 3.3V on the ESP8266 side. I found a couple of other projects that neglected all of this and just hooked TX/RX up directly and that's what I opted to do. I've had good luck interfacing with many 5V boards without voltage regulation. This greatly simplifies the circuit as the CN105 breakout cable can be directly attached to the ESP8266 IO pins.
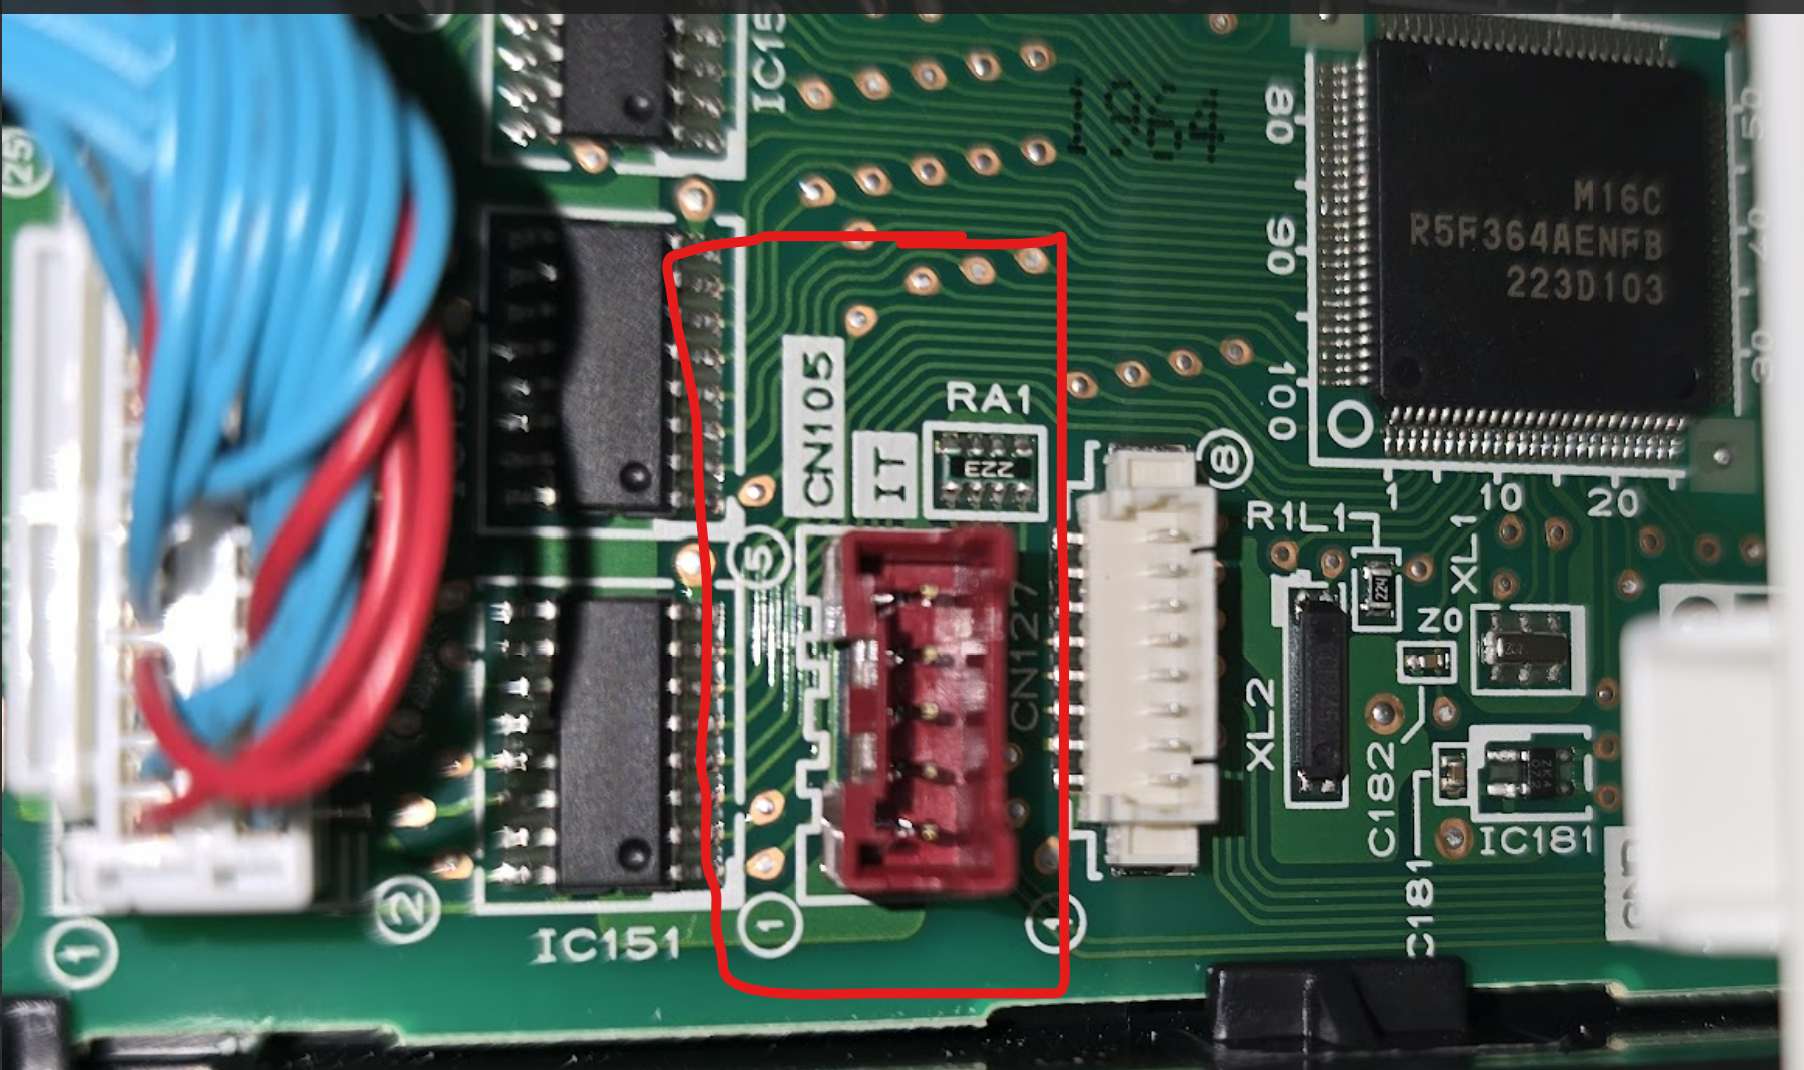
In the other write ups I found, I couldn't find any good pictures of the orientation of the CN105 connector. That is, where pin 1 is (left or right looking from top or bottom). Before attaching to the minisplit, I probed with a multimeter and identified which pin was 12V. An extremely explicit layout of the order of those pins will be my small contribution. With the clip on the top of the connector facing upwards, pin 1 is on the left as depicted below.
Next, I programmed both devices on my own home assistant/esphome instance. I pulled one of the basic configs from the aforementioned github link and tweaked it for fahrenheit:
substitutions:
  name: Dad's Upstairs Minisplit
  friendly_name: Dad's Upstairs Minisplit

esphome:
  name: dadsmitsu
  friendly_name: DadsMitsu

esp8266:
  board: d1_mini

# Enable logging
logger:
  baud_rate: 0
# Enable Home Assistant API

api:
  encryption:
    key: "#####"
  services:
    - service: set_remote_temperature
      variables:
        temperature: float
      then:
# Select between the C version and the F version
# Uncomment just ONE of the below lines. The top receives the temperature value in C,
# the bottom receives the value in F, converting to C here.
#        - lambda: 'id(hp).set_remote_temperature(temperature);'
        - lambda: 'id(hp).set_remote_temperature((temperature - 32.0) * (5.0 / 9.0));'
    - service: use_internal_temperature
      then:
        - lambda: 'id(hp).set_remote_temperature(0);'


ota:
  - platform: esphome
    password: "####"

wifi:
  ssid: !secret wifi_ssid
  password: !secret wifi_password

  # Enable fallback hotspot (captive portal) in case wifi connection fails
  ap:
    ssid: "Dadsmitsu Fallback Hotspot"
    password: "####"


uart:
  id: HP_UART
  baud_rate: 2400
  tx_pin: GPIO1
  rx_pin: GPIO3

web_server:
  port: 80


external_components:
  - source: github://echavet/MitsubishiCN105ESPHome

climate:
  - platform: cn105
    id: hp
    name: "Dad's Upstairs Minisplit"
    icon: mdi:heat-pump
    visual:
      min_temperature: 15
      max_temperature: 31
      temperature_step:
        target_temperature: 1
        current_temperature: 0.1
    vertical_vane_select:
      name: ${name} Vertical Vane
    remote_temperature_timeout: 30min
    debounce_delay : 500ms
    update_interval: 4s
    compressor_frequency_sensor:
      name: Compressor Frequency
      entity_category: diagnostic
      disabled_by_default: true
    stage_sensor:
      name: Stage
      # use_as_operating_fallback: false     # set to true for 2-stage systems or if activity indicator is unreliable
      entity_category: diagnostic
      disabled_by_default: true
    sub_mode_sensor:
      name: Sub Mode
      entity_category: diagnostic
      disabled_by_default: true
    auto_sub_mode_sensor:
      name: Auto Sub Mode
      entity_category: diagnostic
      disabled_by_default: true
    input_power_sensor:
      name: Input Power
      disabled_by_default: true

sensor:
  - platform: uptime
    name: Uptime
Finally, it was time to install and test. I first plugged the two D1 minis into my Dad's raspberry pi and copied the code over/adopted them via ESPHome and connected it to his wireless network.
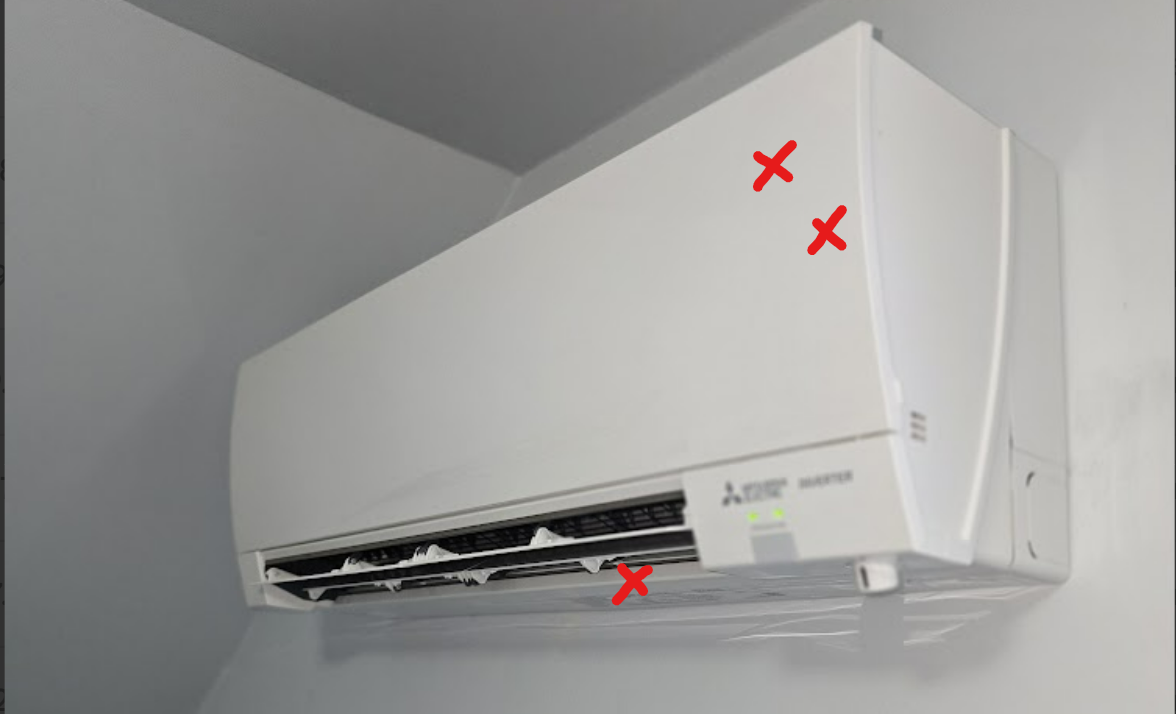
I popped the top cover of the minisplit off (lifts up and then pulls out) and took out 3 screws. The right plastic cover can then be completely removed. This video covers disassembling everything, but I only had to pull the right side.
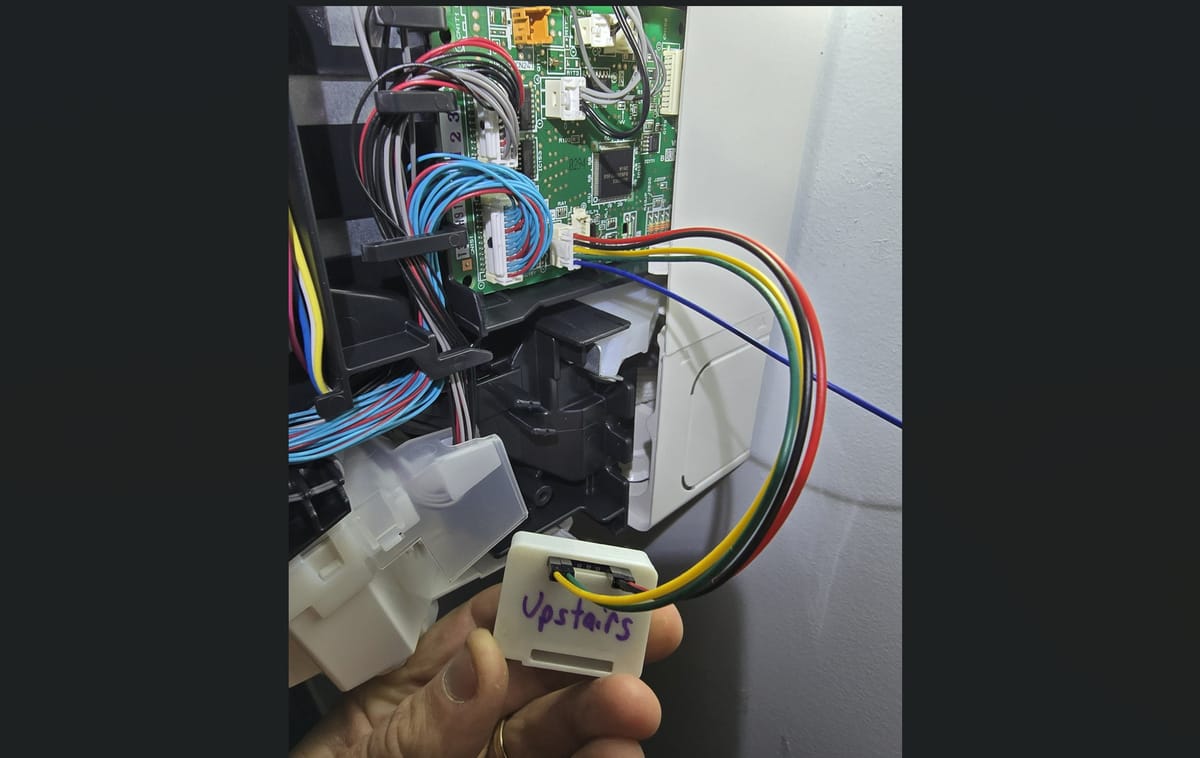
Once the plastic is off, there's one more screw holding on a metal cover that needs to be removed. Removing the metal cover exposes the control board and the CN105 connector.
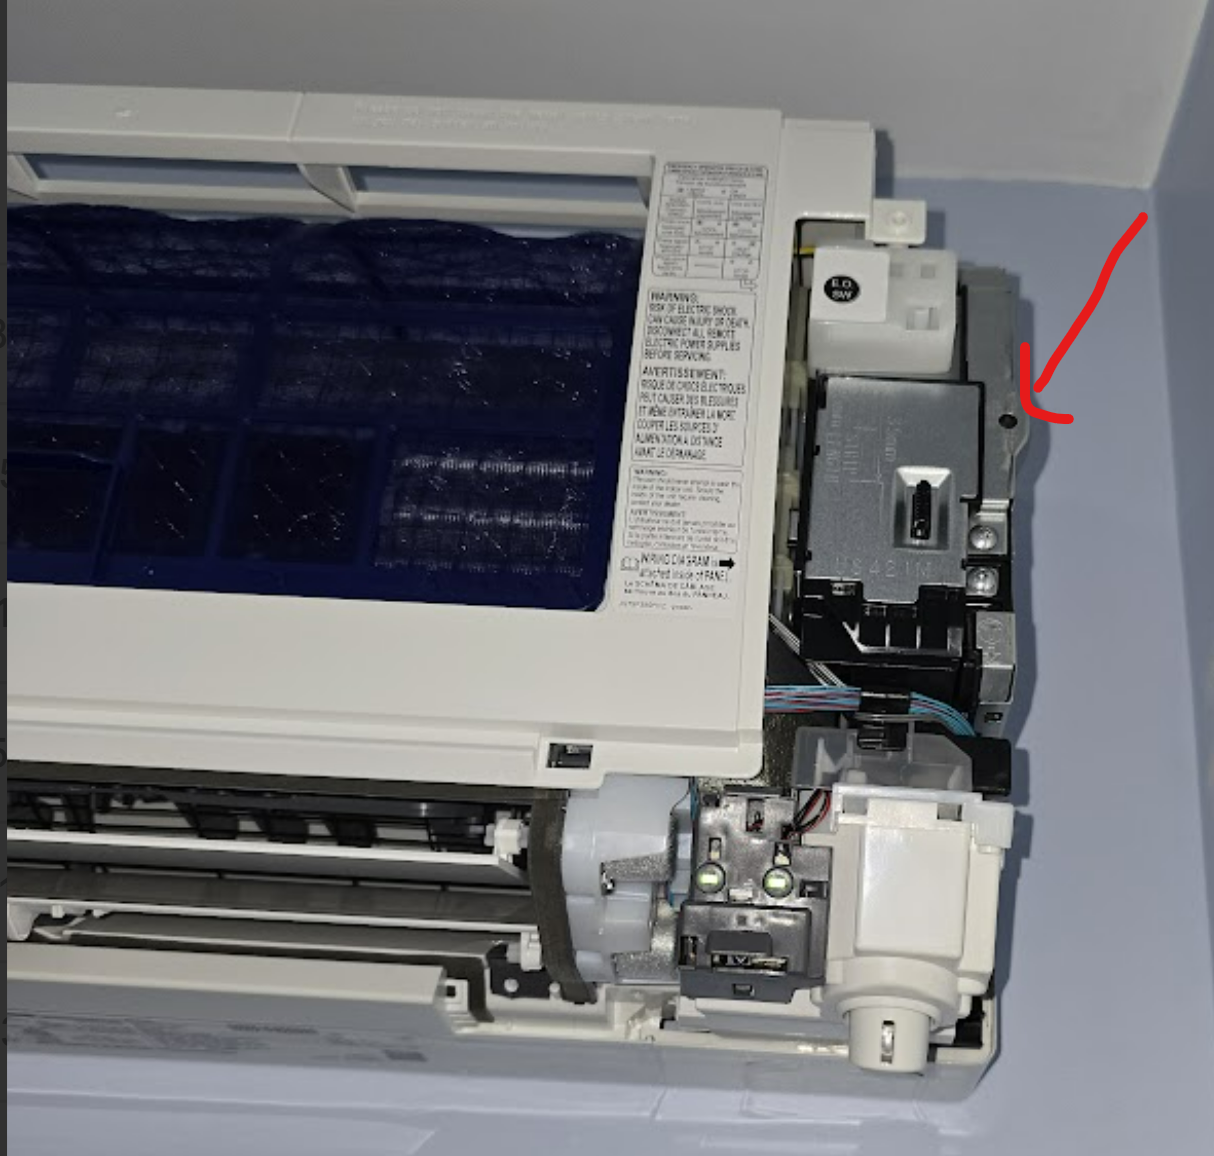
The CN105 connector is towards the bottom left side of the board. On the 9K BTU indoor head unit, it was red and on the 12k BTU unit, it was white. Both had "CN105" printed on the PCB above the port.
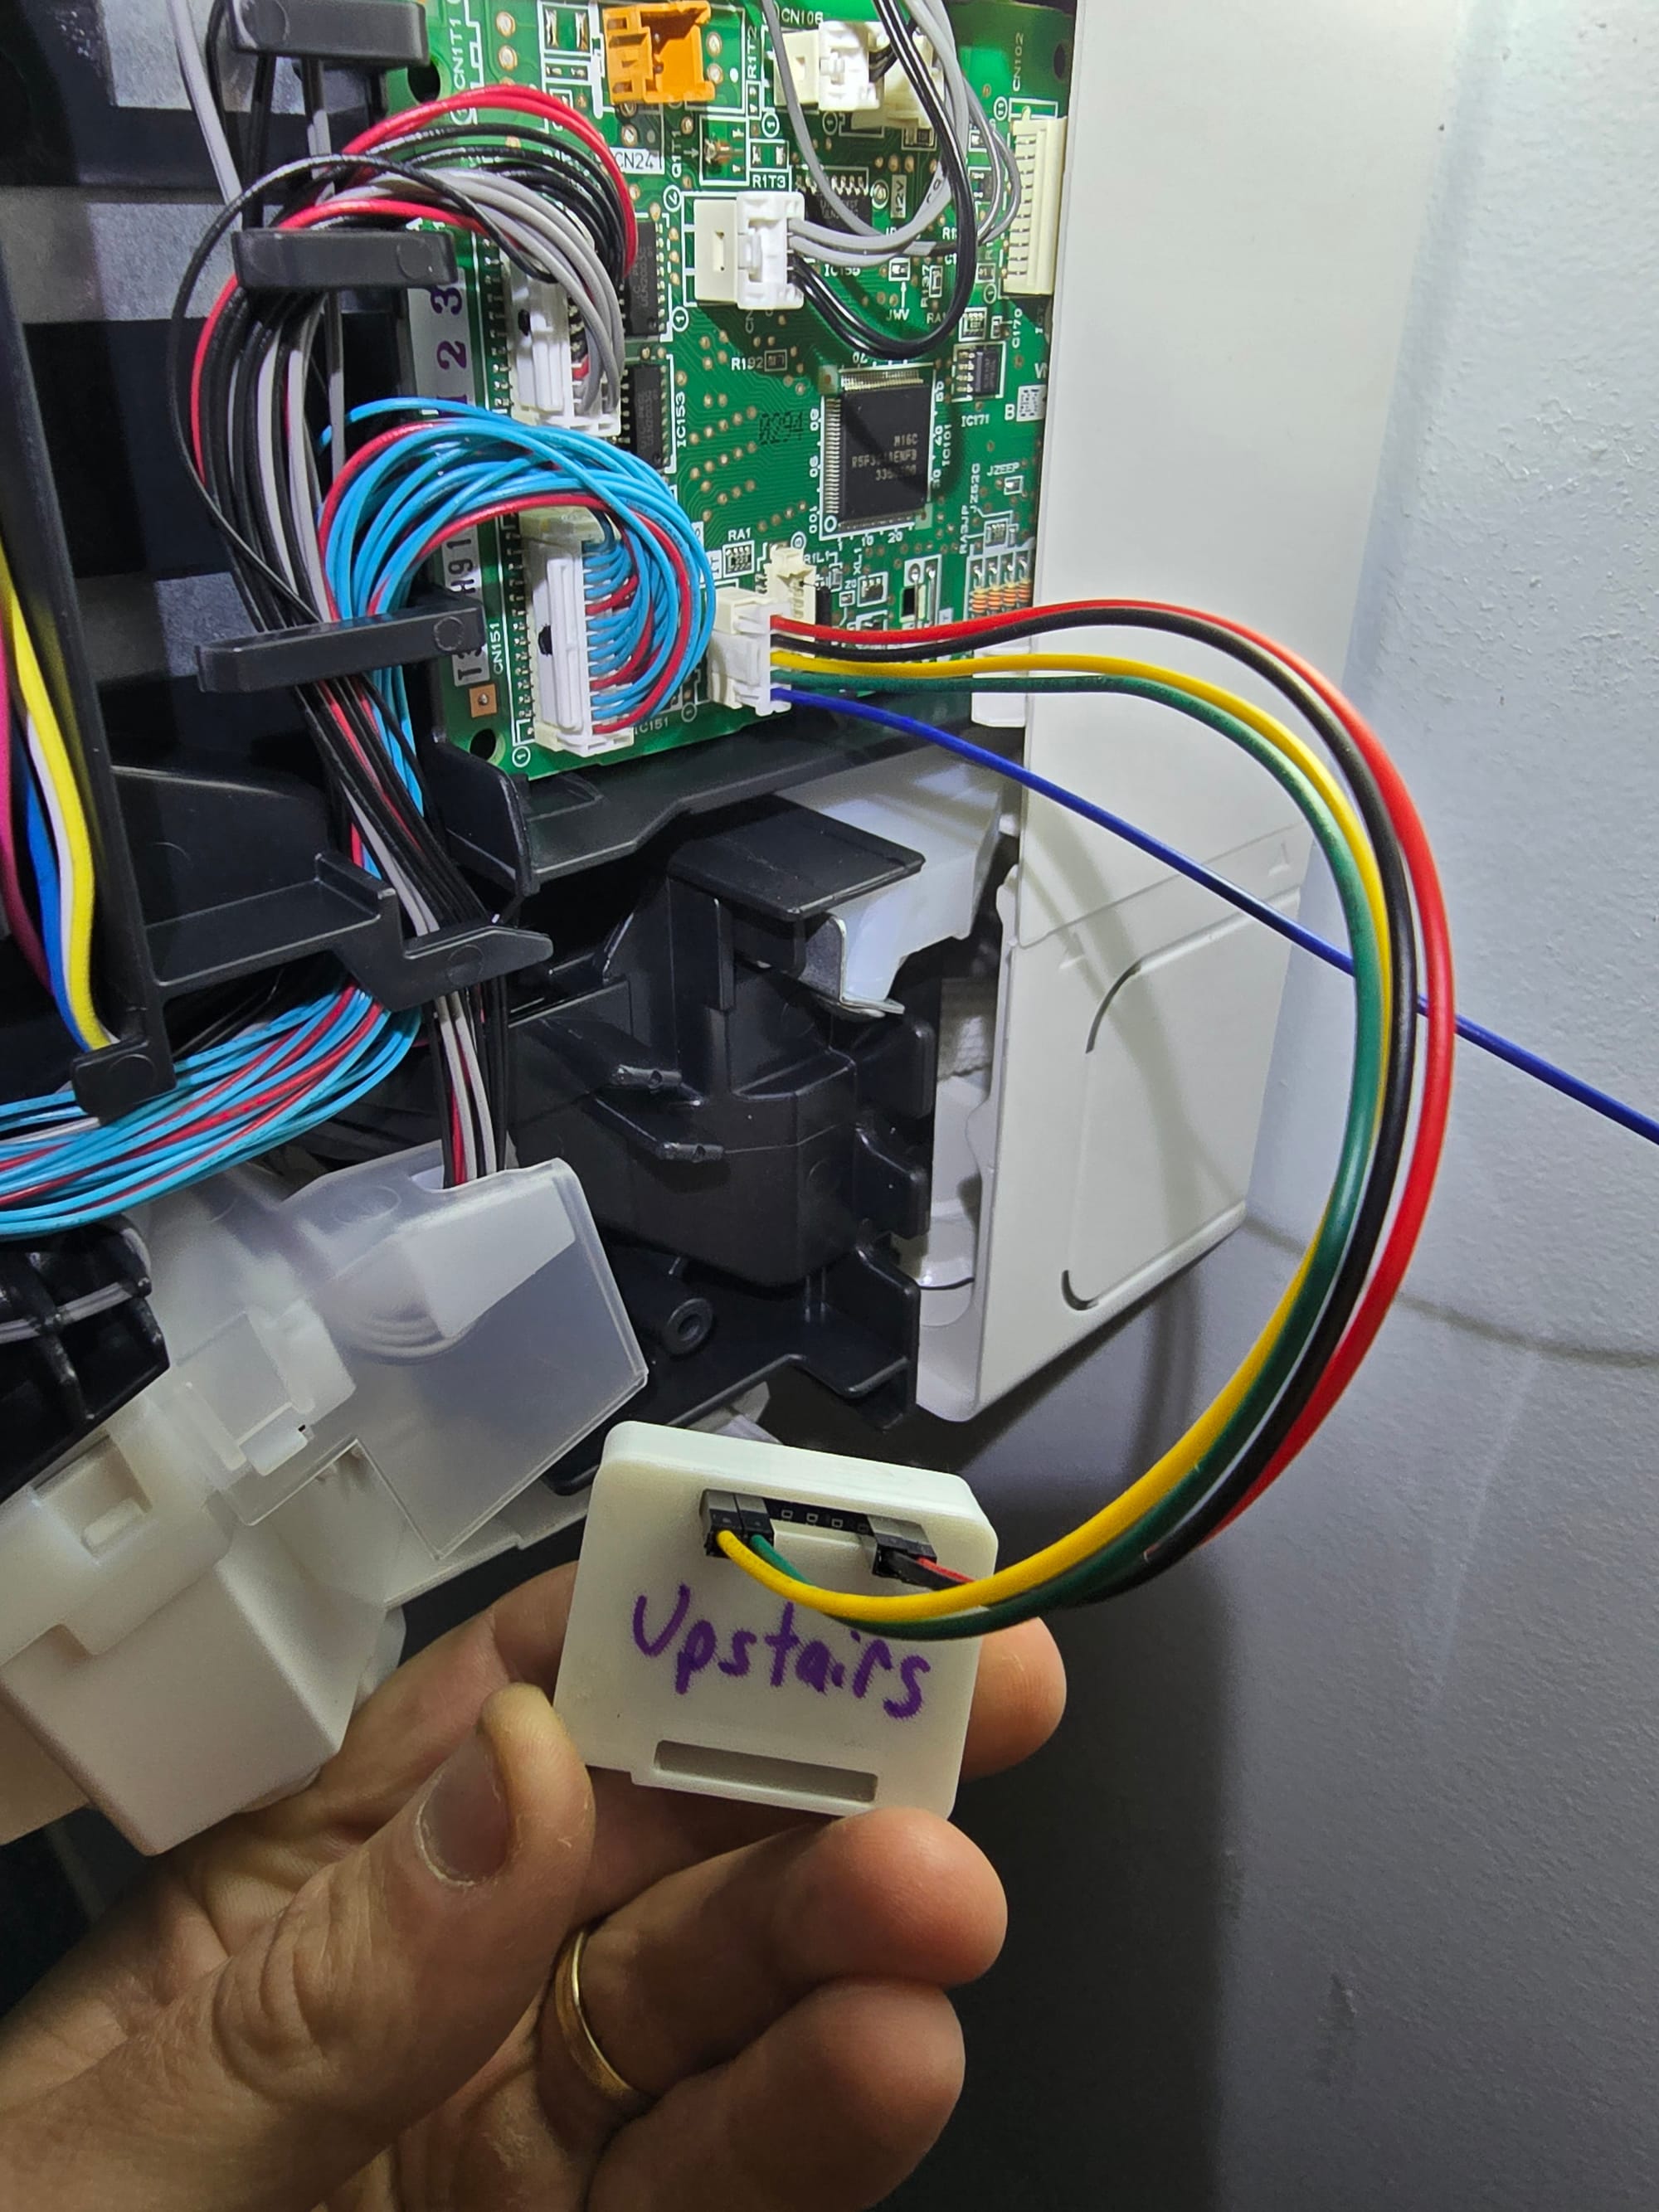
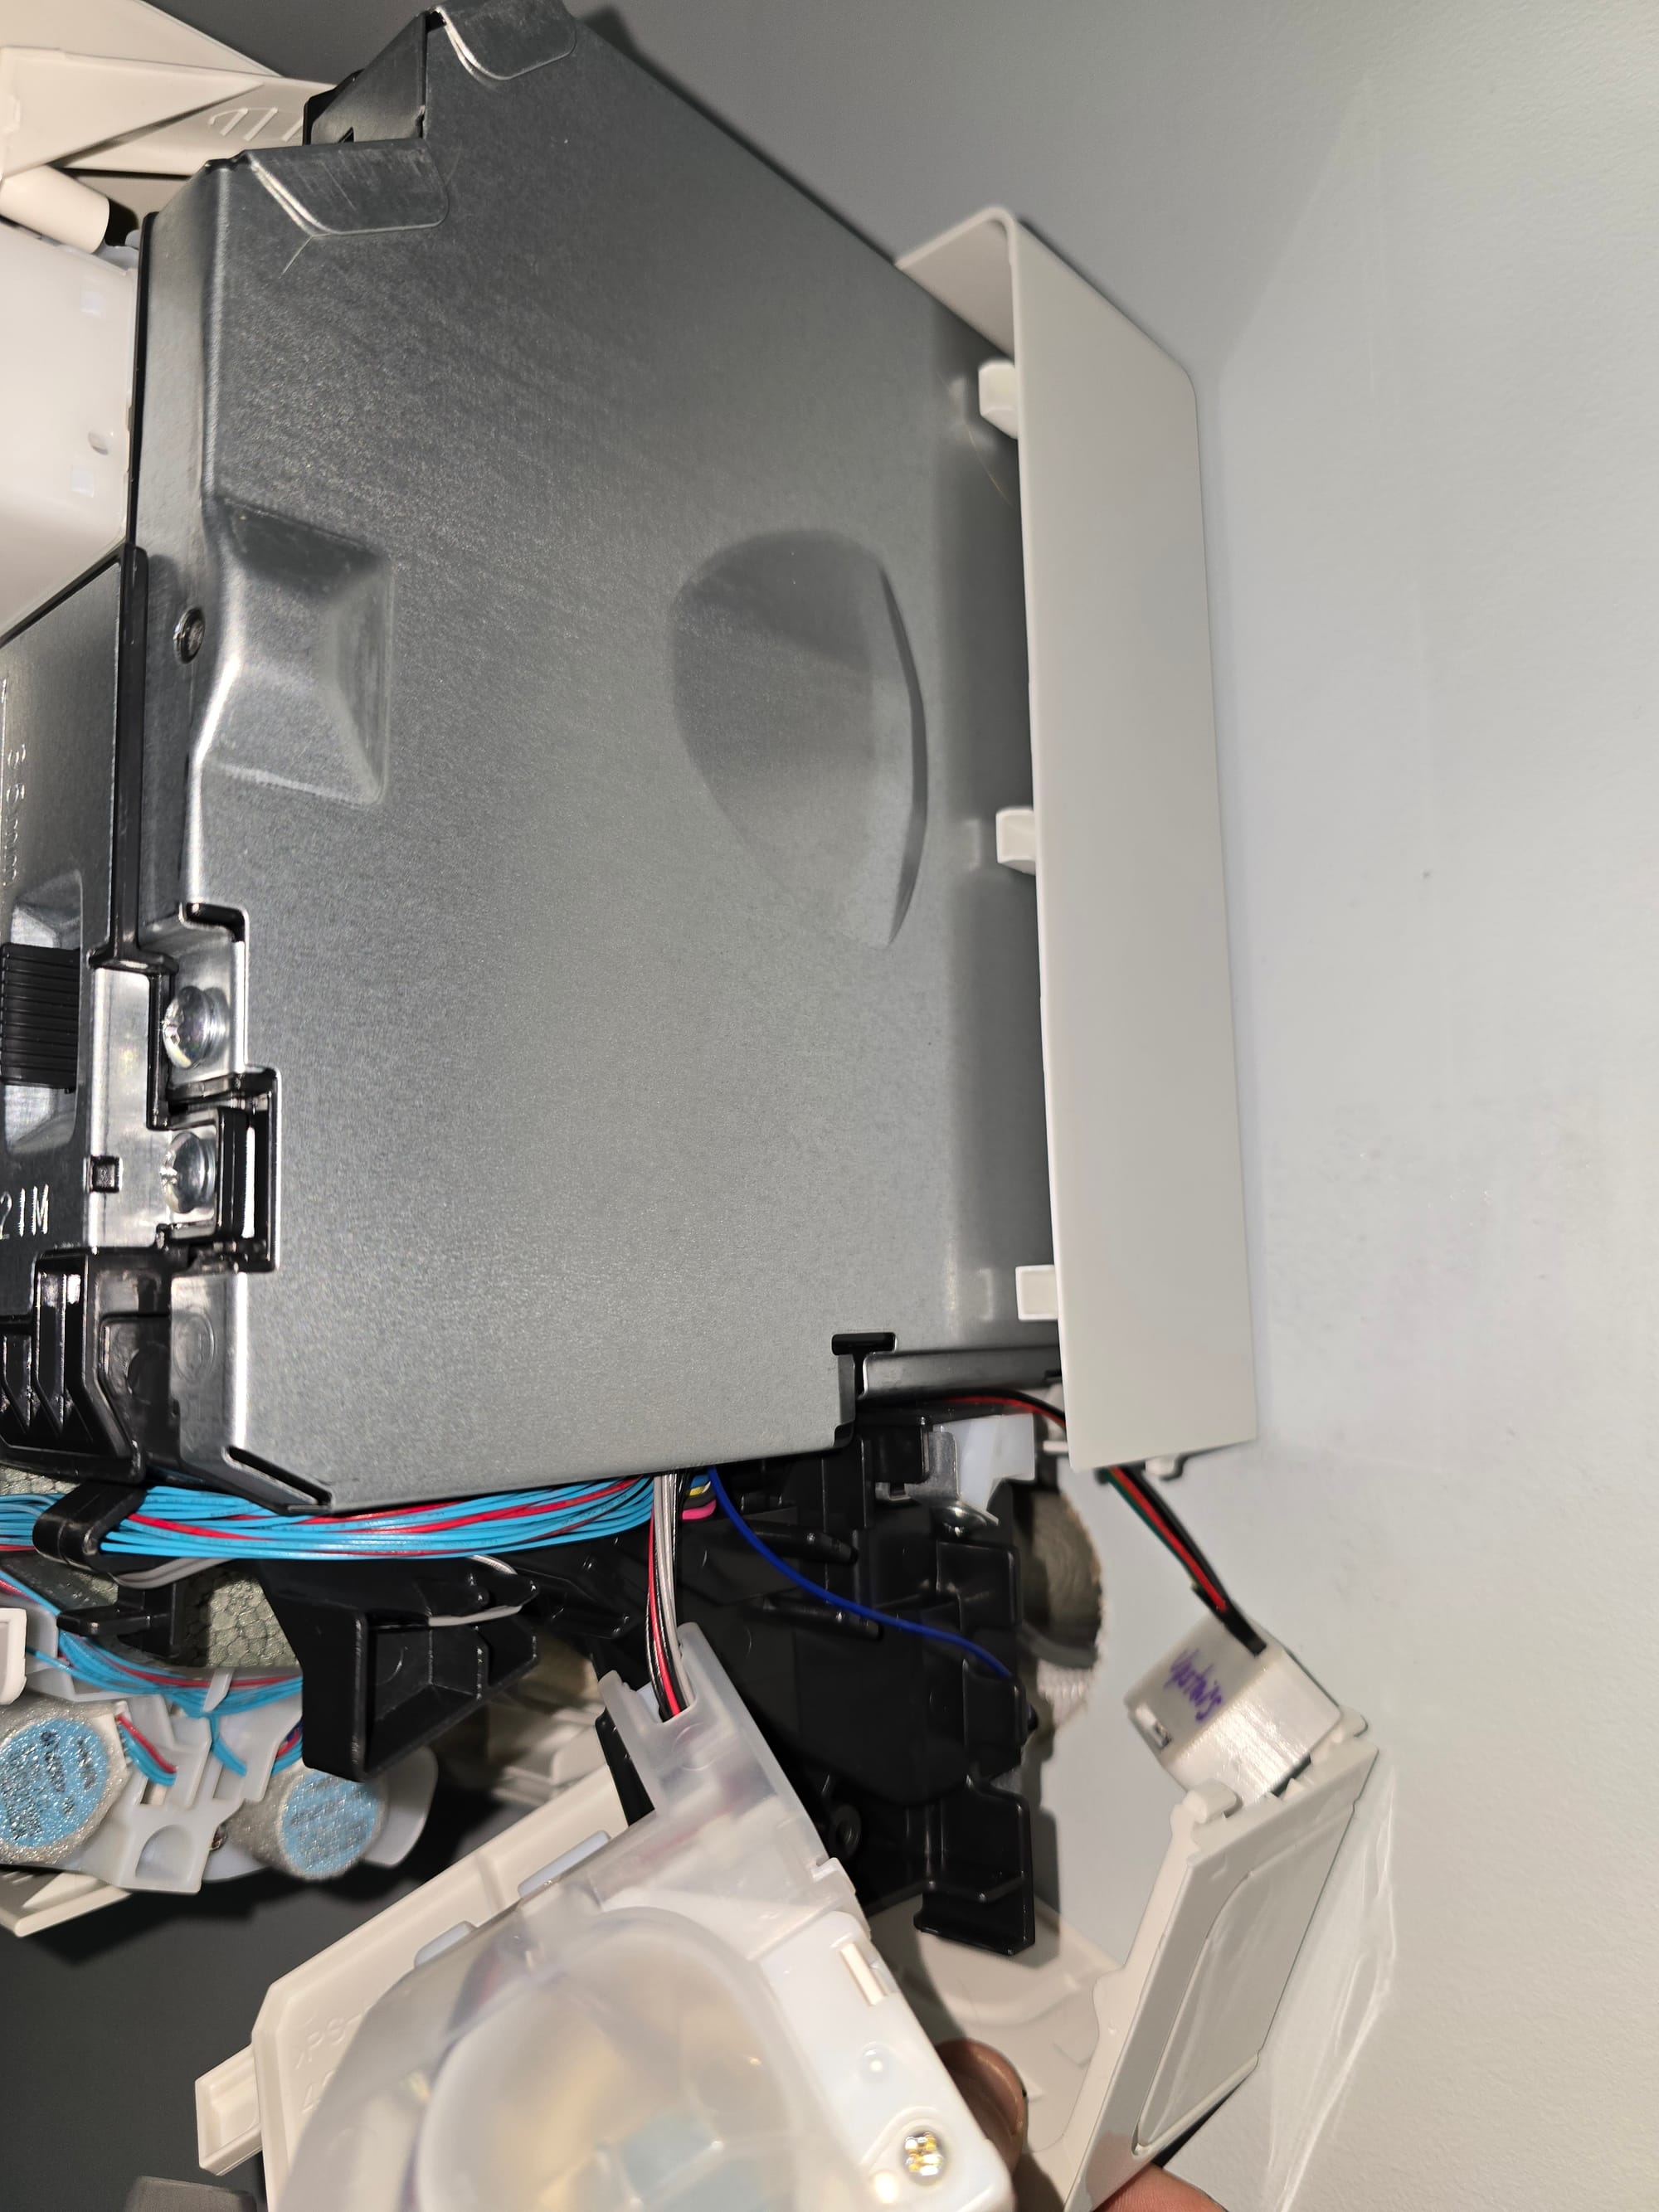
I popped the plastic cover on the bottom right corner of the minisplit off and snuck the dev board in next to the lineset. I routed the cables out beneath the metal cover following the existing cables. The CN105 jumper cable was long enough that I didn't have to extend it with additional dupont cables.
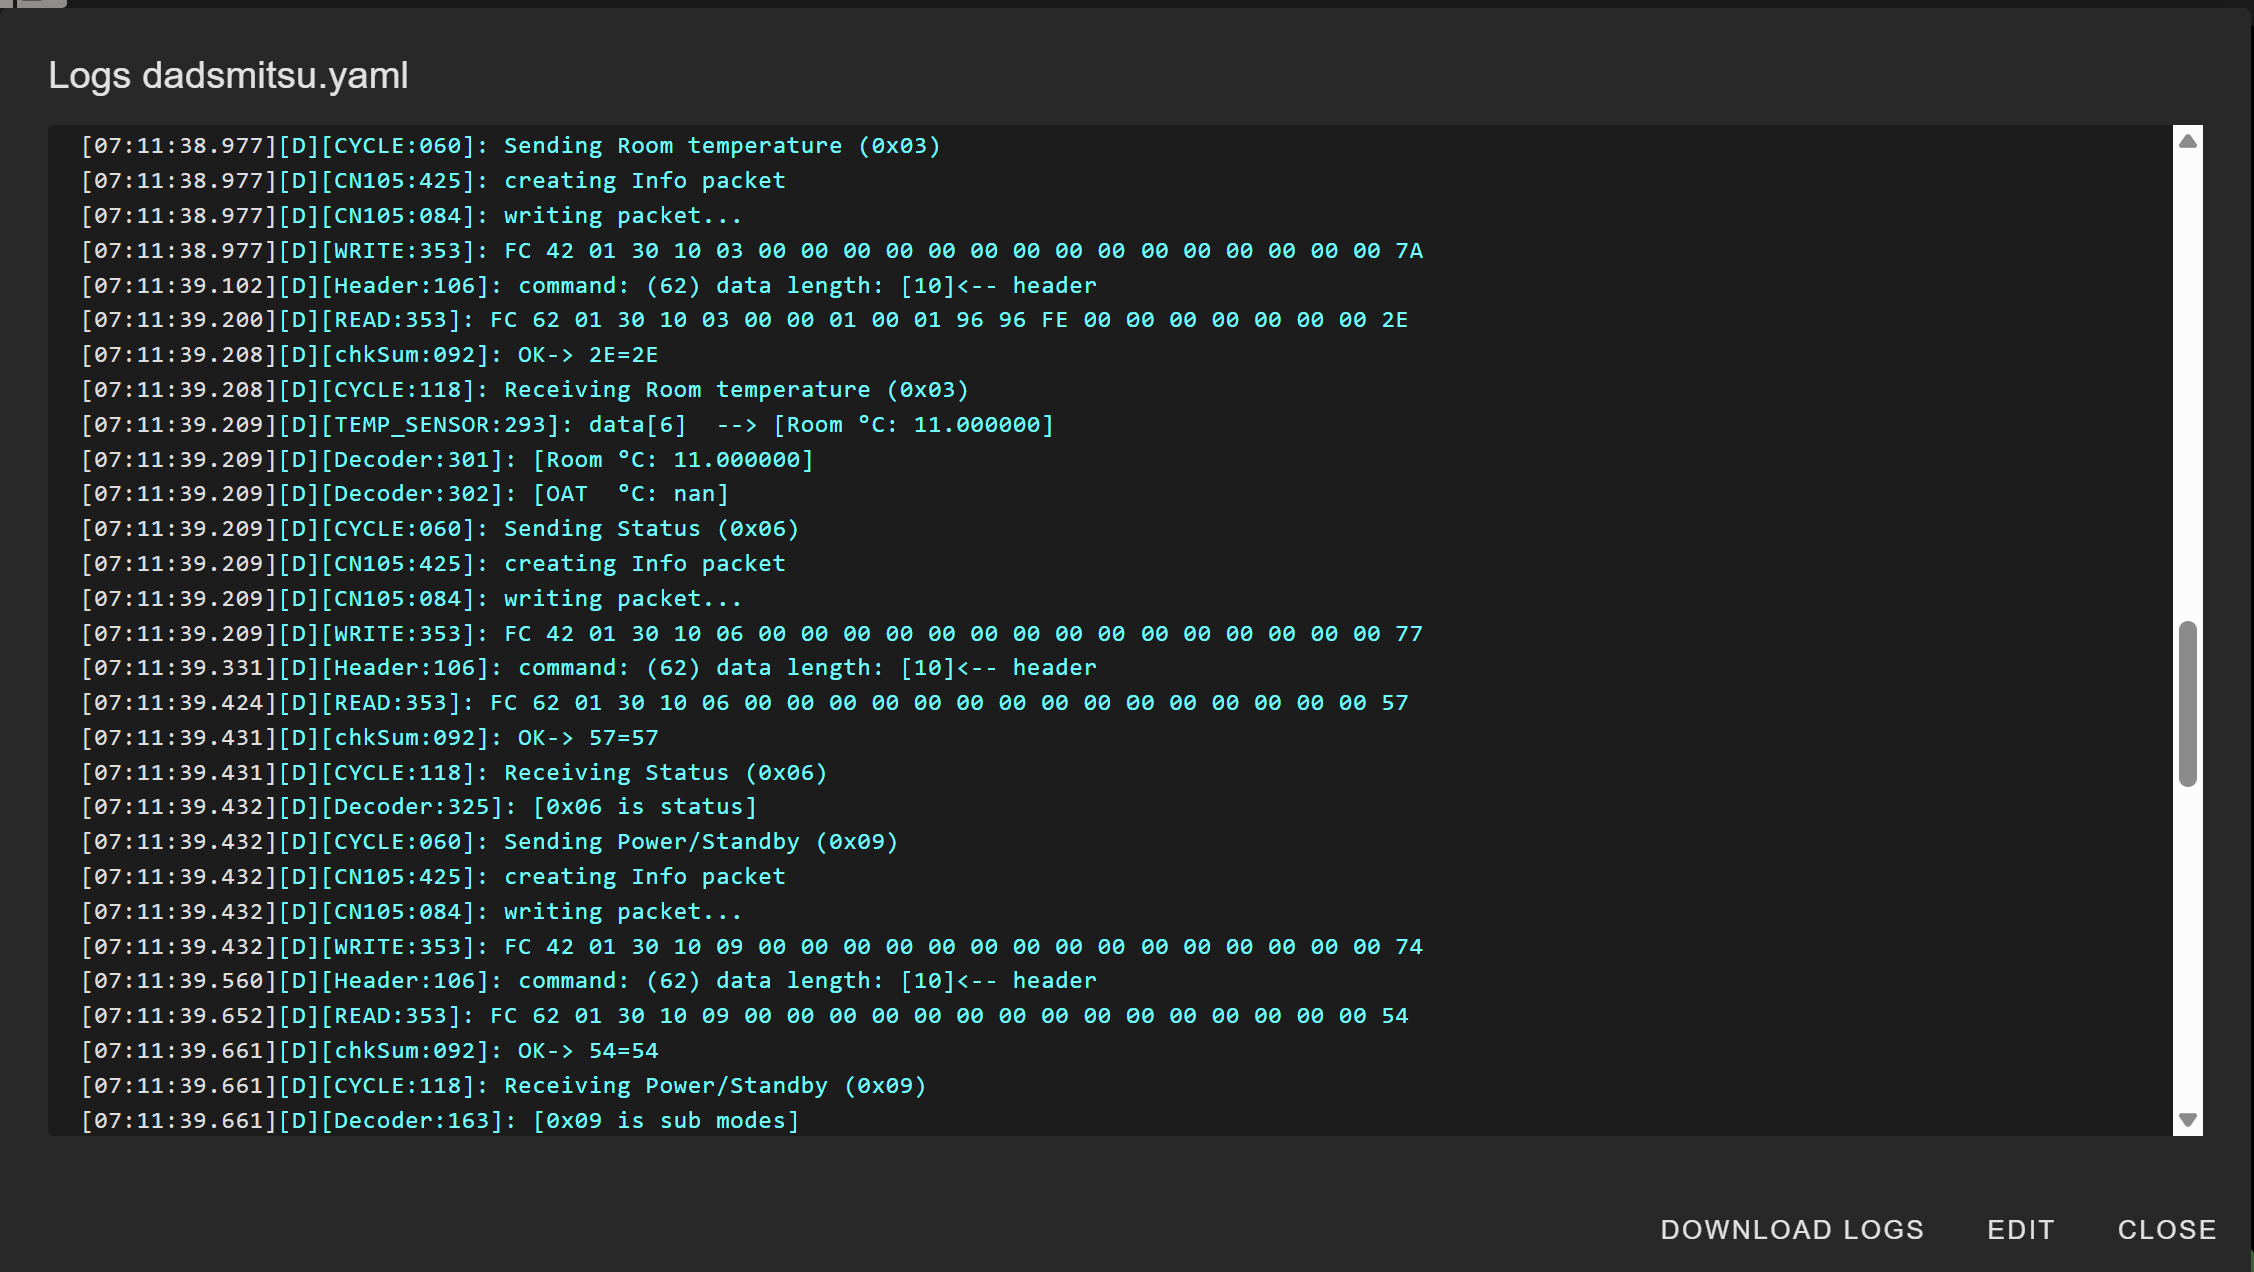
With the unit physically installed, we tested basic functionality before closing up the minisplit. I saw valid serial data via the esphome device logs (acquired wirelessly).
We closed the unit back up and then gave it a full test. The basic climate entity looked good in home assistant. We fired it up and tested the fan speeds, changing temperature set point, power on/off, and changing the horizontal/vertical vanes. Everything worked, so we went ahead and installed the other and tested. That one functioned equally well.
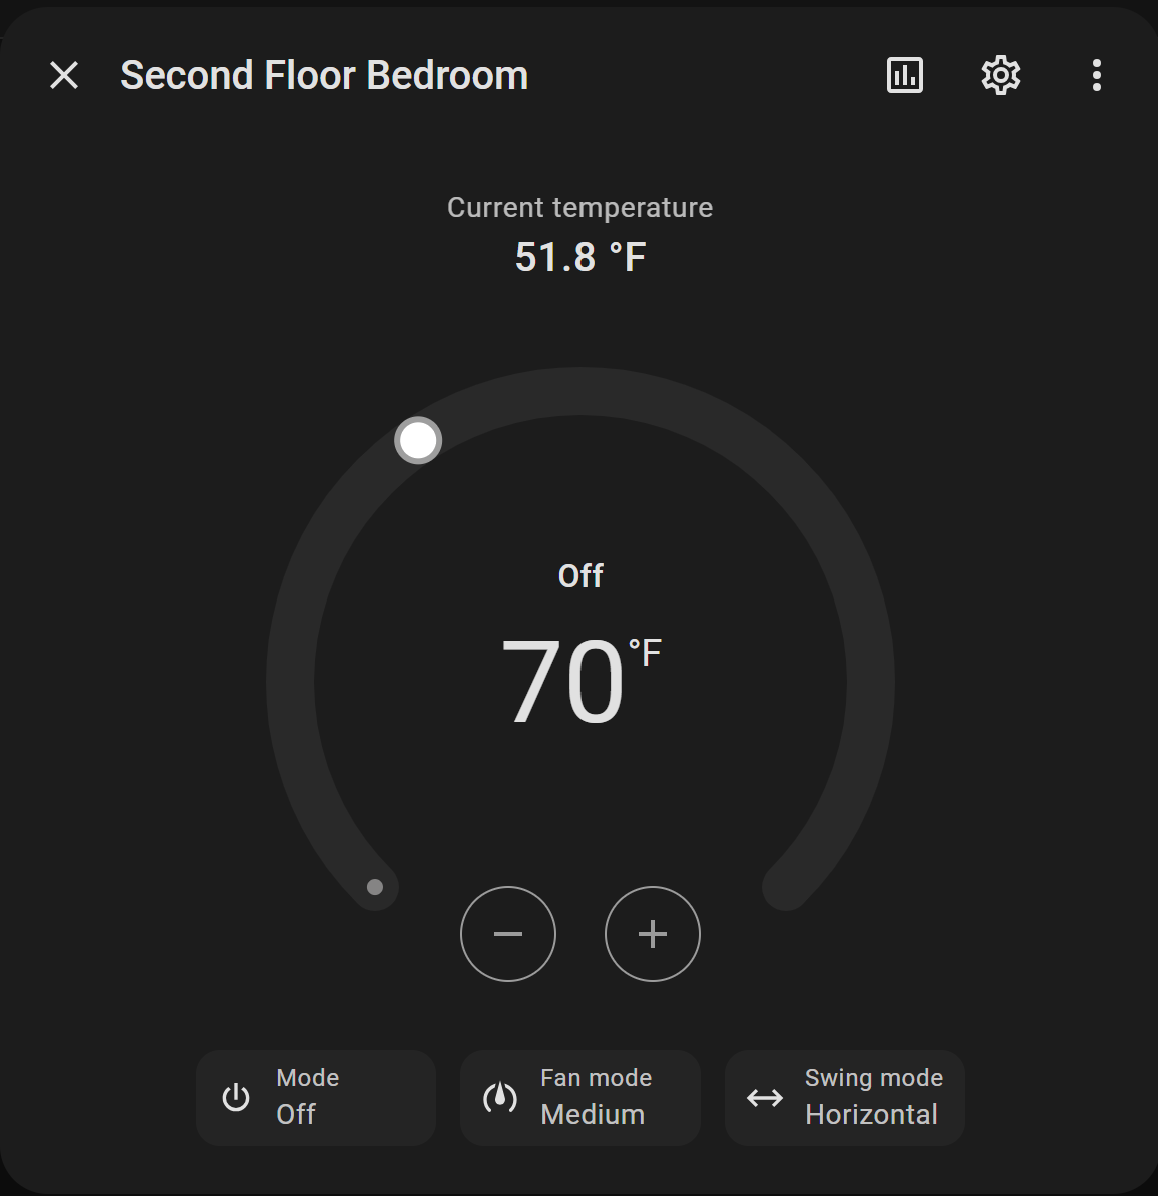
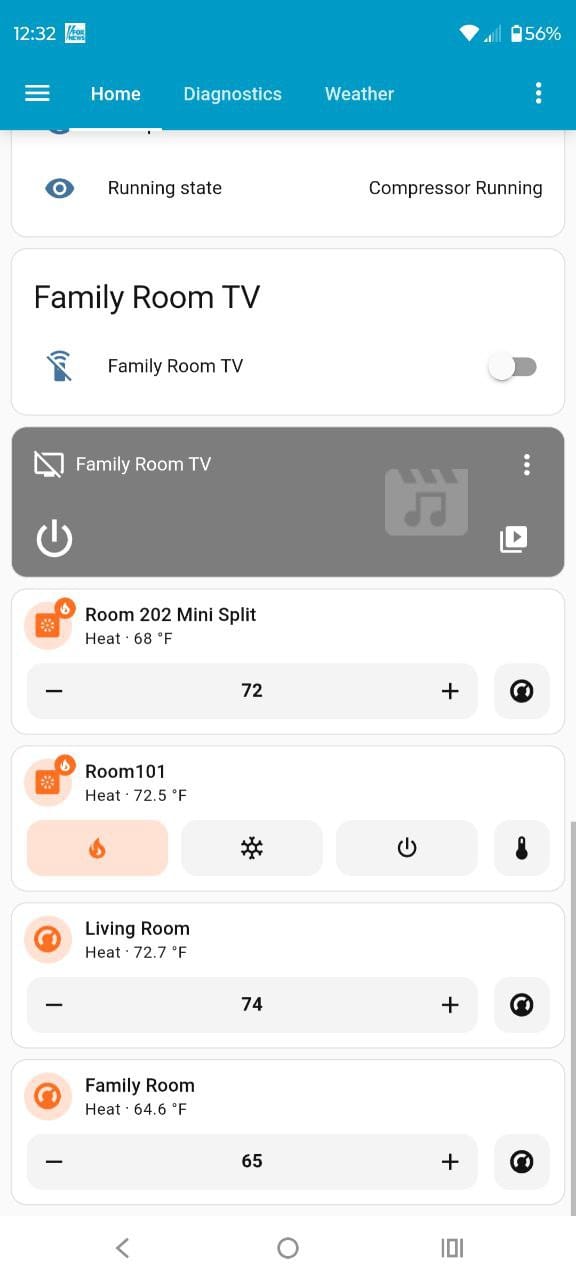
My dad's home assistant instance has lights, TVs, heat pump hot water heater, and the existing sensibo climate entities. We'd been using the basic built in climate card, but it is huge and takes up a lot of space. With 4 minisplits now exposed to home assistant, I downloaded the mushroom card package and swapped the 2 sensibos + 2 ESPHome powered minisplits over to use the mushroom climate card. This is more compact and reduces scrolling on the main dashboard screen.
The ESPHome units have been in for about a week so far and haven't had any issues. I'll probably add two more ESPHome devices to his existing two units to augment/replace the sensibo IR units.
The exact Wemos D1 mini clones I used were $15 for a pack of 5 on amazon, or $3/per unit. A 5 pack of the CN105 to dupont cables were $5.55 + $4 shipping, so about $2/per unit. For less than $5, we were able to breathe smarts into these otherwise great Mitsubishi units. Compared to the OEM wireless modules, we saved $390 and compared to adding two more sensibos, $190. When I get around to doing the other two minisplits, that will be a savings of nearly $800 across the 4 total units, or nearly $400 going the sensibo route, with more functionality to boot.