Smart Coops with Home Assistant
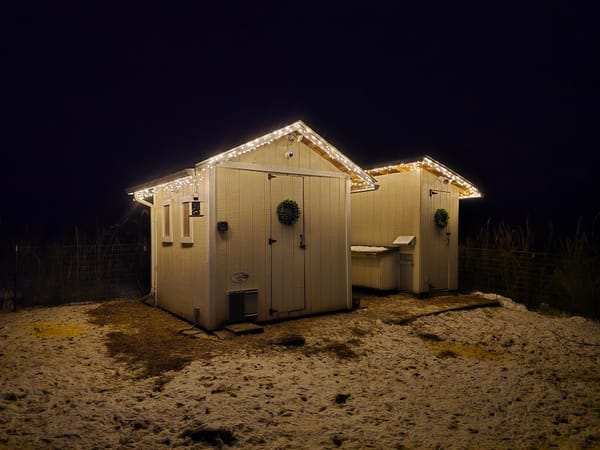
After mostly finishing construction on our 8x8 chicken coop and 4x8 goose coop over the past year, the last thing left to do was make it smart. I had previously installed an Ador Turkey door on the goose coop and an Omlet Chicken door on the chicken coop. These have been working well powered by batteries and on their own built in light sensors, but we've struggled to get the geese and ducks into their respective coops. My end goal was always to have these on permanent power and fully controlled by home assistant.
The coops were the perfect distance from the house to greatly expand my wireless coverage in the backyard, and the wireless signal was weak enough out there that I worried my smart light switches/door controllers/cameras wouldn't reliably connect. I figured I would take this same opportunity to add some network gear - a switch and WAP. I opted to connect this via fiber back to my basement network rack - the distance (roughly 250ft) would've allowed me to make this connection via CAT6 cable, but I didn't want to deal with the grounding implications and figured fiber would electrically isolate my inside network gear from outside.
My materials list for this project was as follows...
- Ador Turkey Door
- Omlet Chicken Door
- Omlet smart door control panel
- Wyze Cameras
- Fortinet 108F 8 port switch
- Fortinet 432F Wireless Access Point
- 4 port POE injector (108F is not POE, need to power WAP)
- 100M preterminated armored LC to LC single mode patch cable
- 4 TP Link Kasa smart switches
- 3.3V relays and ESP8266 dev board
- Outdoor light fixtures
- Indoor light fixtures (found some clearance small LED bay lights at lowes, $17 each)
- 12ga UF cable
I had the fortinet gear on hand or I would've gone with something much cheaper.
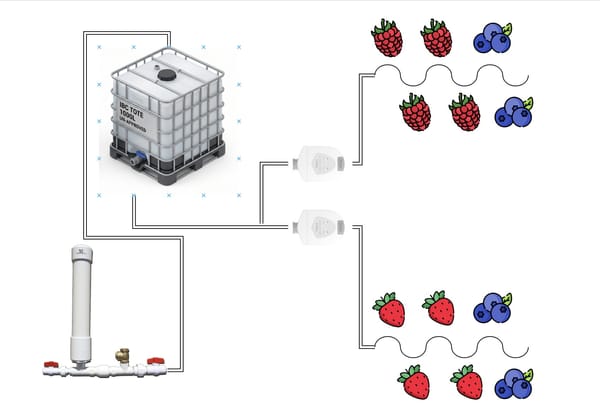
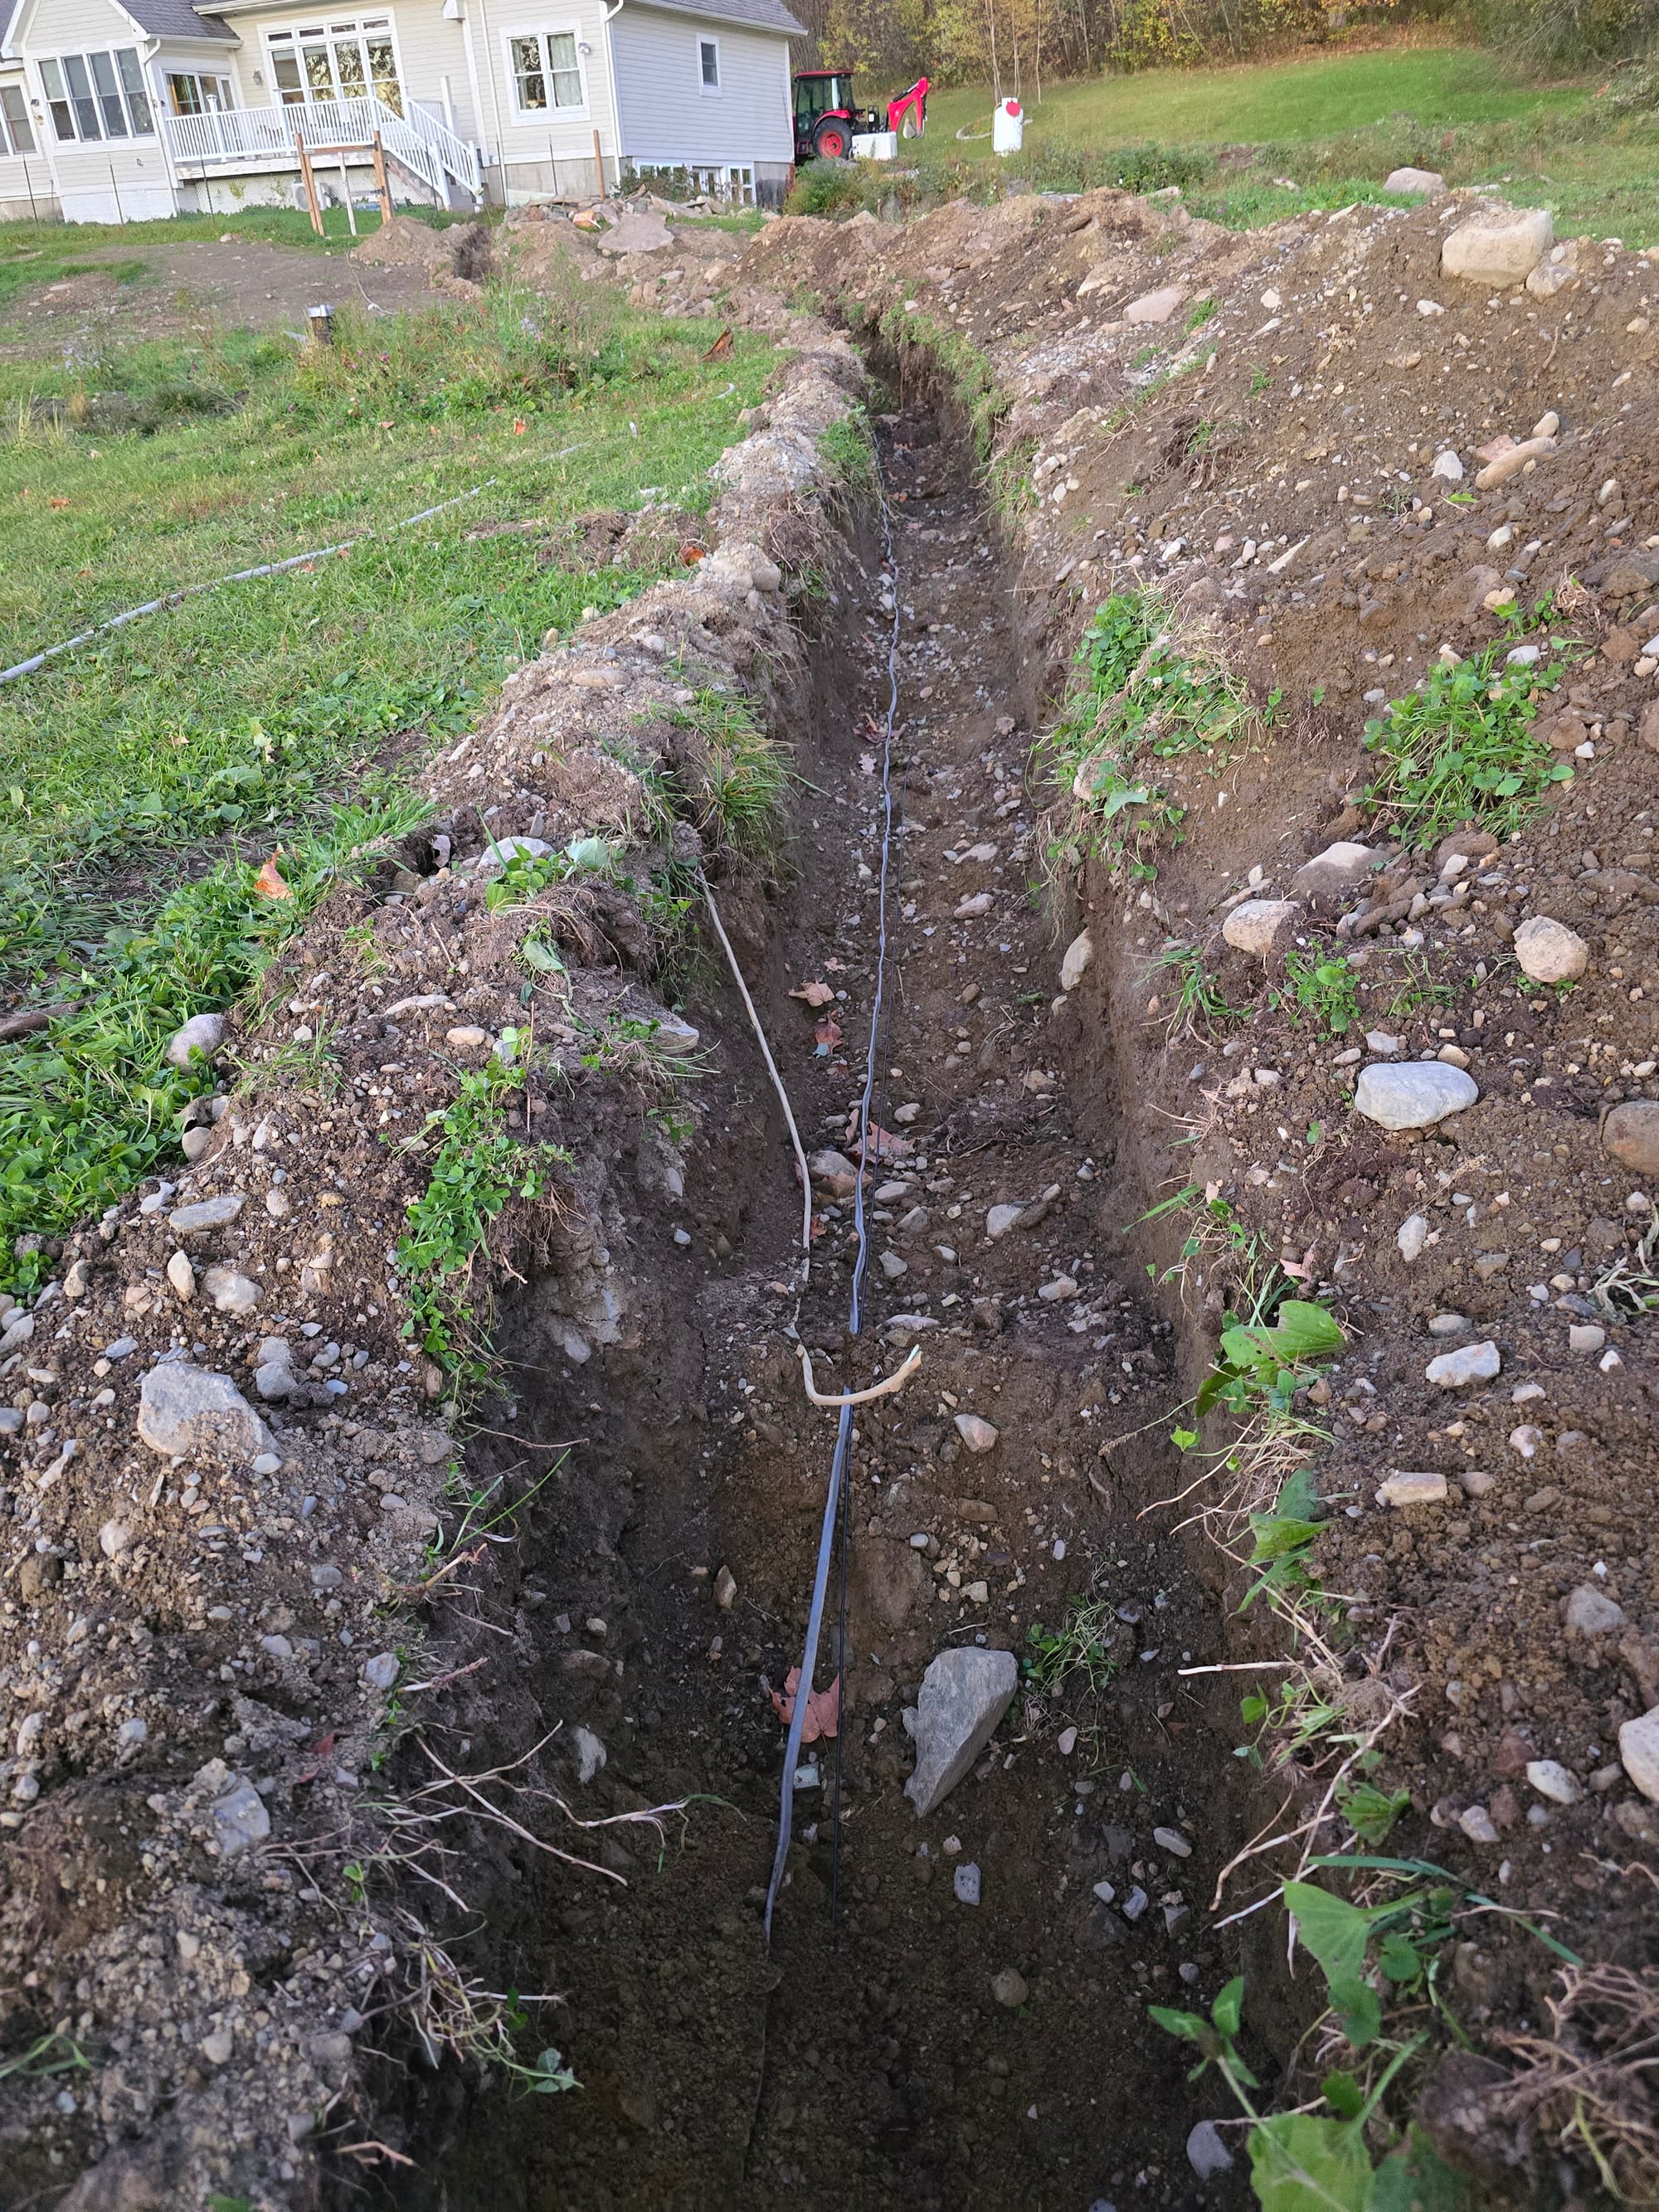
The first order of business was power and fiber. I dug a large trench, roughly 2 feet deep trench from the side of my house to the chicken coop. I tapped the power into an existing GFCI outlet outside and punched a small hole next to a number of other penetrations for the fiber cable. I considered going larger than 12ga for the 250ft run, but we'll only be running small loads (lights and maybe a 100w water heater) out there. Assuming a max draw of 500w, an online voltage drop calculator estimated 3.5% at 250ft. I opted to direct bury the UF cable and fiber - conduit would've been several times the cost of the cables and I figured I'd take my chances. I did run about 30 feet of PVC 3/4" conduit in a particularly rocky area right by the coops. I backfilled the first few inches by hand to try and protect the fiber (it was less armored than I had hoped) before filling everything back in with my tractor.
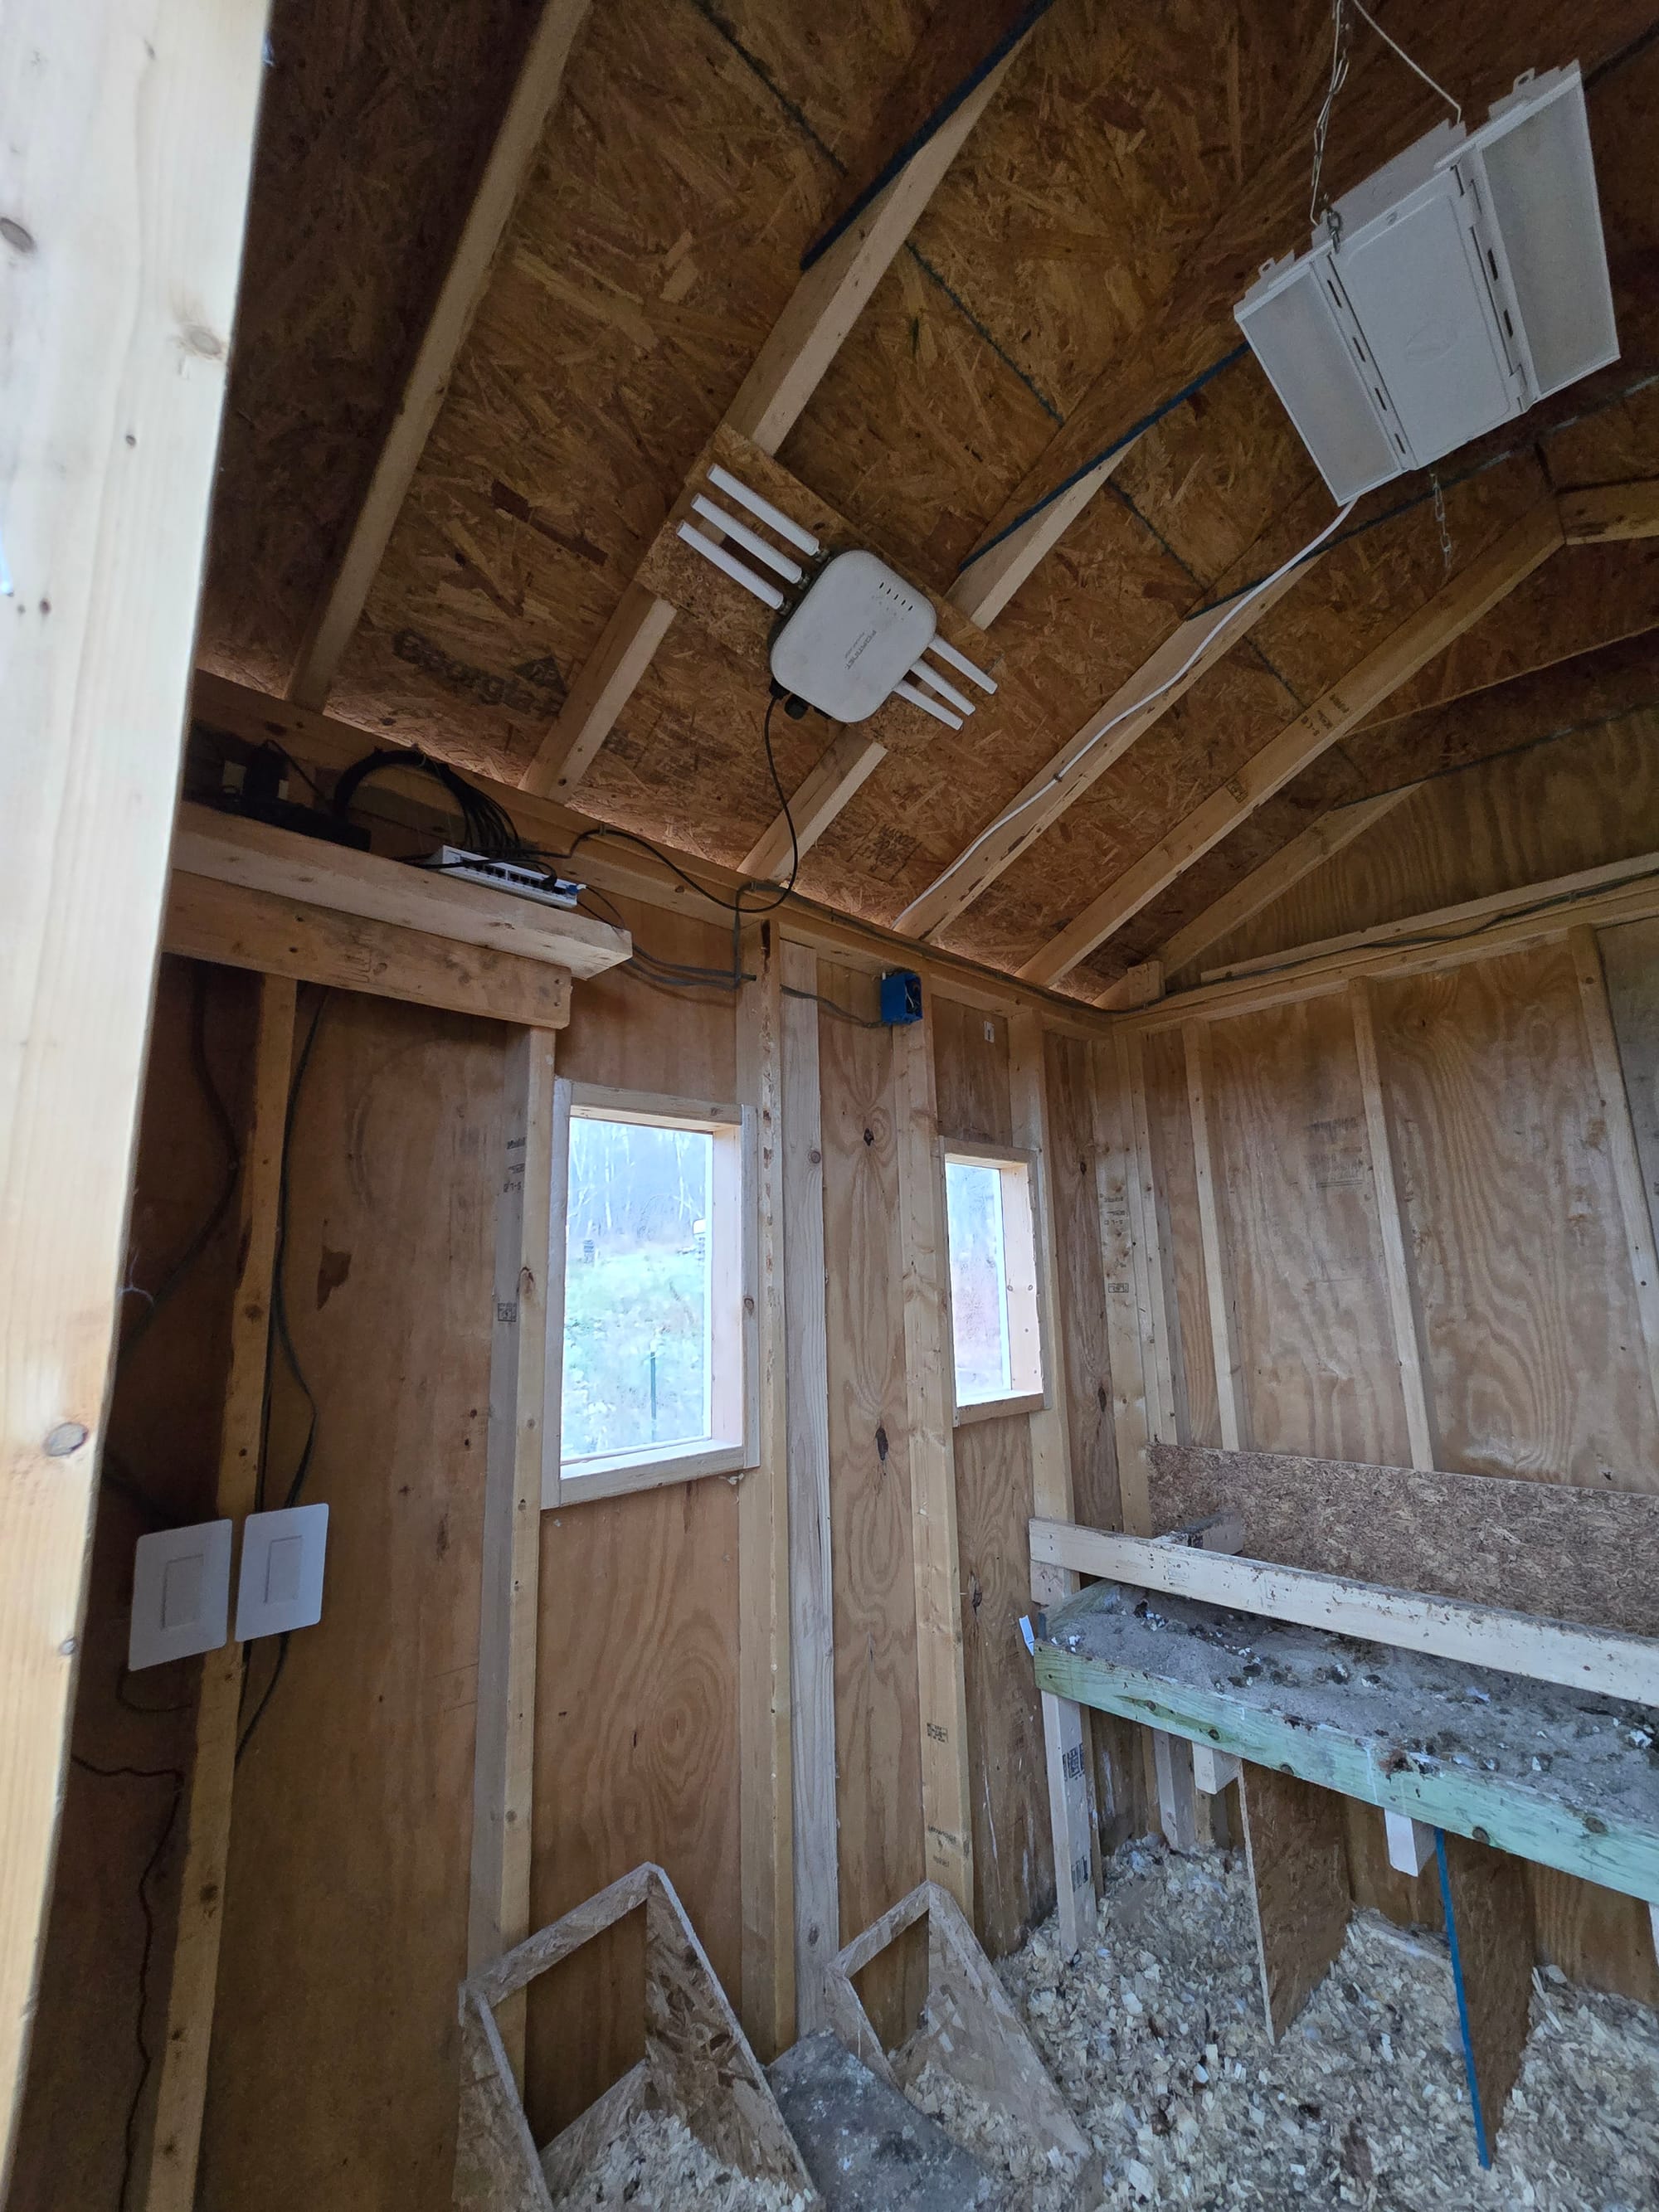
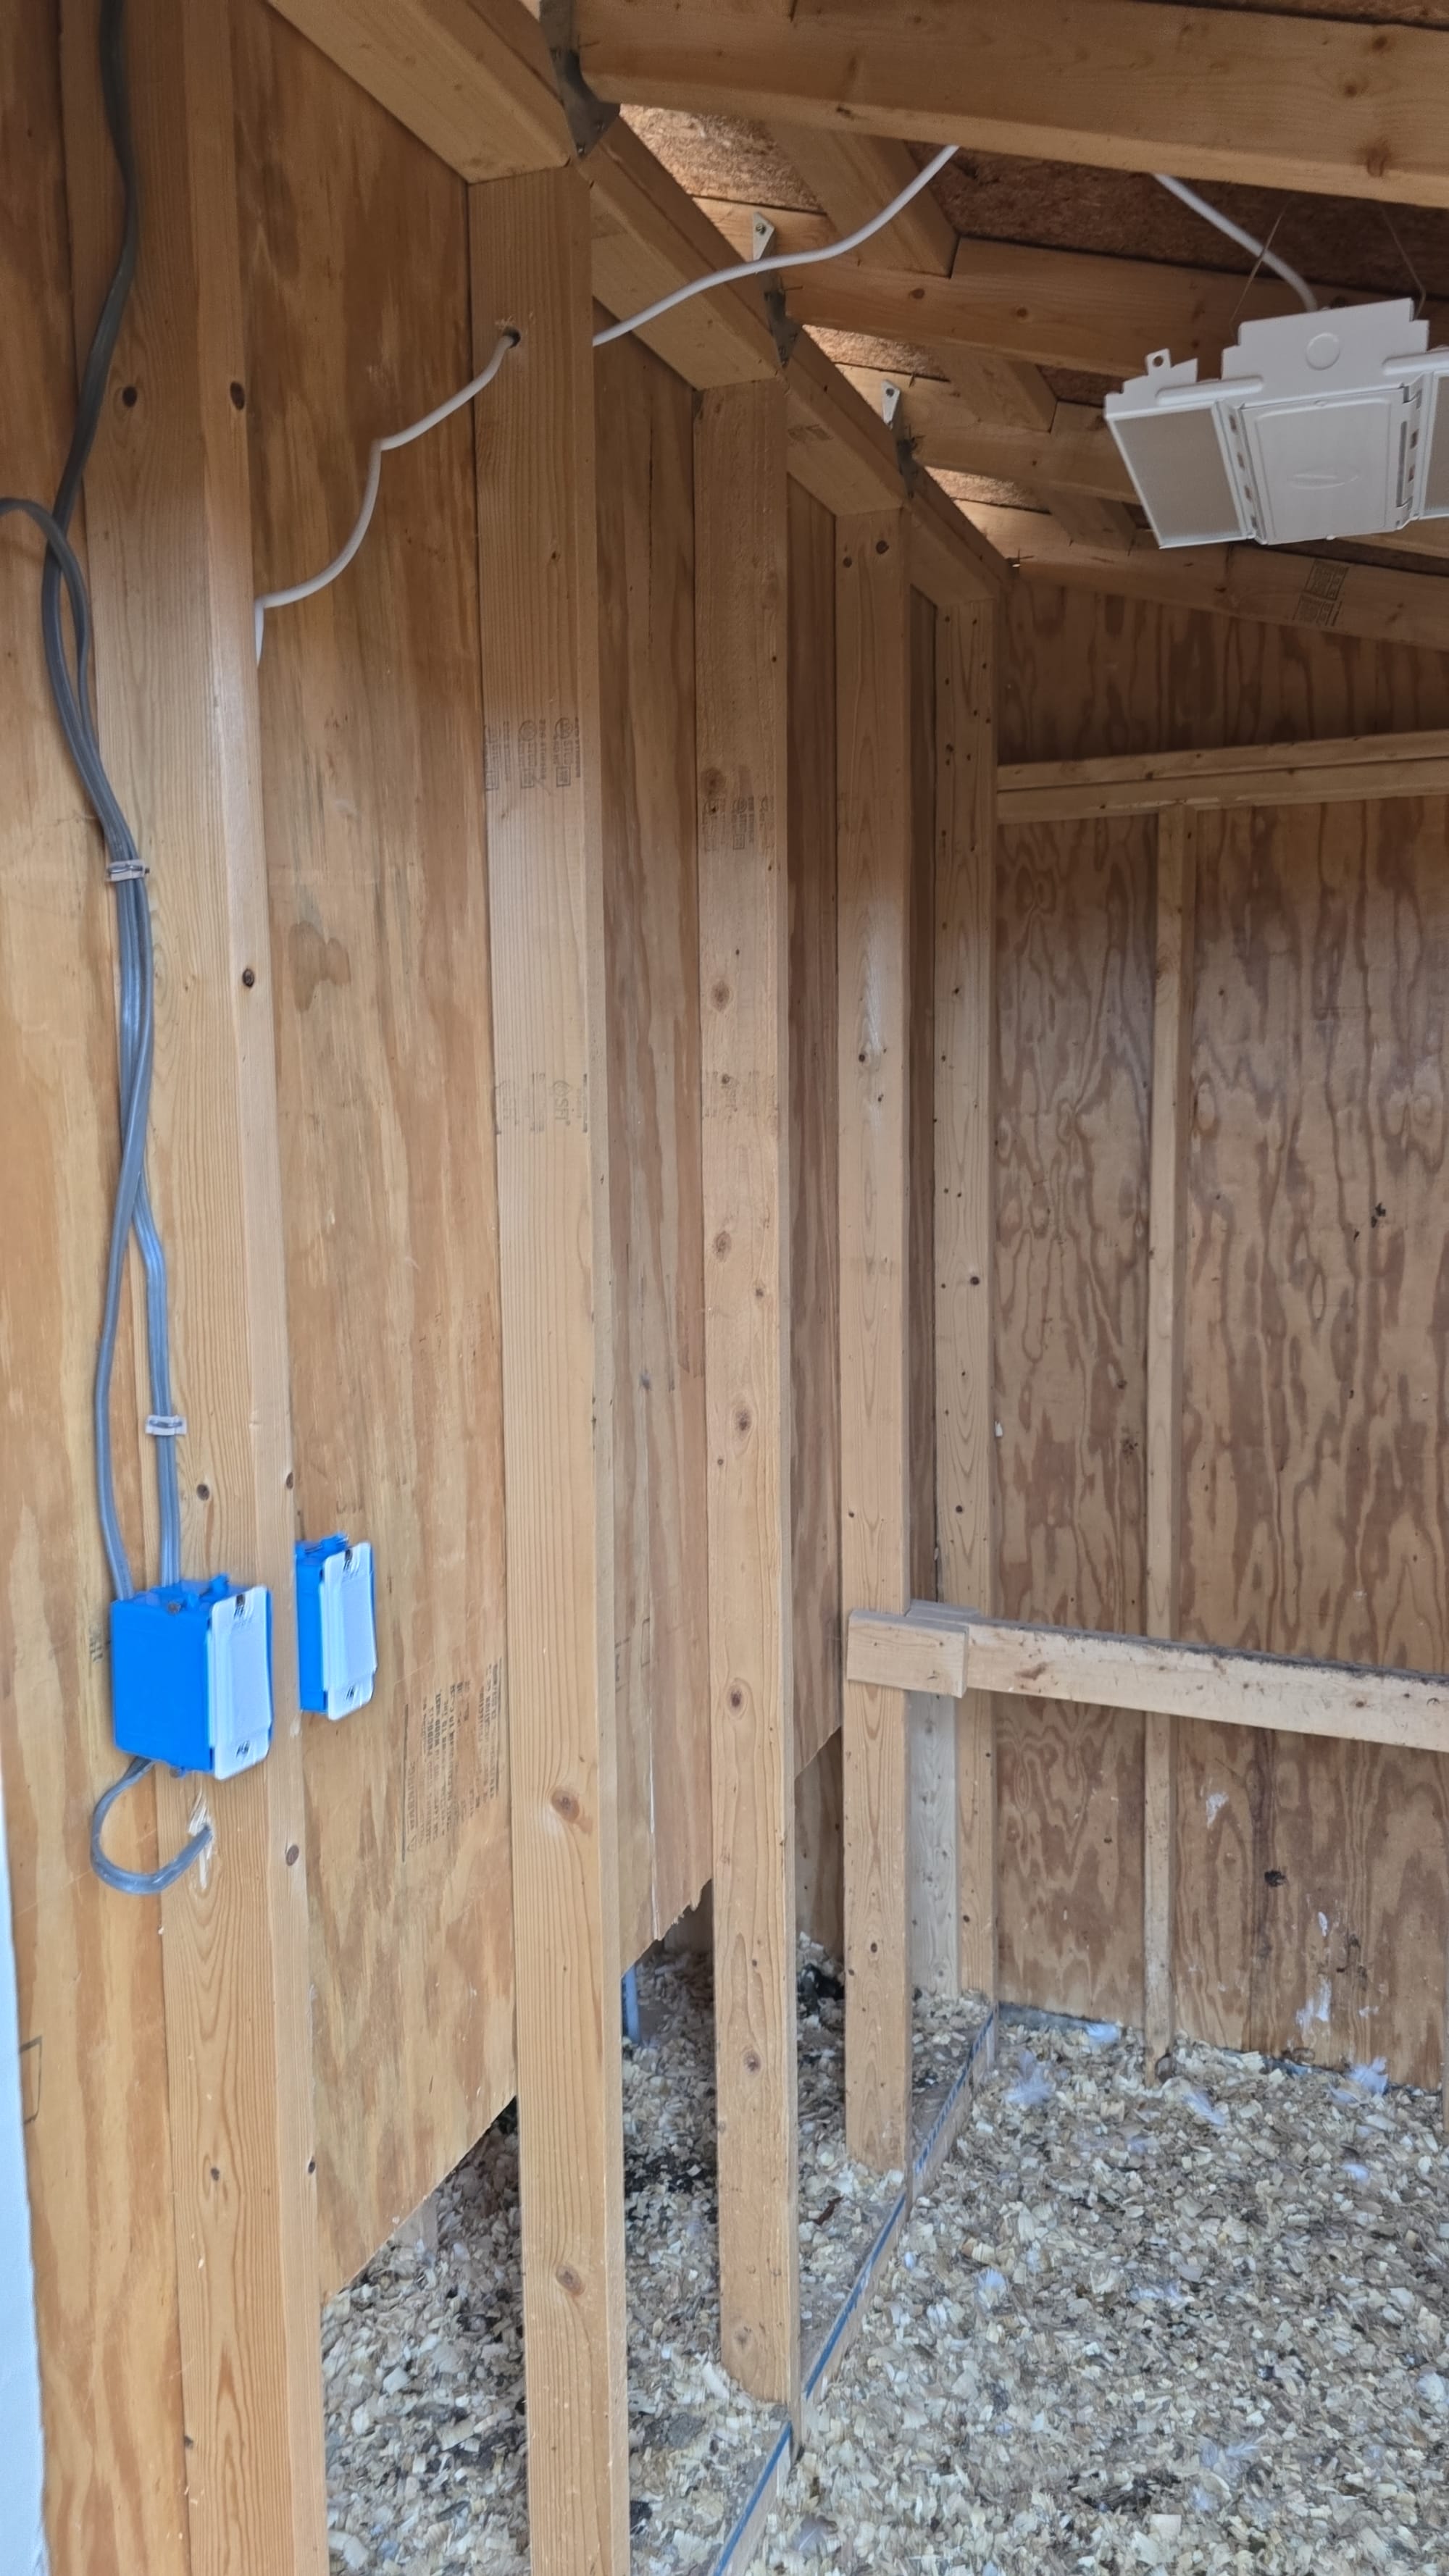
Next, I wired the first coop. I added 2 TP Link Kasa switches, a couple of outlets for the network gear + cameras, and indoor/outdoor light fixtures.
There was an existing trough in the concrete pad between the two coops and I leveraged this to jump power over to the second coop (I did put this in conduit). I did much the same in the second coop, adding 2 Kasa smart switches, indoor and outdoor lights, and a few outlets for the door and cameras.
With power, network, and smart lights in place, it was time for the doors. Omlet recently released a smart door control panel - I ordered this rather than hacking apart and modifying the old "dumb" door controller.
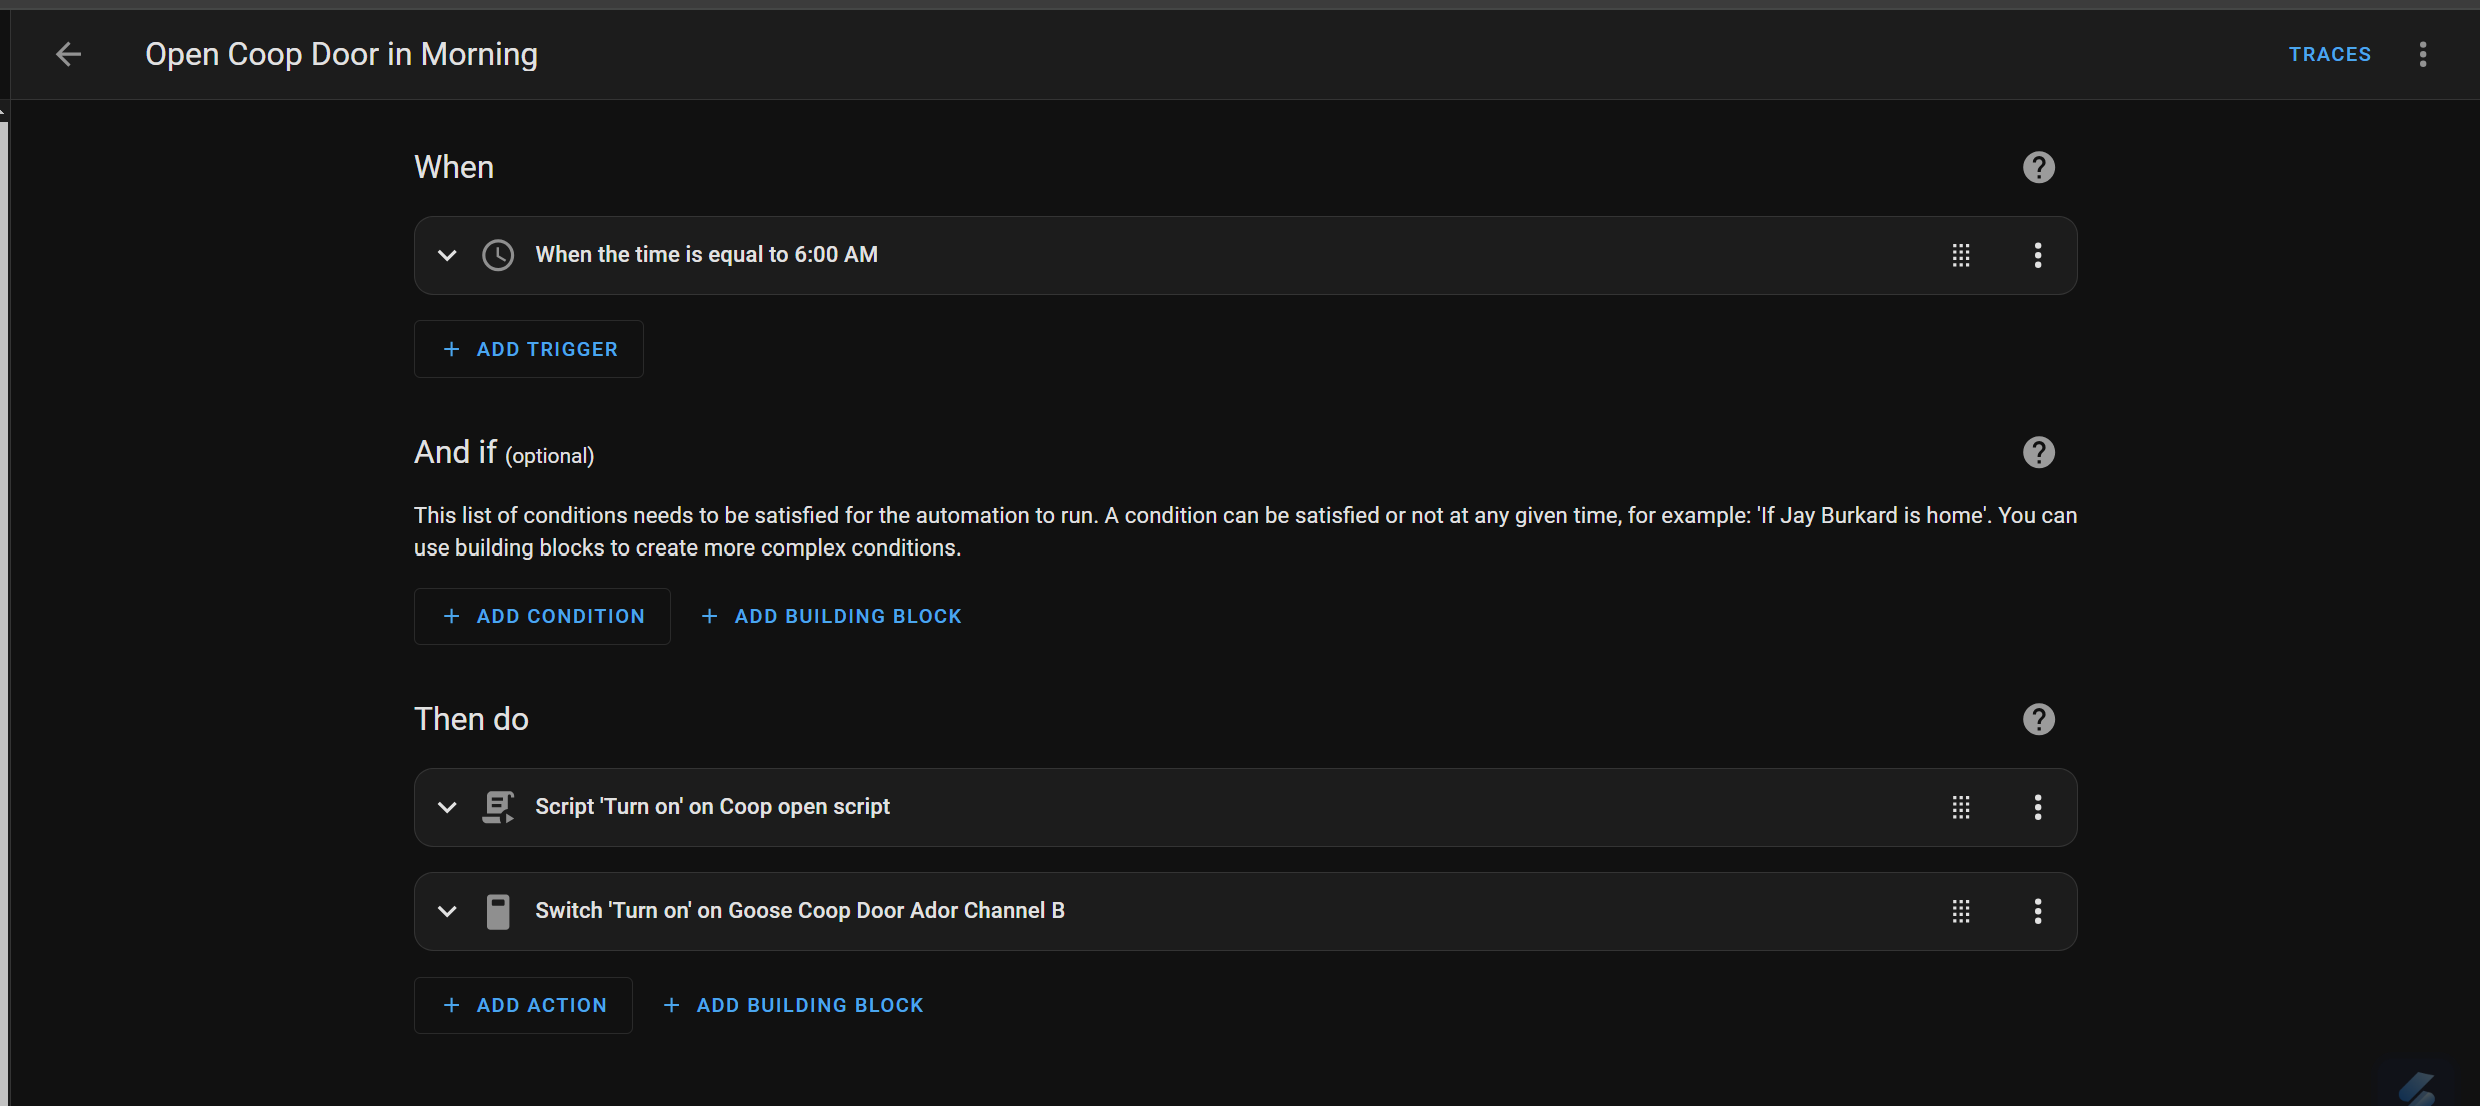
Home assistant integration was not as friendly as I had hoped - I'd seen an integration on github but hadn't looked at it closely and it appears as though its defunct/not documented. Fortunately though, there was a long thread on the home assistant forums with instructions. User "fishter" laid out in post 77 how to connect to the Omlet developer API and read the door state + create open and close scripts. I followed his steps basically to a T, getting an API key from omlet, creating open/close/get state scripts, and creating the webhook to keep the state updated when controlling the door outside of home assistant. After verifying everything worked, I disabled the light sensor in the Omlet app and created automations in home assistant to open and close the doors.
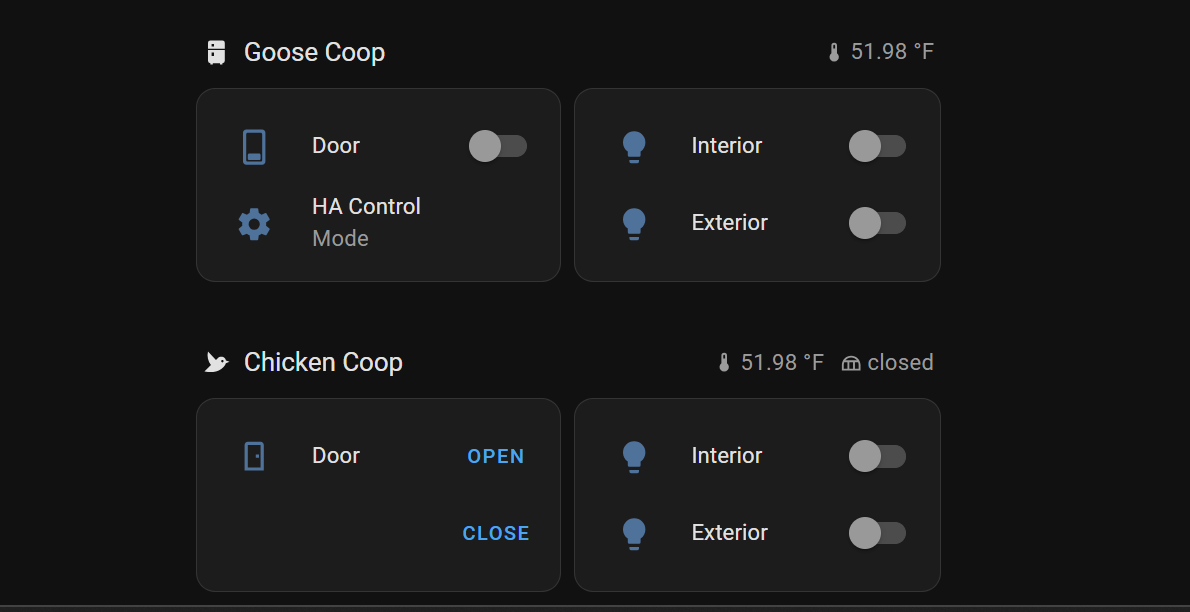
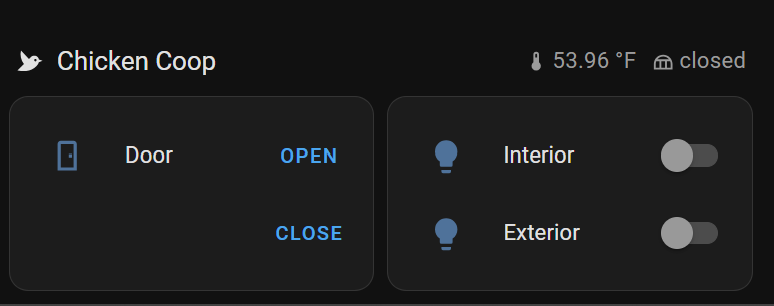
I used the newly released sections layout to create a clean couple of cards to control the lights and view and control the door state manually. For temperature in the badge header, I cheated and used a reading from a 433mhz weather station I am picking up with an antenna and rtl433. Door state is also a badge in the header, on the top far right of the section.
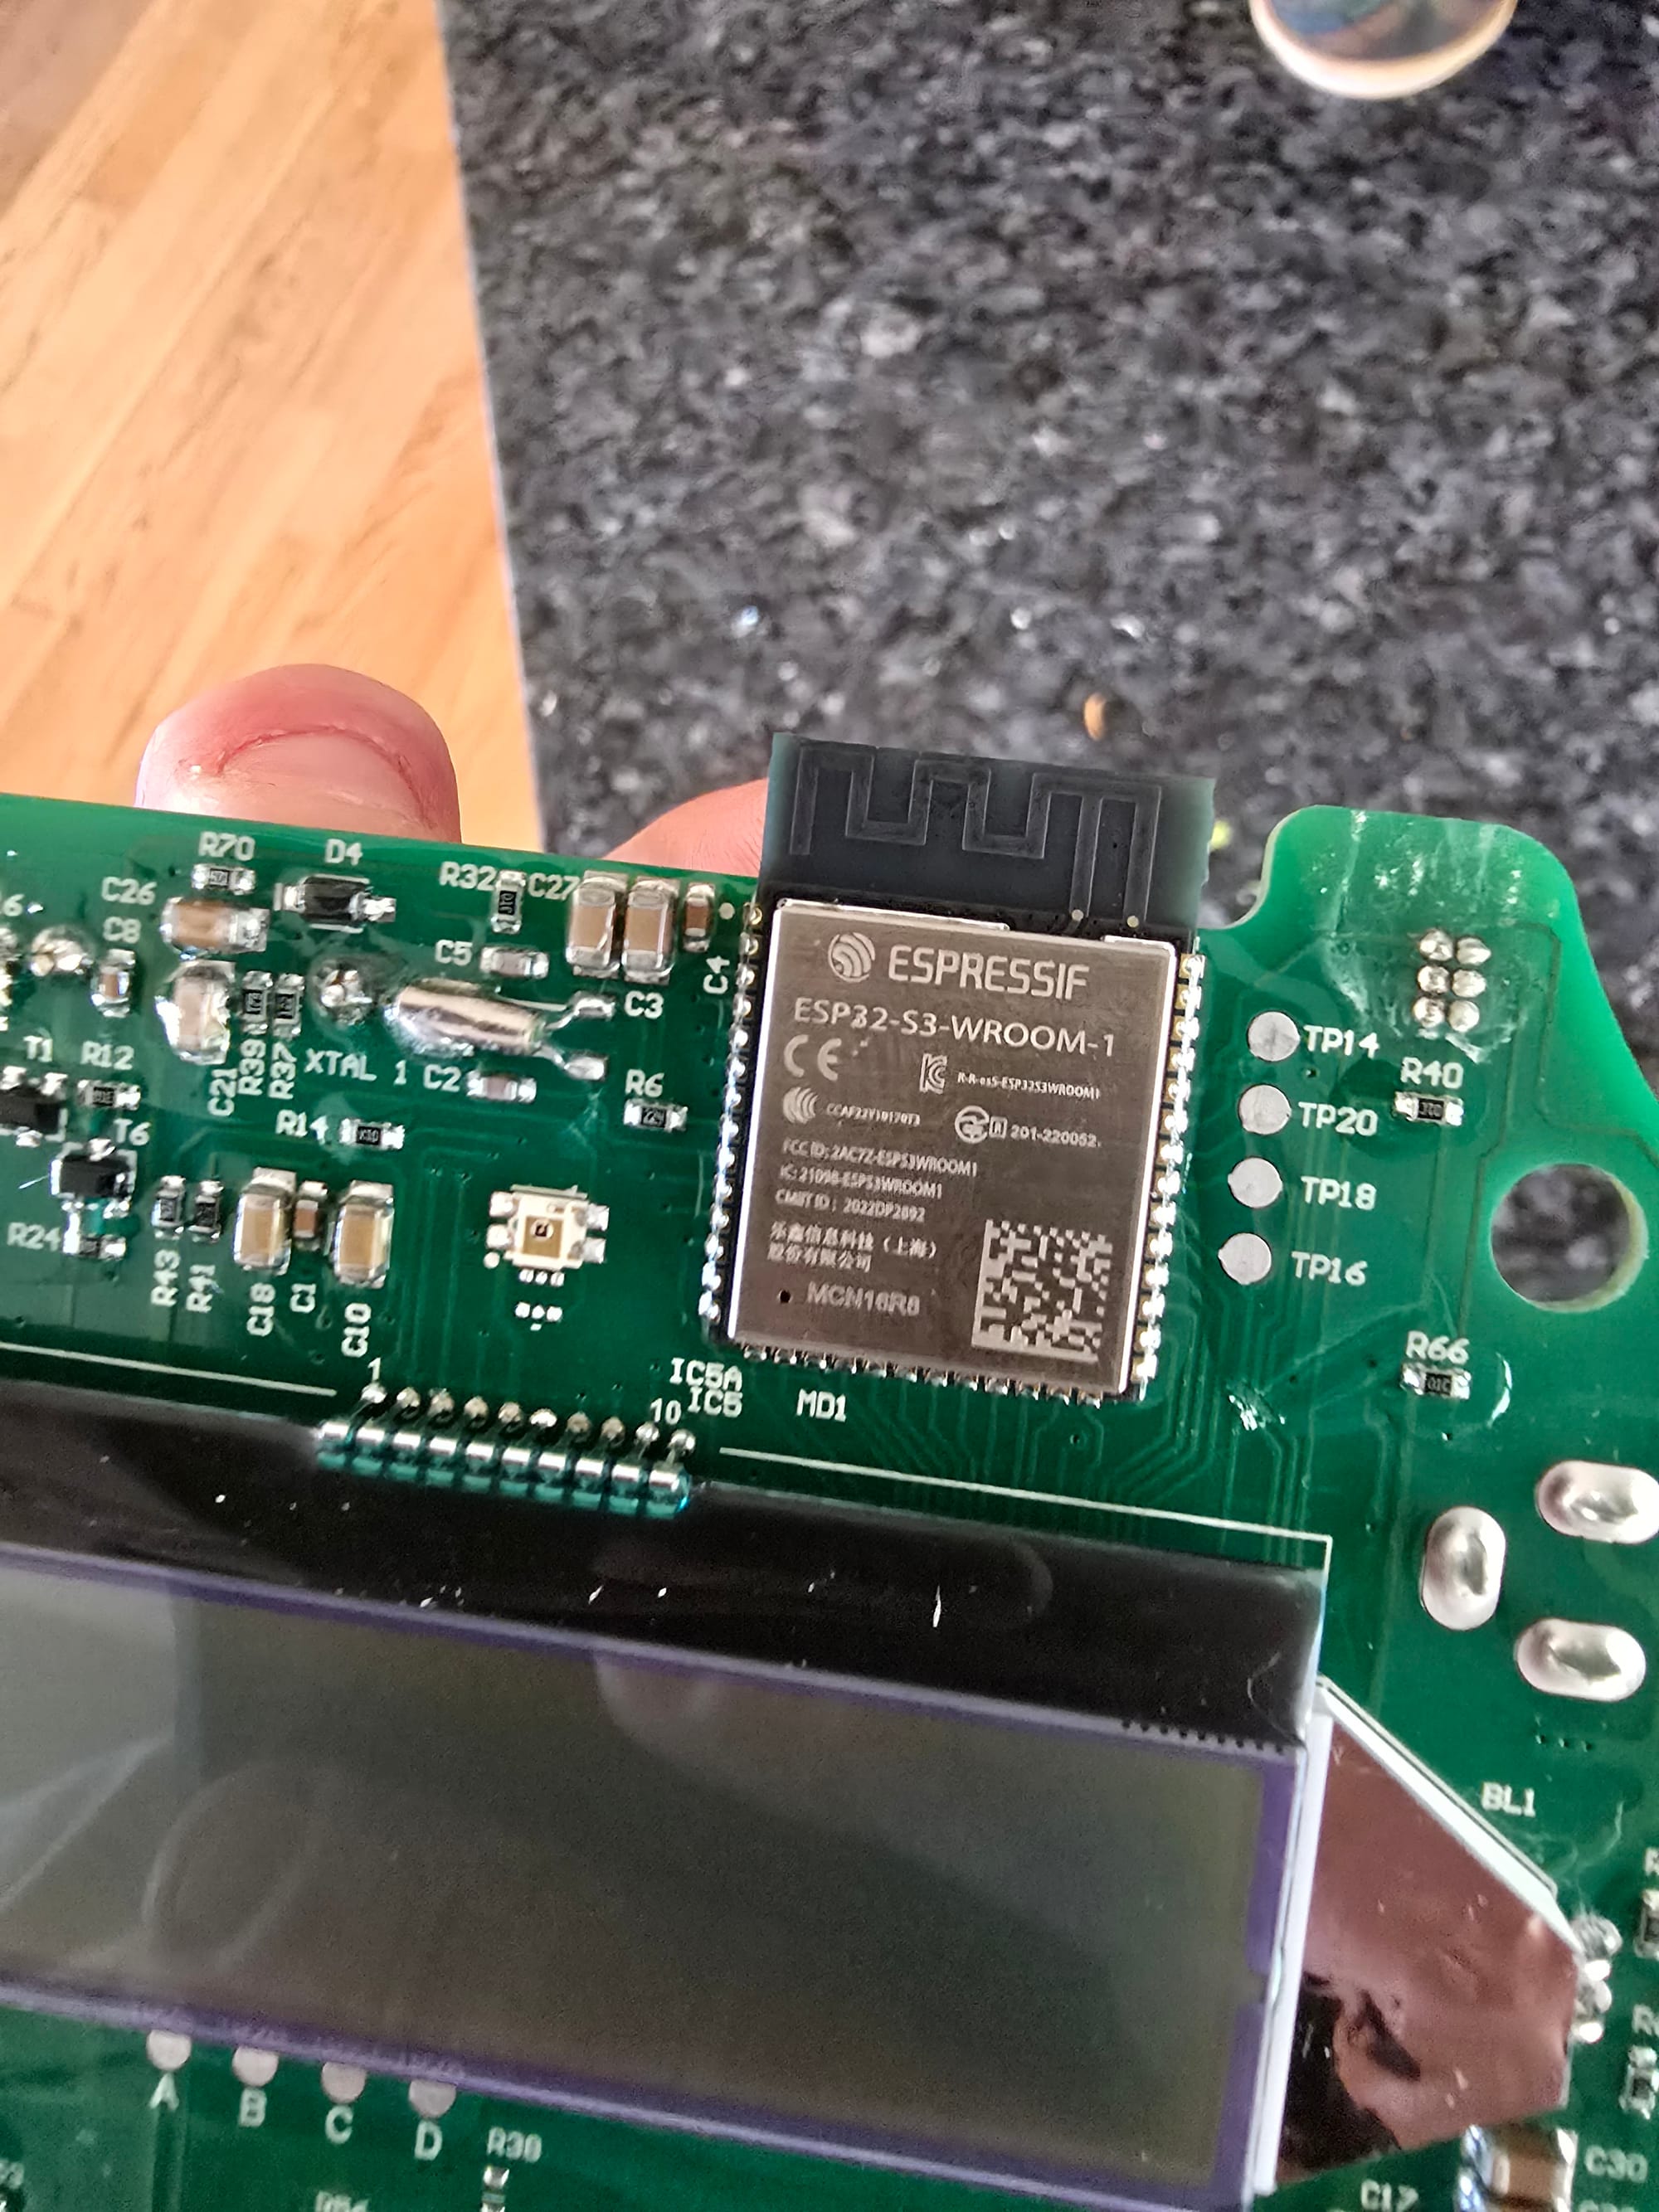
The omlet API obviously requires the internet to work and is not fully local - I compromised on this to keep the install quick and clean, but would like to make this fully local at some point. I tore the board apart before installing and confirmed as stated in the forum thread that there is an ESP32 on board. It appears there are spots to solder on pins for serial tx/rx. I think this is ripe for eventual flashing to esphome and fully local control. If no one else does first, I will dig into this eventually.
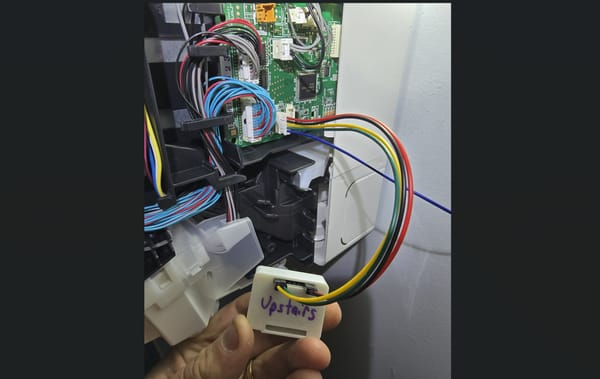
The goose coop was a little more involved. Ador sells a "wifi cable" and has a short guide on connecting to a wifi relay board to control their door. As found, the door has a photosensor between two pins on the control board (connected via a jumper). During the day, resistance is high and the two pins are effectively unconnected. At night, resistance falls, applying voltage to the sensing pin and closing the door. Ador's guide uses two relays - one for "auto" mode, where your relay is closed (effectively same as the jumper) and the photosensor continues controlling things, and one that instead jumps power from a neighboring pin to the sensing pin. With the first relay off, the second relay has complete control of the door.
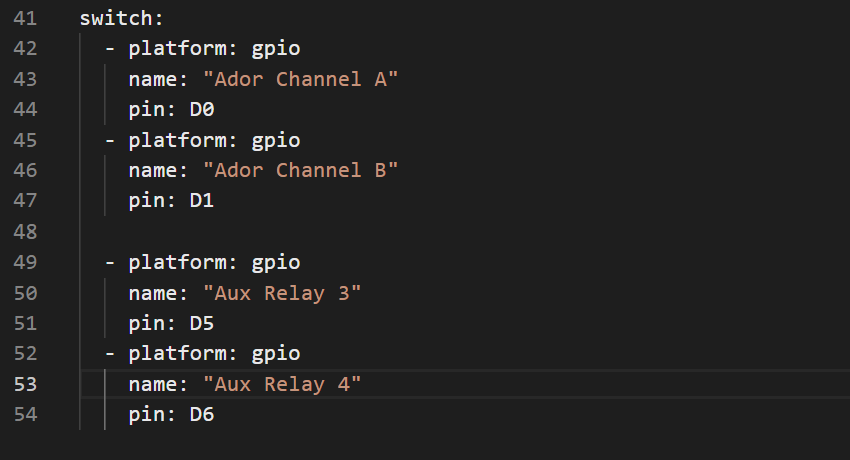
I repurposed an old project from one of our last houses, a garage door controller with an ESP8266 and 4 3.3v relays. I flashed it with a fresh copy of esphome and created a really simple configuration file with the trigger pins for the relays.
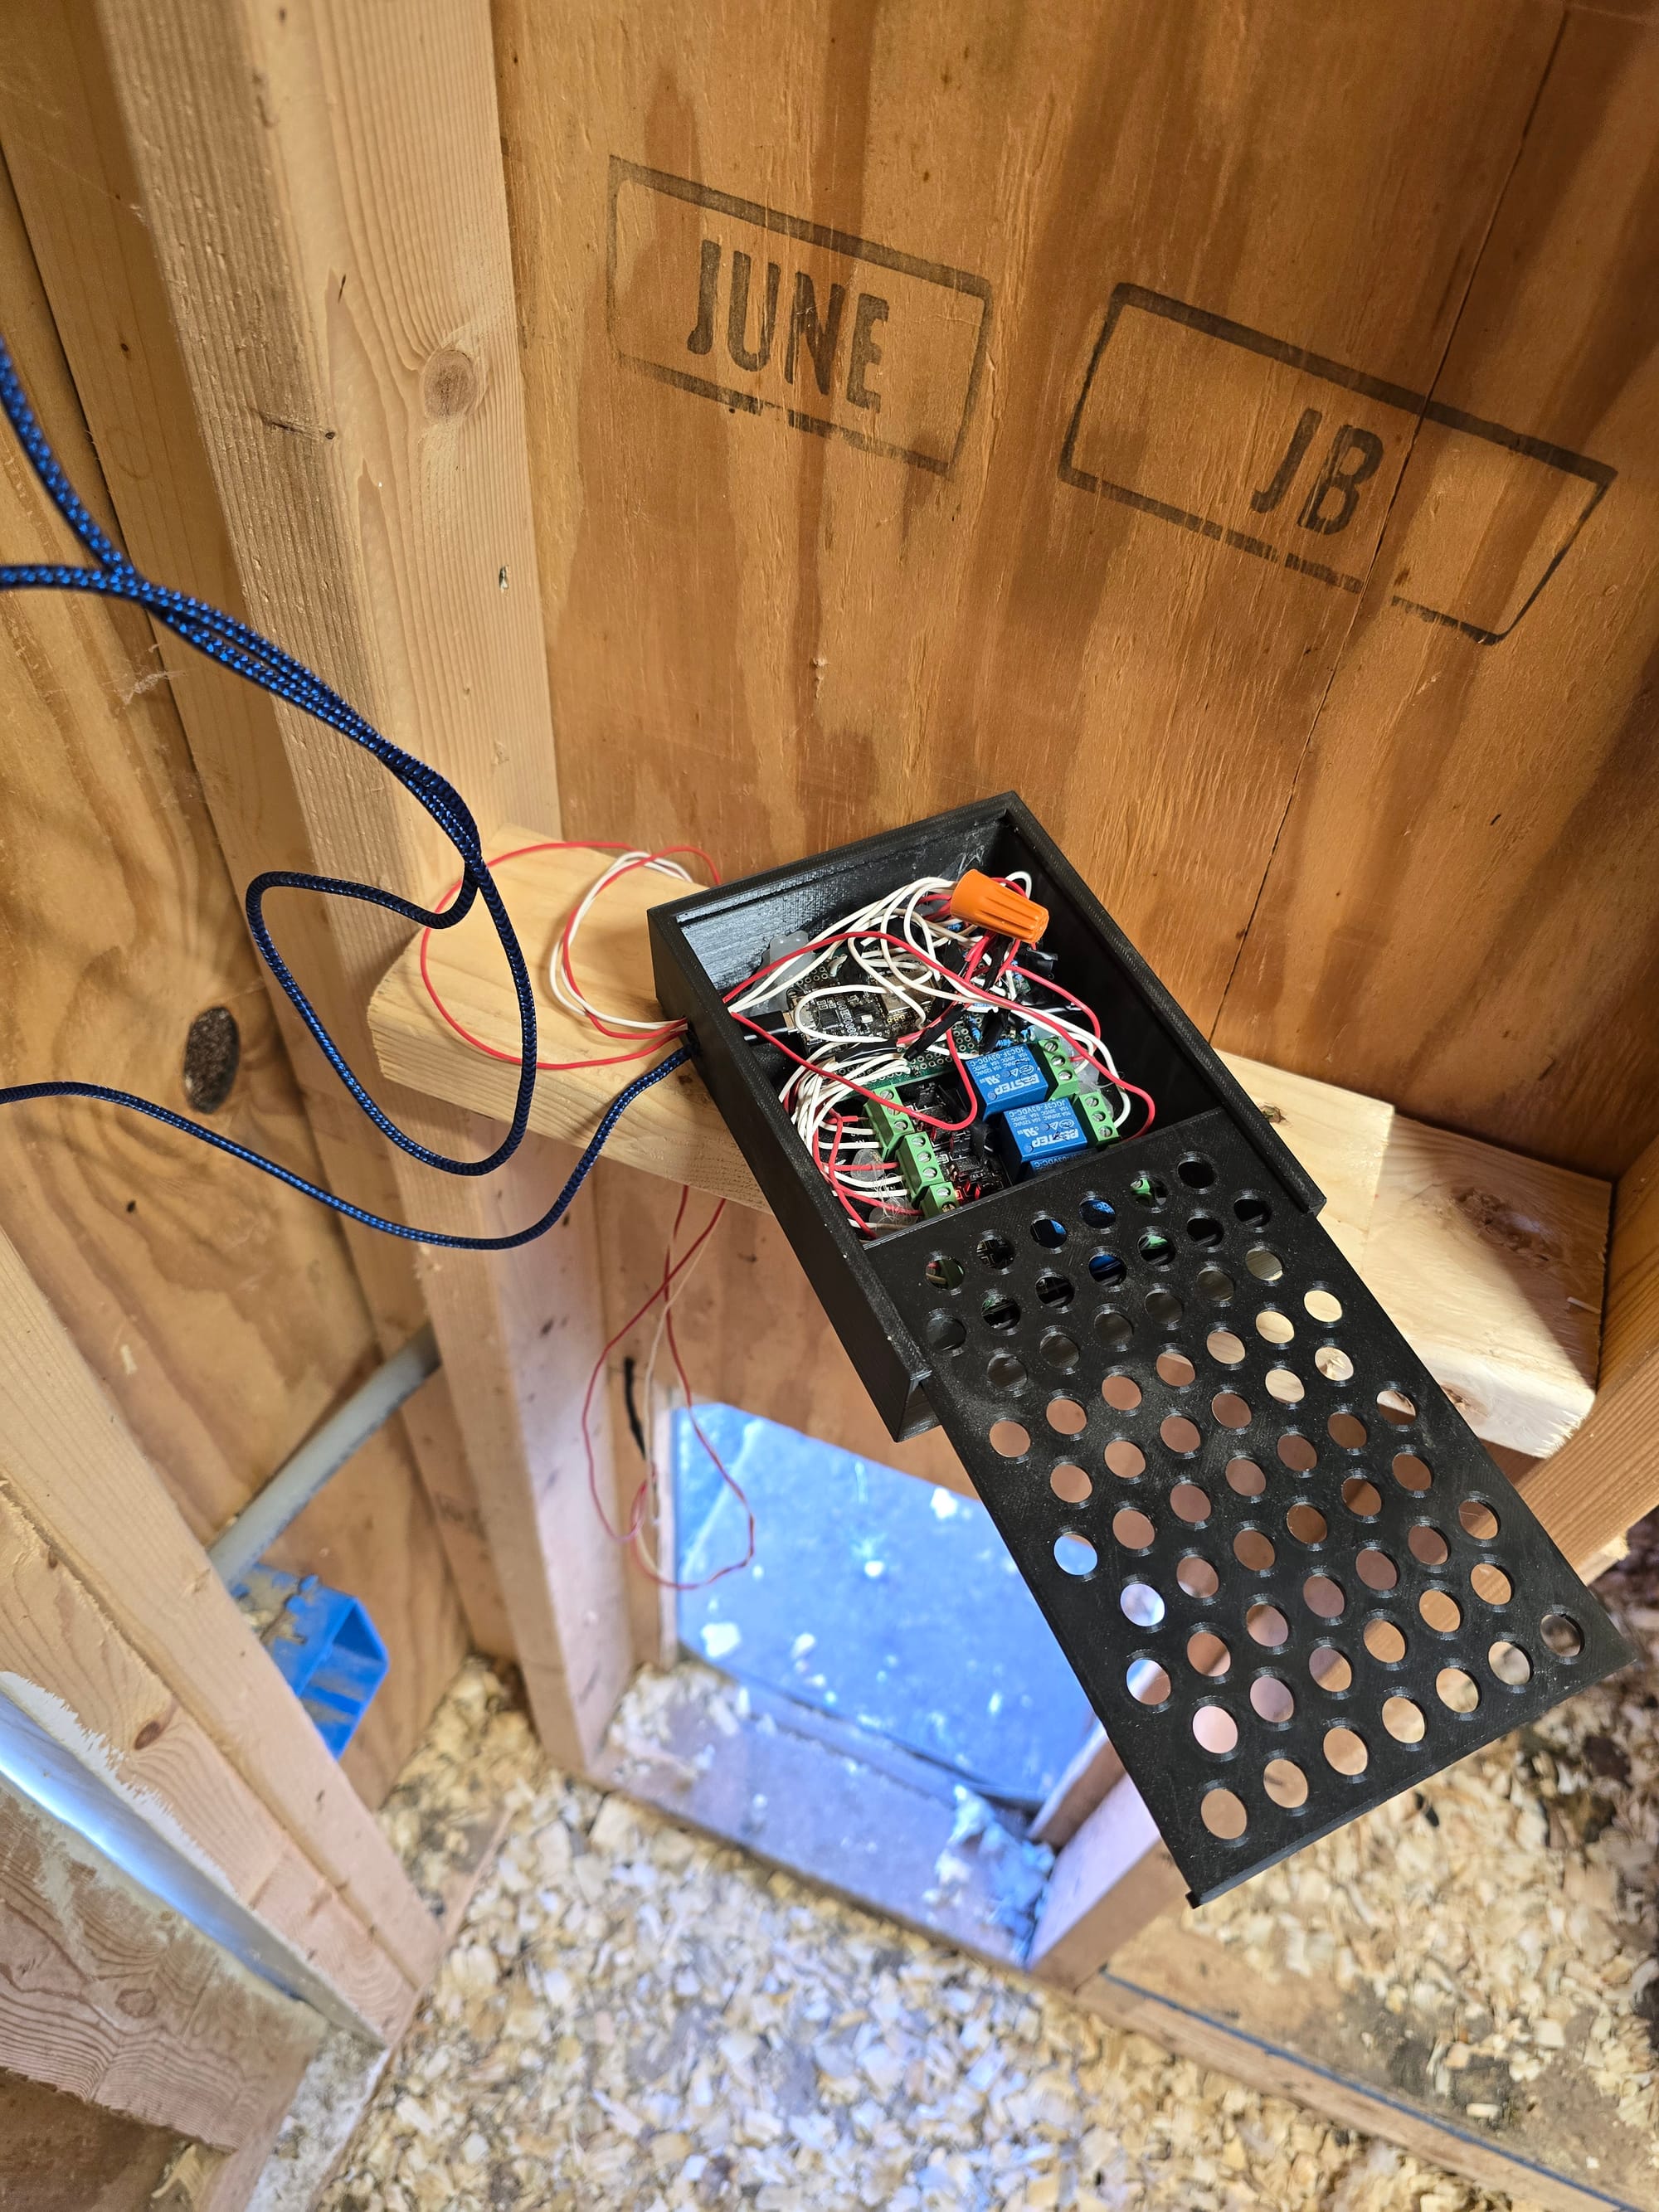
I connected channel A to the two pins originally containing the jumper (for "auto" mode). These were the pins farthest to the back, closest to the white connector. Deviating from Ador's guide, I connected the cables to the common and normally closed pins of the first relay - I leave the switch on in home assistant to break the photosensor circuit and enable manual control, but if I ever lose power or connectivity, the photosensor circuit will complete itself and continue opening/closing the door with the sun. Fail safe!
I tied the commons on the two relays together (like their wifi cable) and wired the normally open contact of the second relay to the 3rd pin from the back (orange cable in pic below). This is the relay ultimately used for manual control. The photo below shows 4 cables connected but I ultimately only ended up using the back 3. Relay A connects the back pin to the 2nd from the back pin, and Relay B connects the 3rd pin from the back to the 2nd.

With the kasa switches and esphome door controller in home assistant, I created a very similar few cards to control the goose coop. The door and light switch are on simple entities cards.
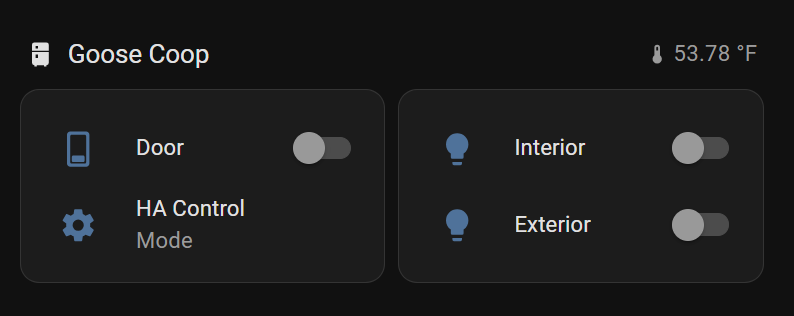
For the door "mode", I installed template-entity-row and added a second entry to the door entities card. If relay switch A is on (normally closed to common opens and disconnects photosensor), the entity row displays "Home Assistant Control" and if switch A is off (normally closed to common closes, connecting photosens0r) it displays "Light Sensor".
type: entities
entities:
- entity: switch.goose_coop_door_ador_channel_b
secondary_info: none
name: Door
- type: custom:template-entity-row
icon: mdi:cog
name: >-
{% if is_state('switch.goose_coop_door_ador_channel_a', 'on')%} HA Control
{% else %} Light Sensor {% endif %}
secondary: Mode
grid_options:
columns: 6
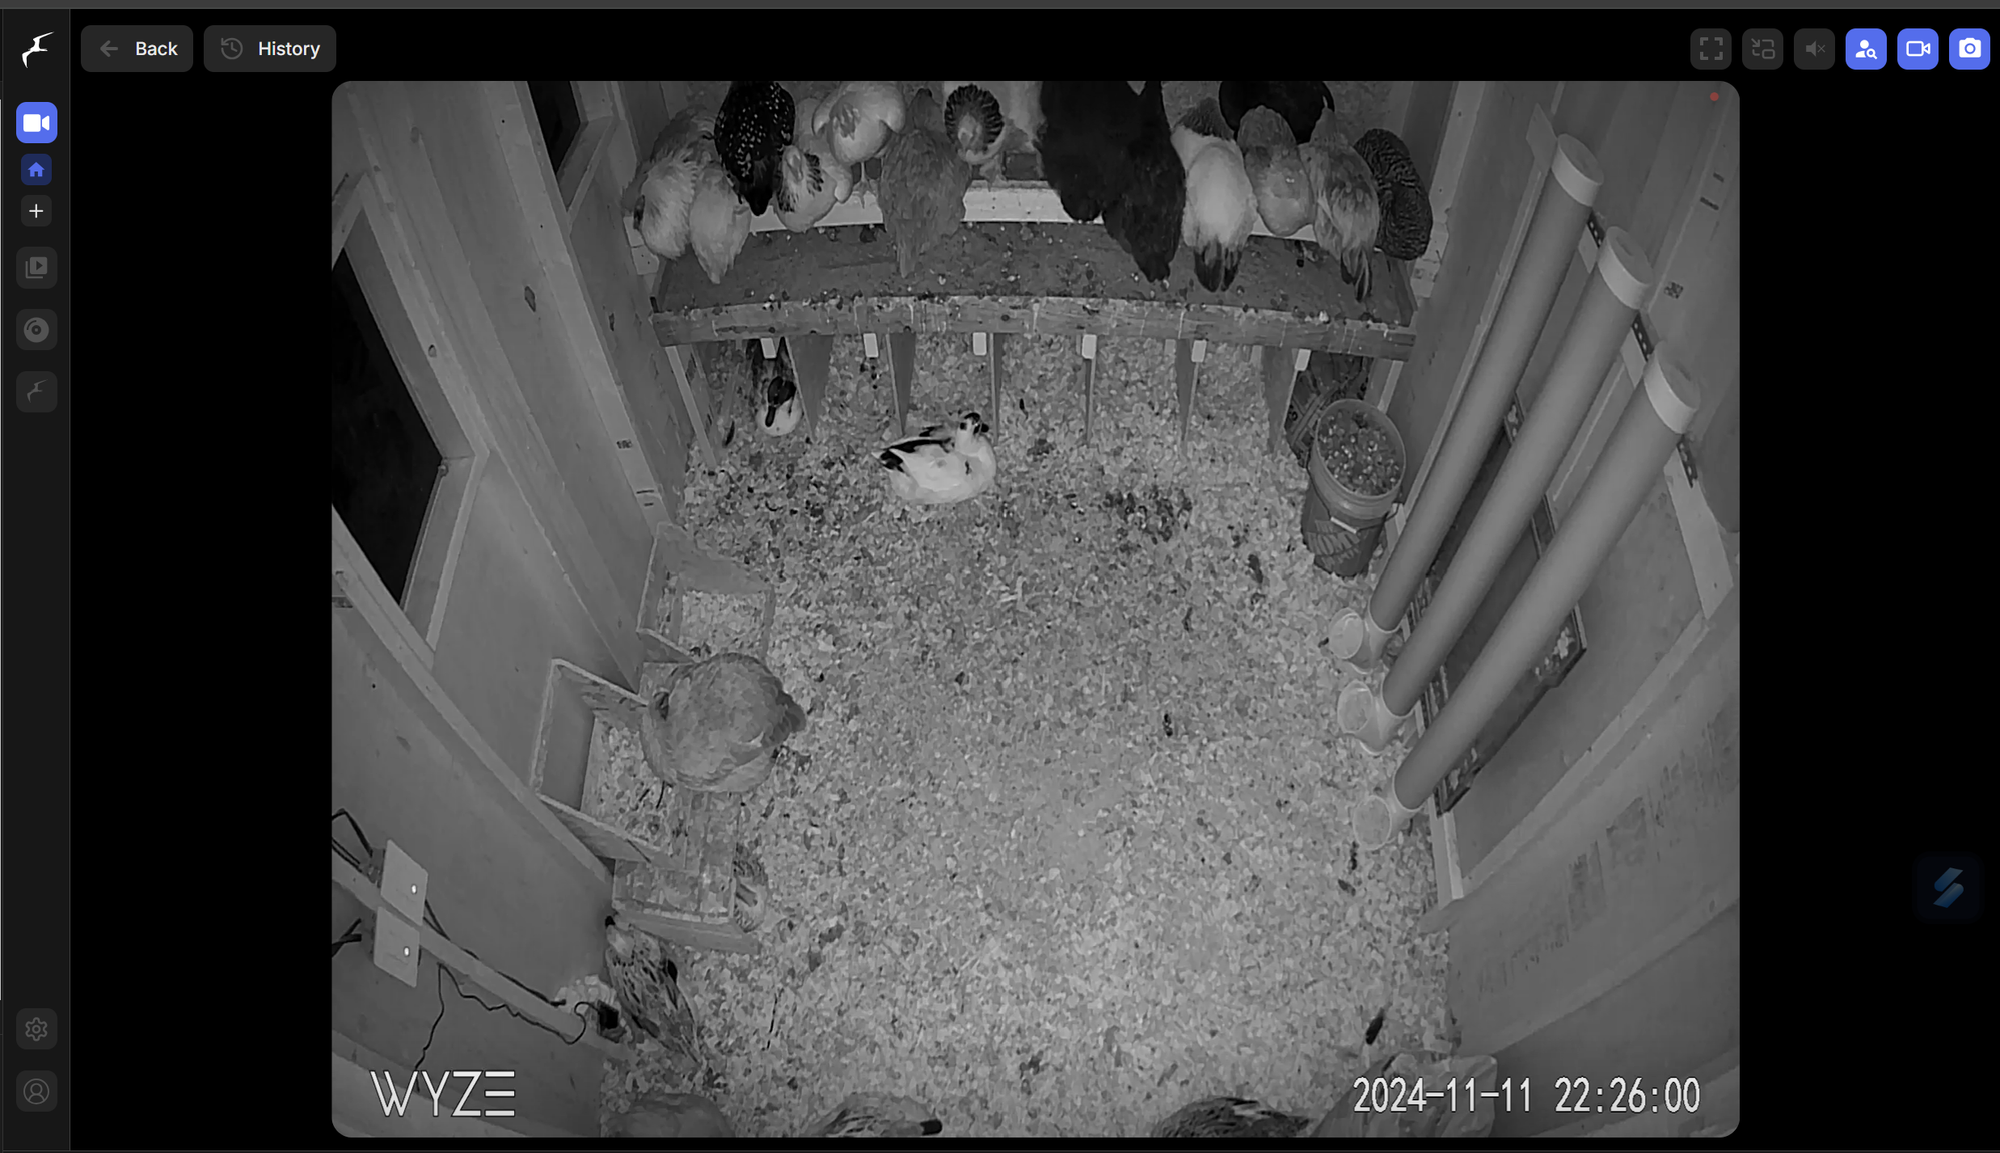
rows: autoI went back to my Wyze/Frigate guide and added a couple of cameras, one inside each coop and one outside. As a next step, I'd like to implement a "second chance" function for the stragglers - open the door for 5 minutes an hour after closing to allow anyone left out a chance to get in. In my head, I was thinking about piping a picture from frigate to Gemini (similar to these AI notifications) to determine if there are birds out (or even predators present) before firing this automation. I'm also considering signing up for frigate+ for better/custom object detection and training it on our birds.
I've already tweaked the automations a bit - the goose coop interior light comes on 5 minutes after the chicken door closes. I've delayed the goose coop door close an hour in an effort to coax them in with the light. Geese are stubborn.
As always, there are a few remaining items I'll get to eventually - I connected the omlet door to mains but have yet to power the goose coop Ador door from mains power. They recommend using a 6v battery charger for this, which I've just ordered. The goose coop still needs some trim and another window, and I've still got to source a water defroster of some kind but we are in a much better position heading into winter than we were the last from an automation standpoint.