An end to end guide to Wyze Cam v3s with Frigate

I've been using every home assistant user's favorite NVR, Frigate, for a couple of years. The majority of my property is covered by hardwired Reolink RLC-520As - these aren't on Frigate's recommended hardware list, but they're frequently on sale in the ~$40 range and I've had great luck using them with the reolink specific configuration provided by Frigate (I'll include my exact configuration at the end).
I was looking for a wireless camera to cover the inside and outside of my chicken coop - I've run power to it, but don't have a network switch or any easy way to use POE cameras. I had a few requirements I was looking to fulfill:
- Compatible with frigate
- 24/7 stream - constant on, no batteries!
- Cheap
After a bit of looking and stumbling on wz_mini_hacks, I decided to buy a couple of Wyze Cam v3s.
Wz_mini_hacks adds a lot of functionality to the wyze cameras, but the most important to me were exposing an RTSP stream for Frigate to consume (there's an official wyze firmware with RTSP, but it's outdated) and enabling self hosted mode, where the camera can be isolated from the internet entirely and continue functioning without phoning home to any outside servers. Without self hosted mode, even on the official RTSP firmware, these cameras reset every few minutes if they can't reach the Wyze servers. I broadcast an SSID specifically for IOT type devices and cameras that can only talk to home assistant/frigate.
I learned most of this from Leo's Notes. I've tried setting these up a few different ways, but they were a bit finicky each time. The following instructions have been the easiest and most repeatable.
- Download firmware version 4.36.9.139 from here: https://download.wyzecam.com/firmware/v3/demo_wcv3_4.36.9.139.zip
This is the latest version that works well with wz_mini_hacks. Unzip the contents and copy the file "demo_wcv3.bin" to the root directory of a blank microsd card. Insert the microsd card in the wyze camera. Hold down the setup button while applying power until the light on the front of the camera turns purple - this indicates the firmware is being flashed. At this point, release the setup button and wait for the light on the front to turn red and start blinking (firmware flash complete).
- Setup the Wyze camera with the wyze app. I tried using leo's instructions to connect without using the wyze app at all, but had connection timeout issues on 3/4 of the cameras I set up. Connecting with the app always worked. Do NOT update firmware when the app prompts you to. If you're connecting to a network that's firewall'd off like my IOT vlan is, you'll have to temporarily enable a rule to allow traffic to Wyze's servers (I just flipped on an "any" rule for the few minutes this took). Assign a static IP using your router/firewall/whatever device is serving up DHCP.
Side note - while you're still in the app, disable motion tagging! There isn't any way to do this in wz_mini_hacks and it results in annoying green boxes on the RTSP stream if you don't.
- Remove the microsd card from the camera and delete all contents. Download the "SD_ROOT" folder from wz_mini_hacks, here: https://github.com/gtxaspec/wz_mini_hacks
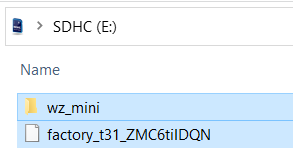
Copy the contents of "SD_ROOT" to your microSD card. You should have a "factory_xxx.bin" file and a "wz_mini" folder.
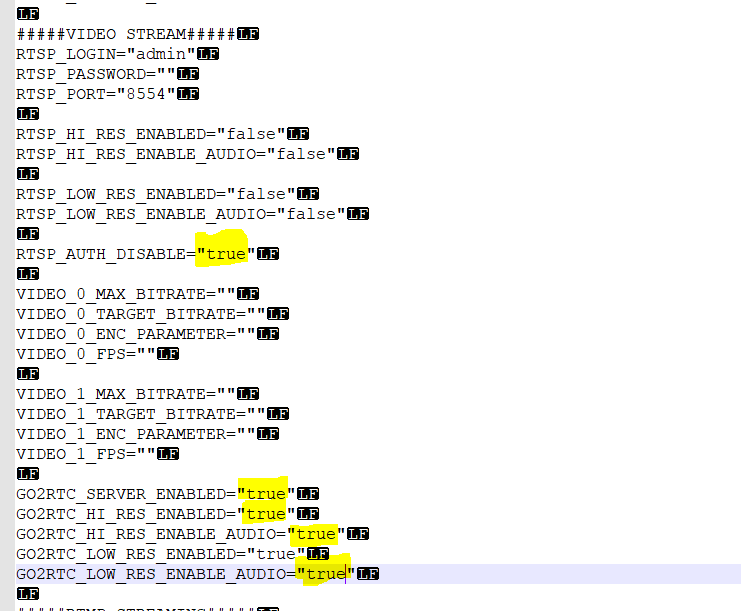
Open the "wz_mini" folder and find the "wz_mini.conf" file. Open it in a text editor. Make the following changes
- Disable rtsp auth and enable all go2rtc settings
- Enable self hosted mode

- Enable the web server, set a password, and add the line I have pointed to in red - it was not present in the boilerplate config on the version of wz_mini_hacks I'm using, but you'll need it to administer the camera from the web page.

Save the config file and pop the microsd card in your camera.
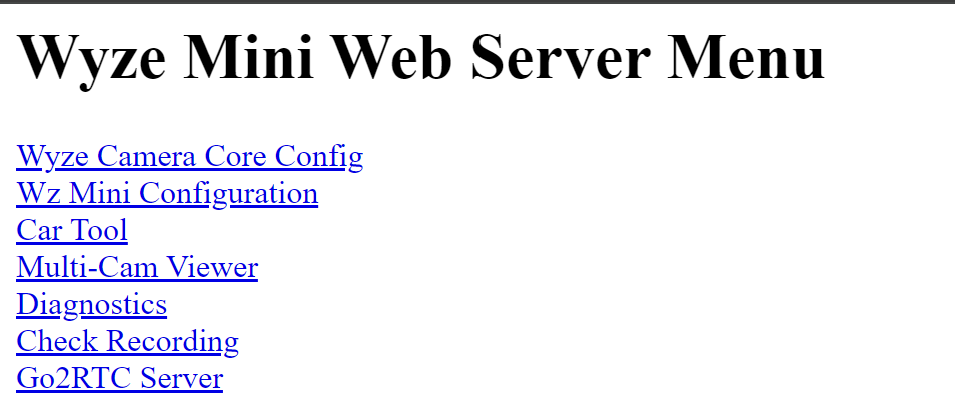
- Power up with the wz_mini_hacks sd card installed. On first boot, you should hear "w z mini, initializing first boot, extracting swap, please wait". When the light turns blinking blue (solid blue if you didn't enable self hosted mode), the camera has booted and ready to access. Go to http://your-camera-ip and you should be presented with the wz_mini_hacks config page. If you have trouble accessing this, make sure your browser isn't defaulting to https://your-camera-ip. The camera will not respond to an https request!
All further administration of the camera can be done from this page.
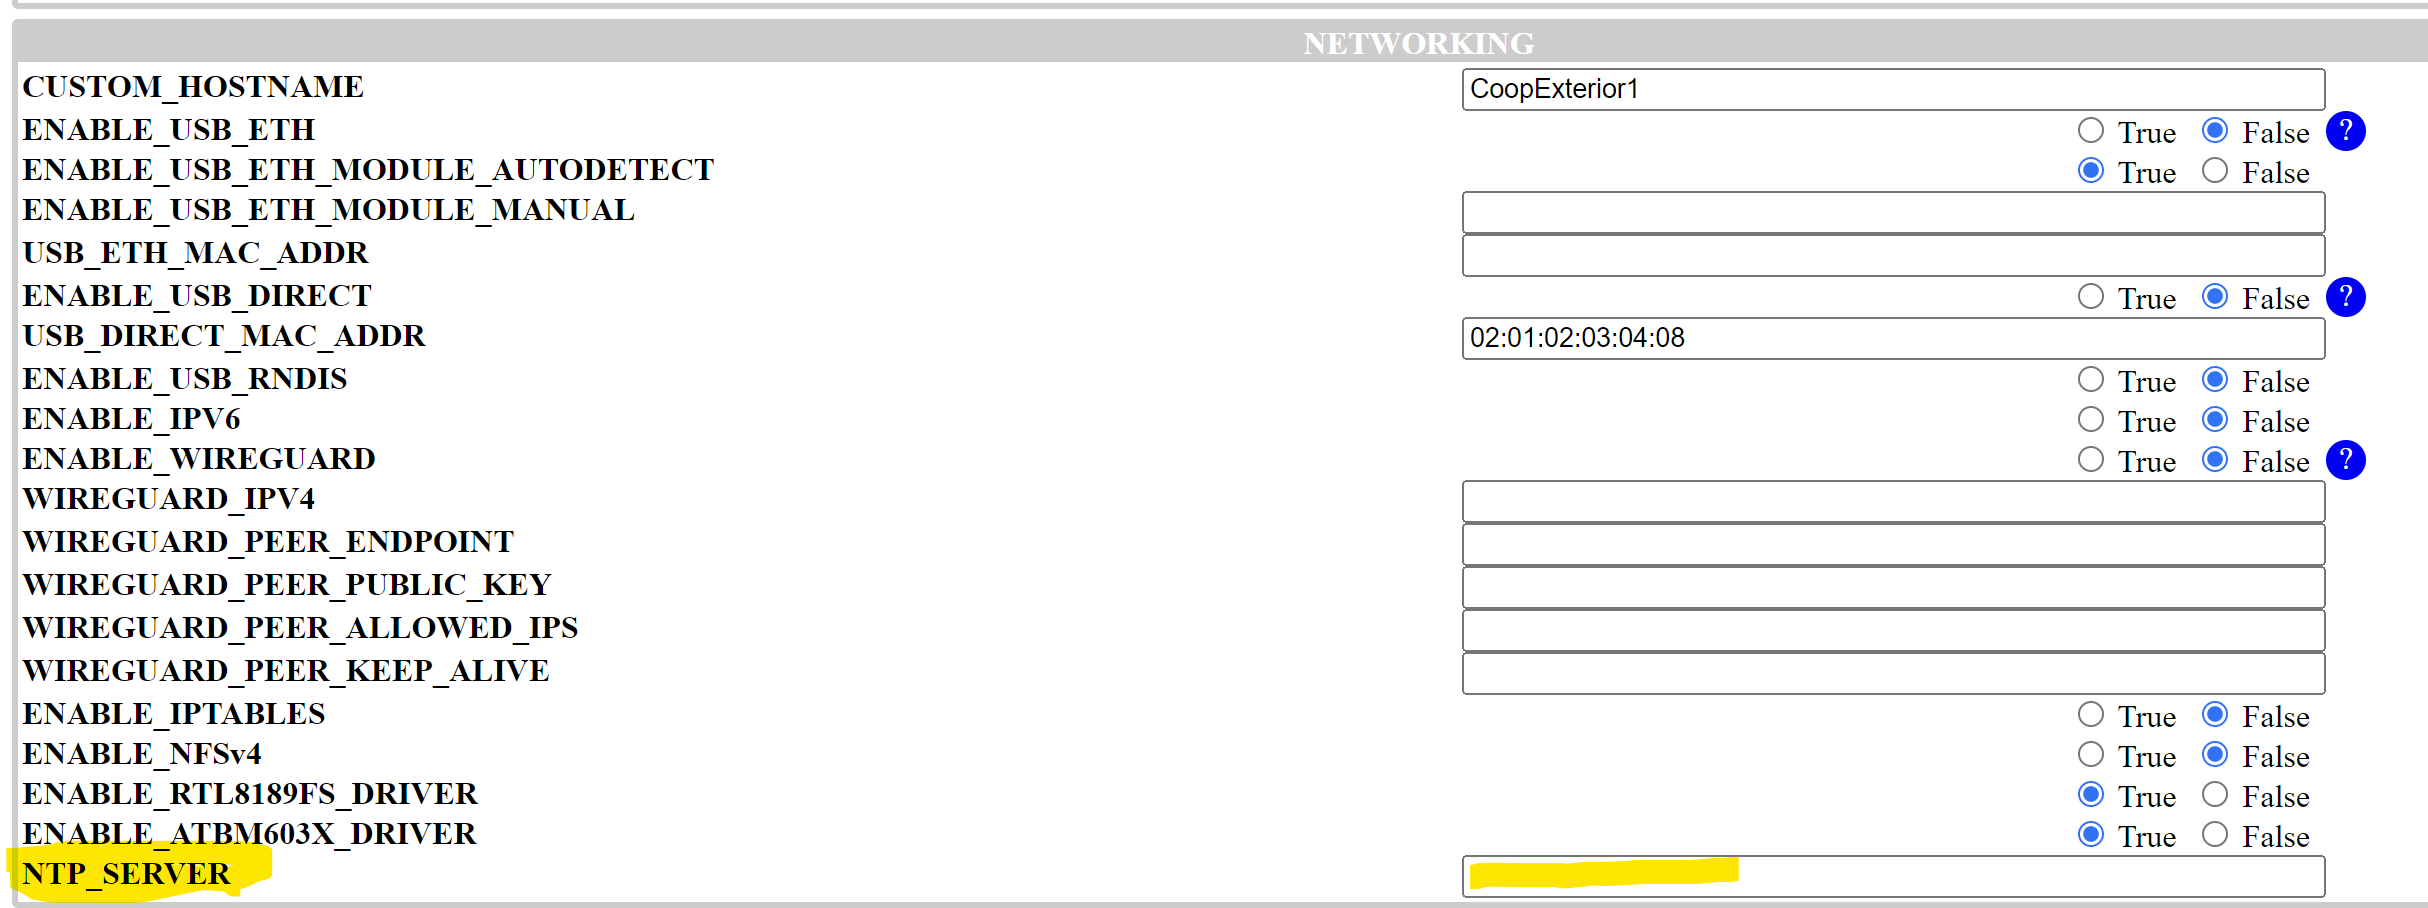
If you'd like the timestamp to be accurate on the wyze camera overlay, click on "wz mini configuration" and configure an NTP (network time protocol) server. This can be your firewall or something like pool.ntp.org if your cameras still have outside access.
- Now, to configure frigate! Because we're using go2rtc, the actual frigate configuration is really simple.
Here's what mine looks like.
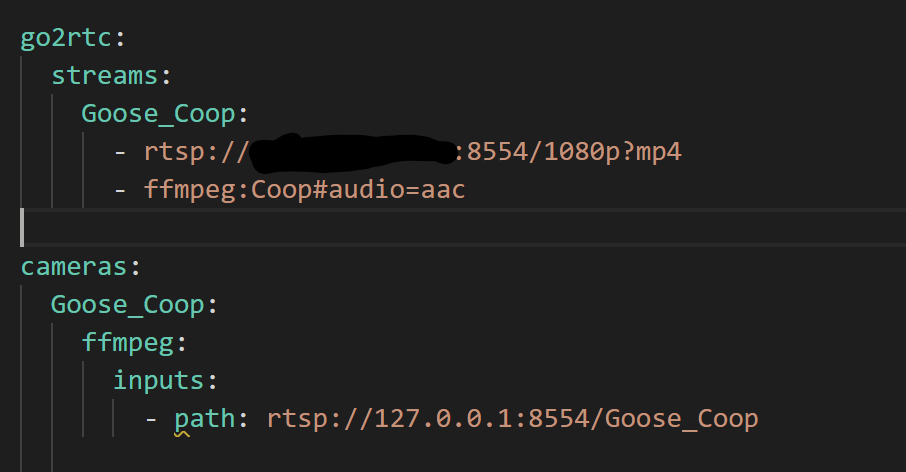
You'll define your camera twice - once in the dedicated go2rtc section, and then once in the traditional "cameras" section. The go2rtc section points at the actual camera IP and the cameras section points at the loopback adapter (127.0.0.1), pointing at the go2rtc rtsp stream. The names have to match (stream_name in go2rtc and 127.0.0.1:8554/stream_name) for this to work, but in this way you only make a single connection to your camera.
I'm not doing any object detection on this particular camera (just a simple view into my chicken coop), so I haven't defined any "roles", but you'd do so under inputs just like any other frigate camera you may have (record, detect, etc).
Save and restart frigate, and your wyze cam should be visible.
I've been running one of these cameras for nearly a year now with this configuration and just recently added several more.
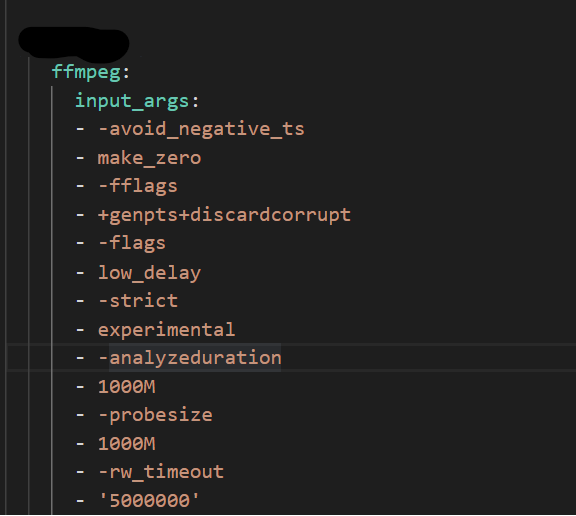
As a footnote, here are the ffmpeg arguments I'm using for the reolinks as mentioned in the beginning of this writeup.