Sportsman 850 Spun Timing Gear / Engine rebuild Part 1
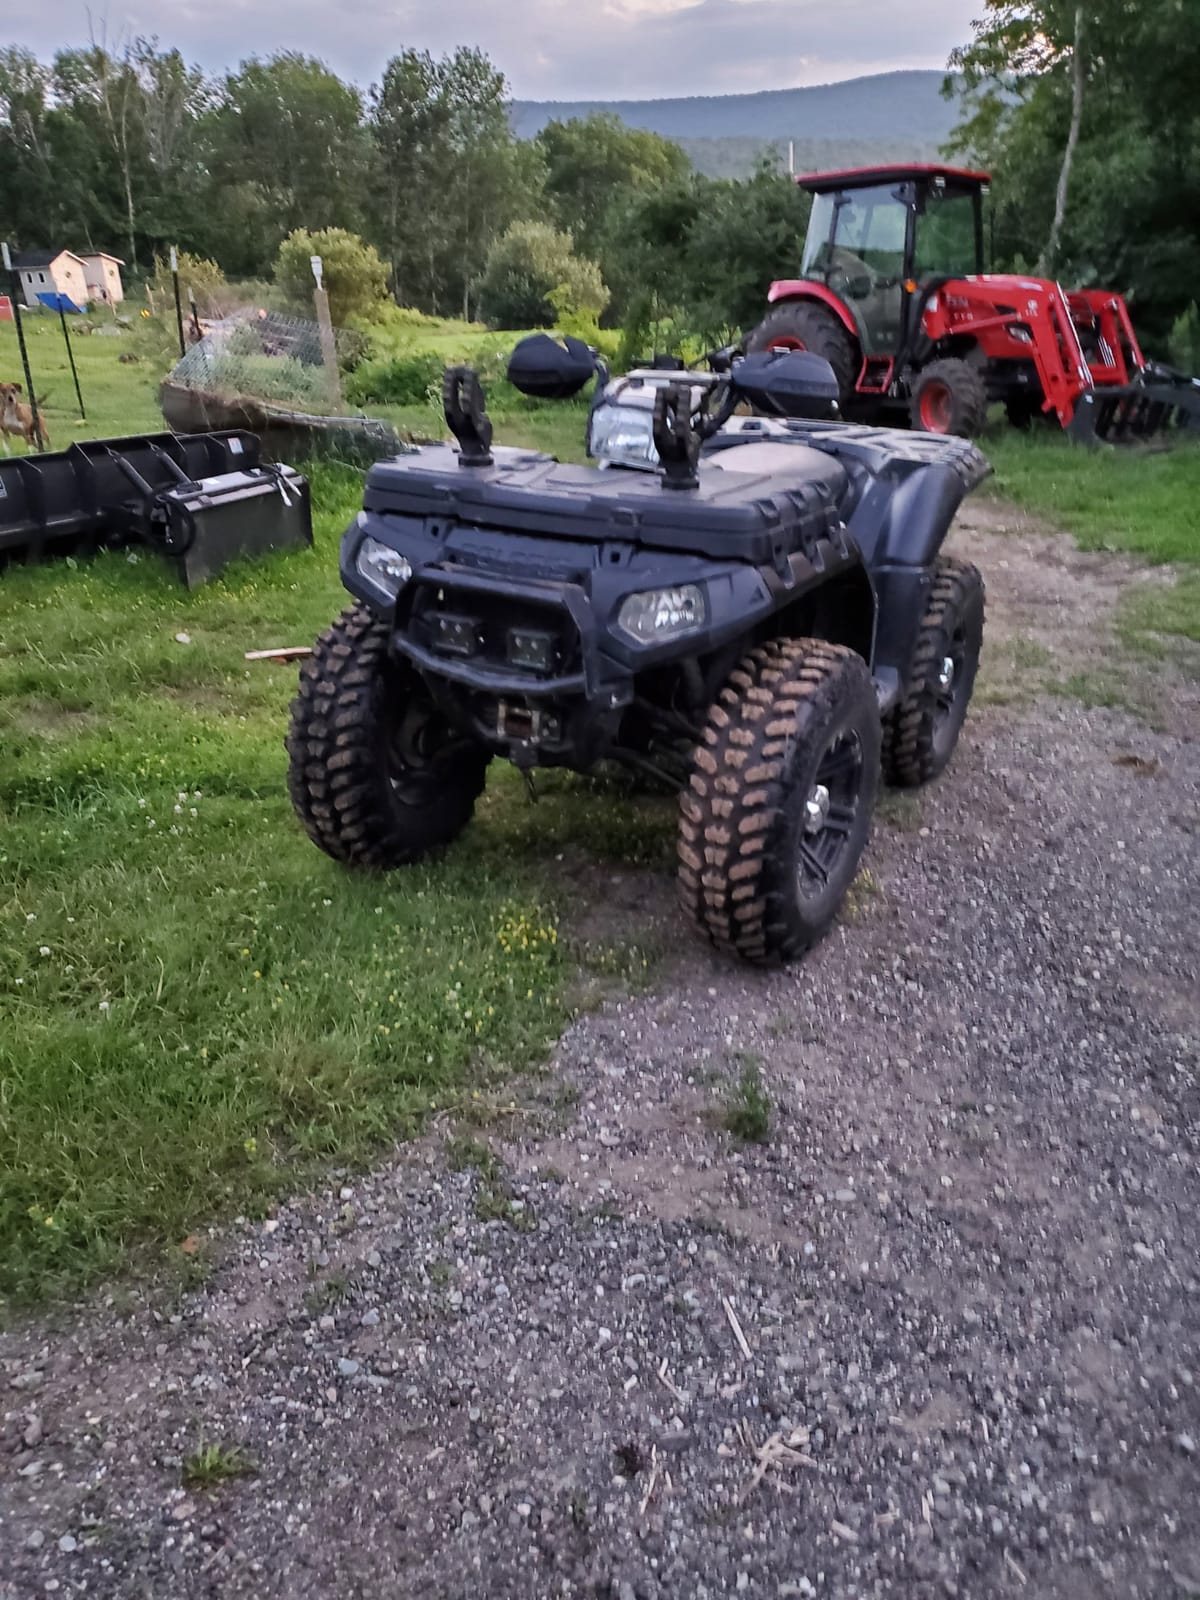
In the midst of rebuilding a couple other 4 wheelers, Brittany and I picked up a used "ready to ride" 2011 Sportsman 850 XP EPS. We got a decent deal on it and it had a few thousand in extras - small lift, 30" tires, upgraded axles, and a gun rack - all perfect for the rough terrain trails that cross our property. It had a low and somewhat erratic idle when we went to check it out - previous owner seemed honest and said it'd always ran like that for the year and 500+ miles he'd had it (he was only selling because he had 6 or 7 others in the family already and his son just upgraded). He said he'd performed no maintenance other than making sure it had oil, so I figured it'd be an easy air/fuel fix. It seemed to run fine up at speed on a quick test drive.
After getting it home, we started by changing fluids - I did a bunch of research on proper alternatives to the expensive Polaris branded oils. Near as I can tell.....
Engine oil: Polaris is 5W50, I opted to use Rotella 5W40, as I do in almost all my engines.
Transmission fluid: Polaris is "AGL", which is a 5w20 ish weight oil. Some run engine oil, and others ATF. I opted for regular valvoline maxlife ATF (also about 5W20) that I had on hand.
Rear differential/pumpkin: Polaris is "Angle drive fluid", but I read any old synthetic gear oil is good. I chose cheap supertech 75w90.
Front differential/pumpkin: Polaris is "Demand drive fluid", this differential is a special little Hillard unit (technically an "electro-mechanically activated bidirectional overrunning clutch"). It appears demand drive is roughly equivalent to tractor hydraulic transmission fluid (JD-20D/C spec) which I had plenty of on hand and opted to use.
As soon as Brittany and I started in on maintenance, things went south. I popped the engine oil drain plug out only to discover it was stripped. I was able to chase the threads with a tap and die kit and replace the plug - easy fix. Next was the rear diff - I popped the plug and discovered total sludge. It looked like a mixture of water intrusion and perhaps grease from the CV axle leaking through. No metal shavings in the sludge, so we just flushed it out thoroughly and put new gear oil in - all good for the time being (maybe seals later....)
Moving on from oils... the EPS light was on (electronic power steering) - there's a relay towards the front left of the ATV that I read sometimes got caked with mud. Ours was extremely dirty - cleaned it all out with contact cleaner and the EPS light went away. A small win!
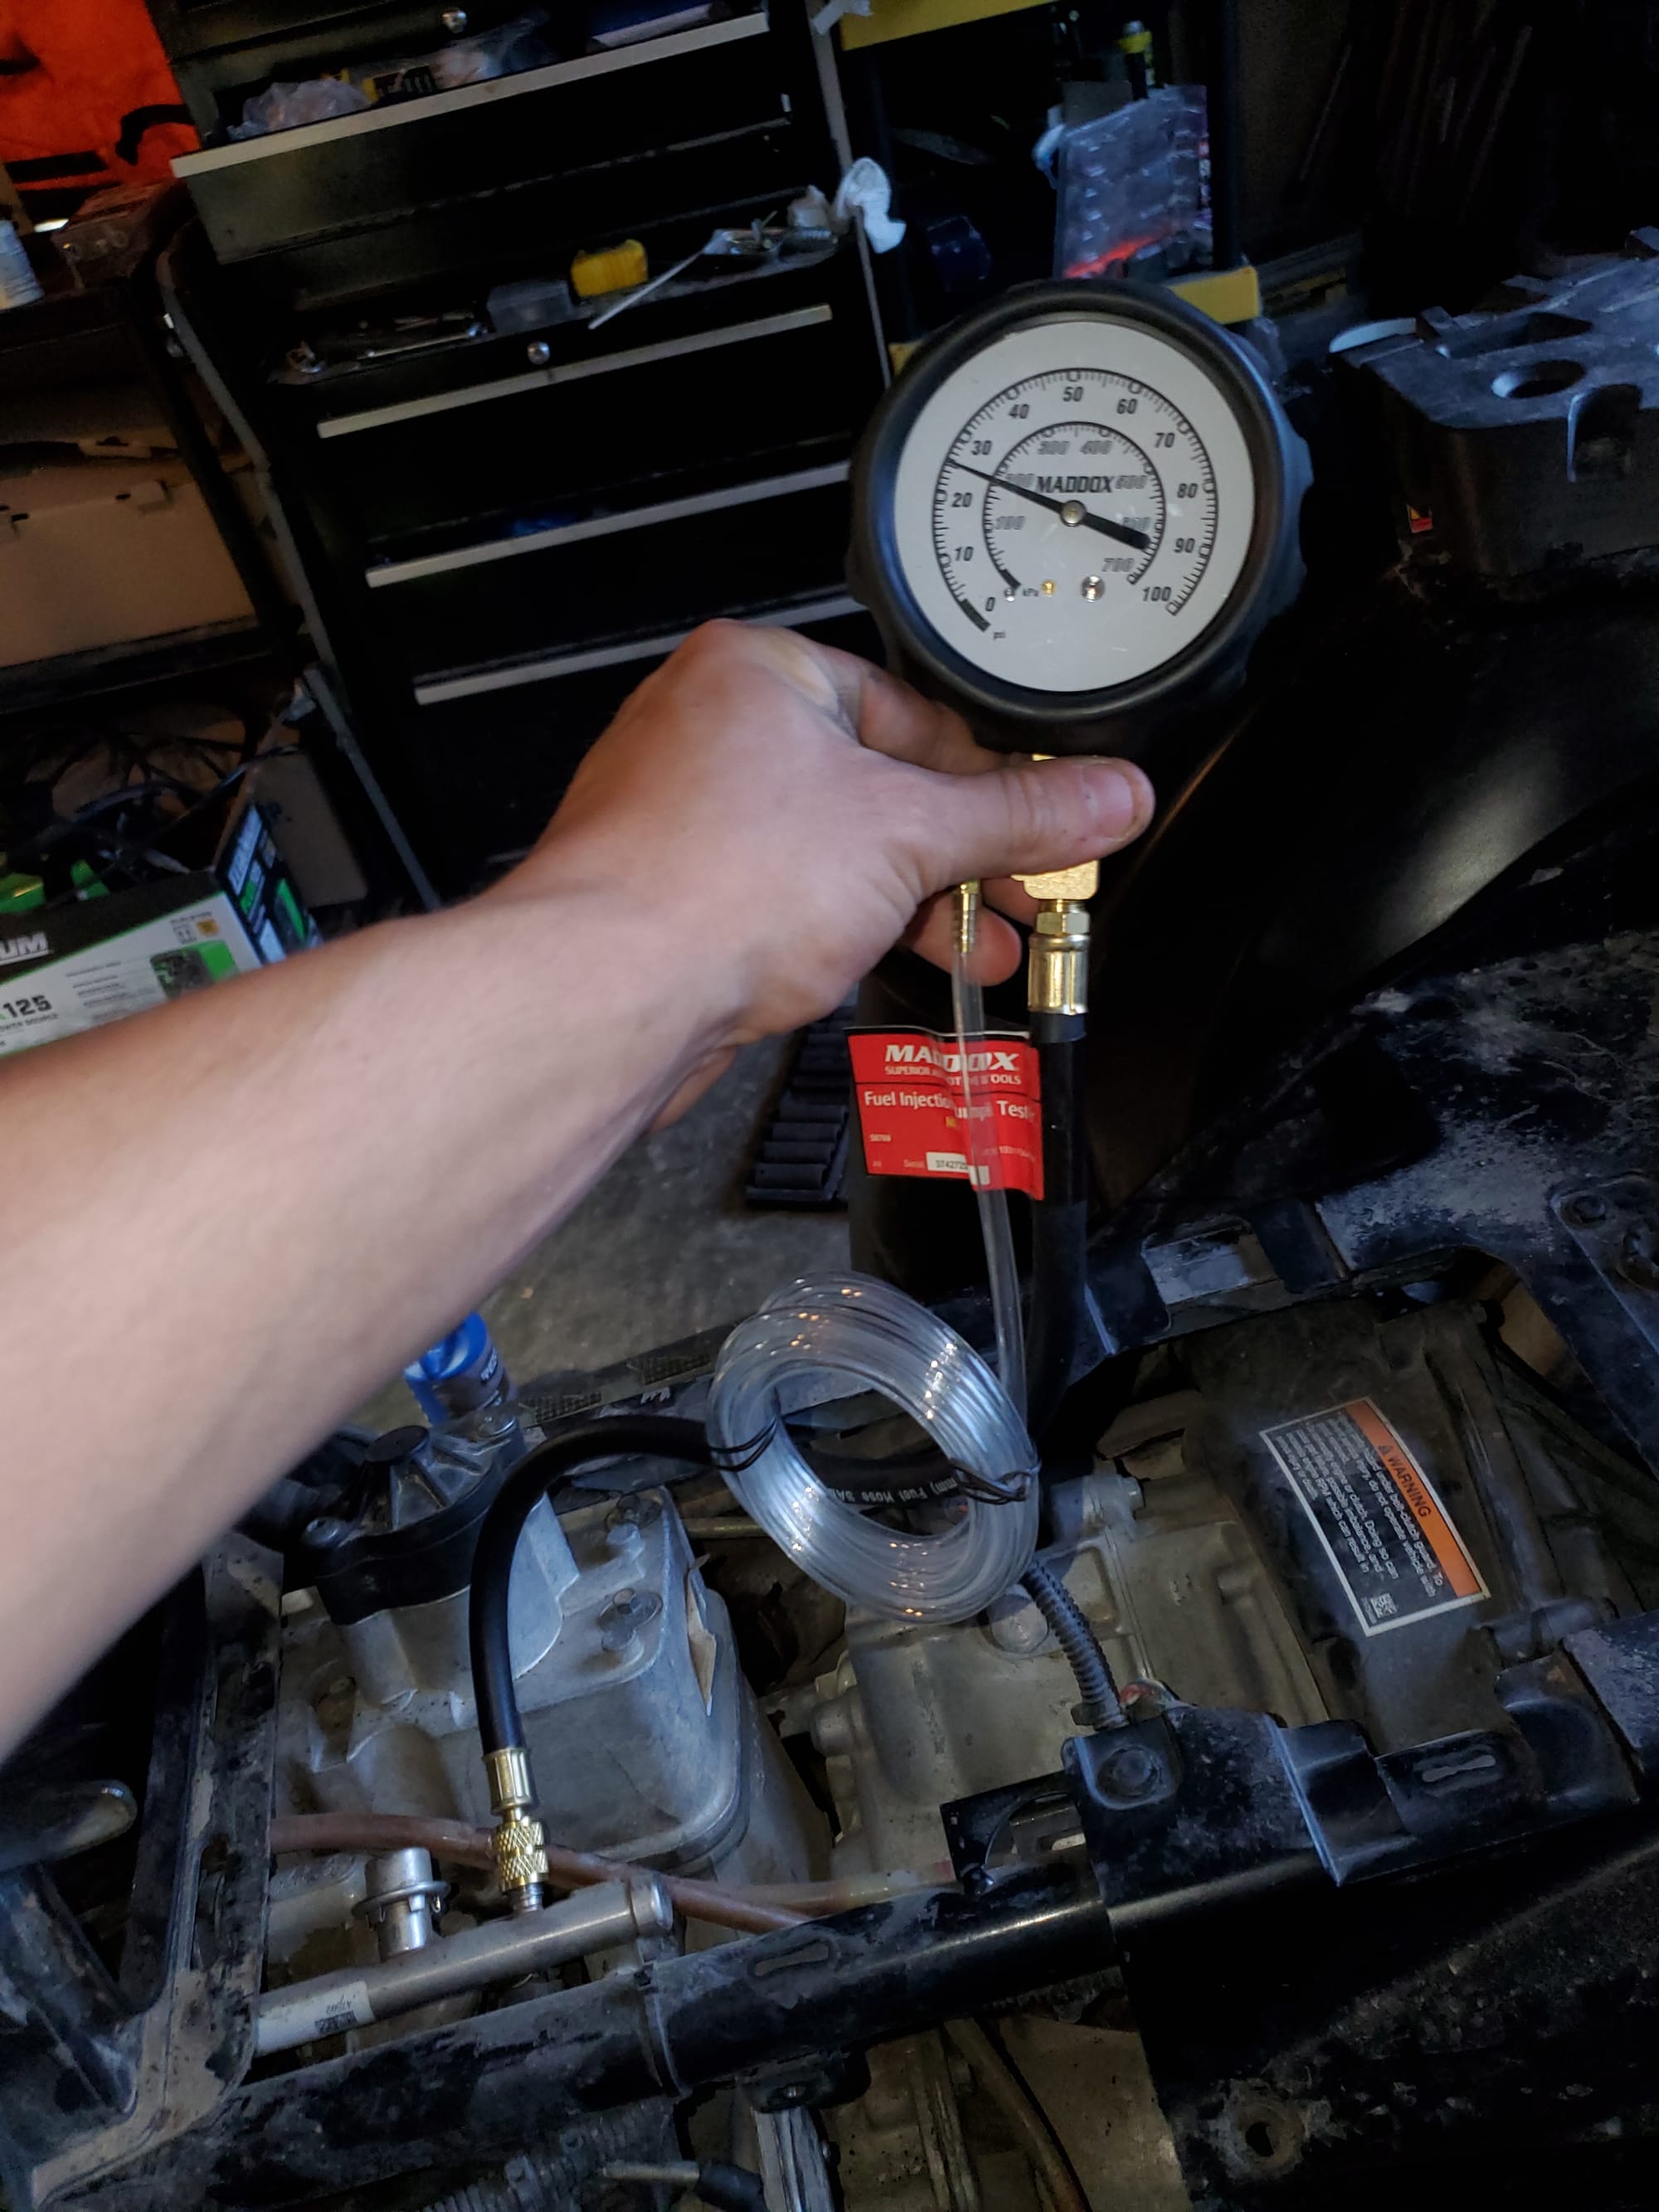
Next was the elephant in the room - the rough idle. Per the Polaris service manual, the 850 should idle at 1200RPMs +- 50. Ours was idling at around 900 and fluctuating +-100. I started by swapping the spark plugs. The olds ones were fouled and looked like it had been running really rich (plugs black and smelled like fuel). New NGK plugs made no change. I fired it up and connected a fuel pressure tester to the shraeder valve on the fuel rail - it read mid to high 20s and was stable, which I read is fine.
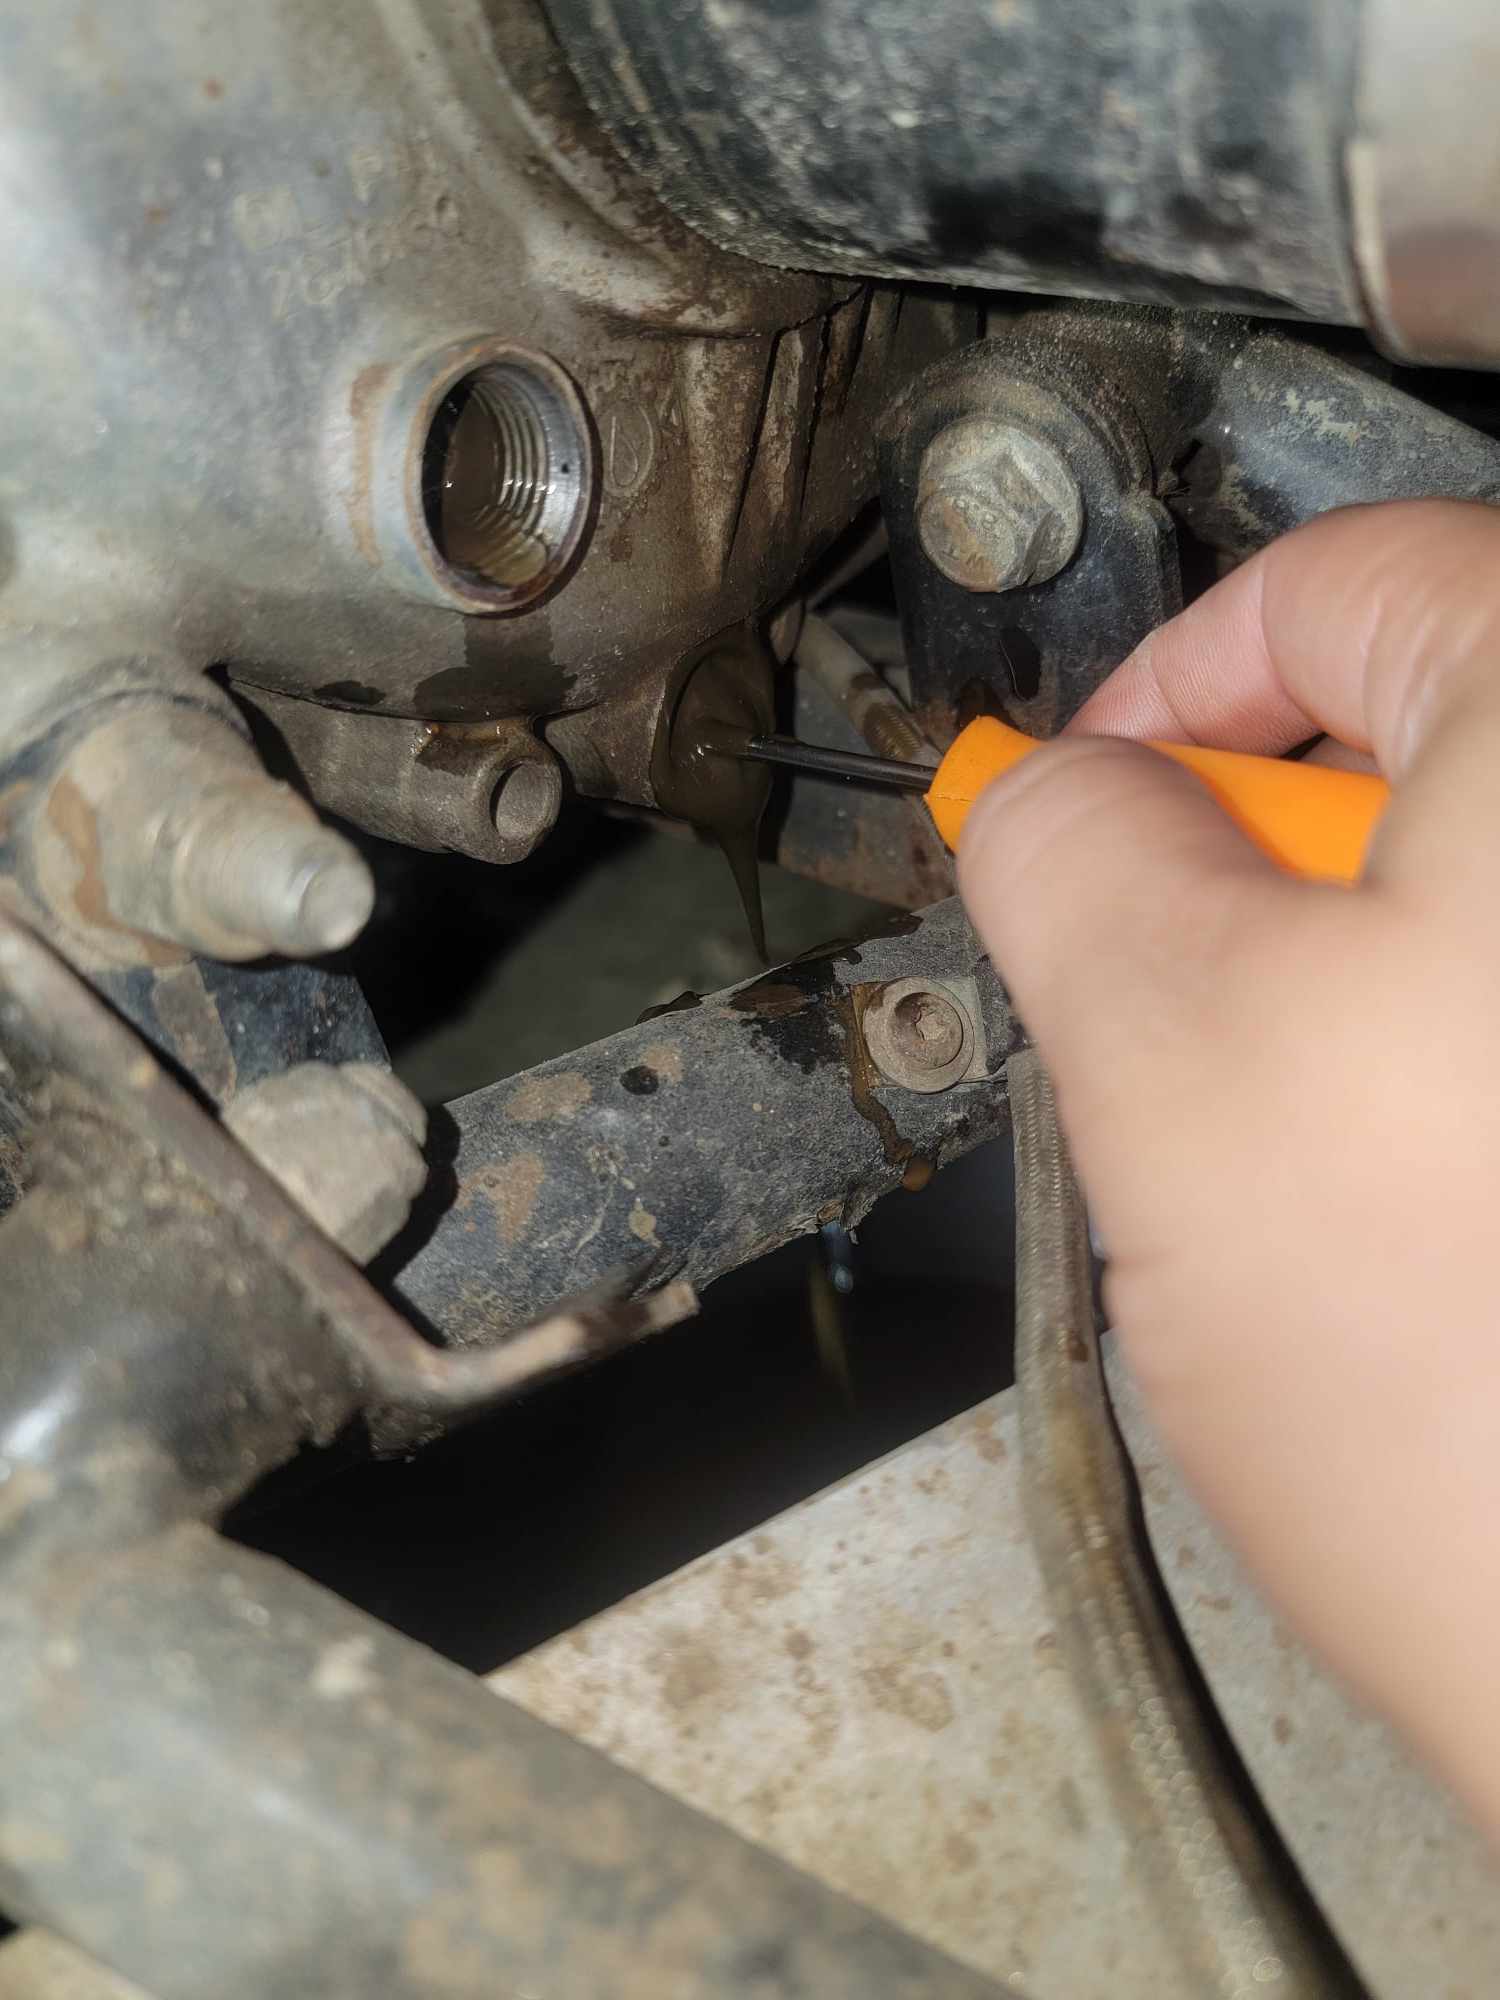
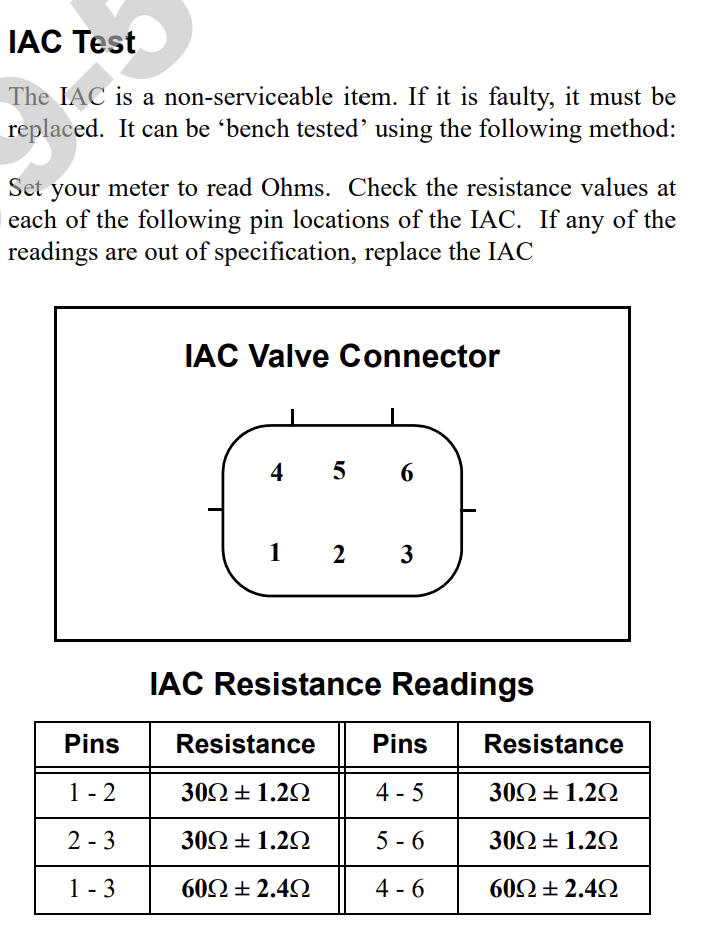
I removed and cleaned the throttle body (it wasn't very dirty). I noticed the engine ran much better with the idle air controller disconnected - it seemed to be stuck shut. I removed it, disassembled it, and lubricated it and then checked and watched the solenoid move while starting and stopping the ATV. I also checked resistance across pins per the service manual - all checked out good. Thinking this could be the low idle culprit, I reinstalled it only for the idle to go low and erratic again.
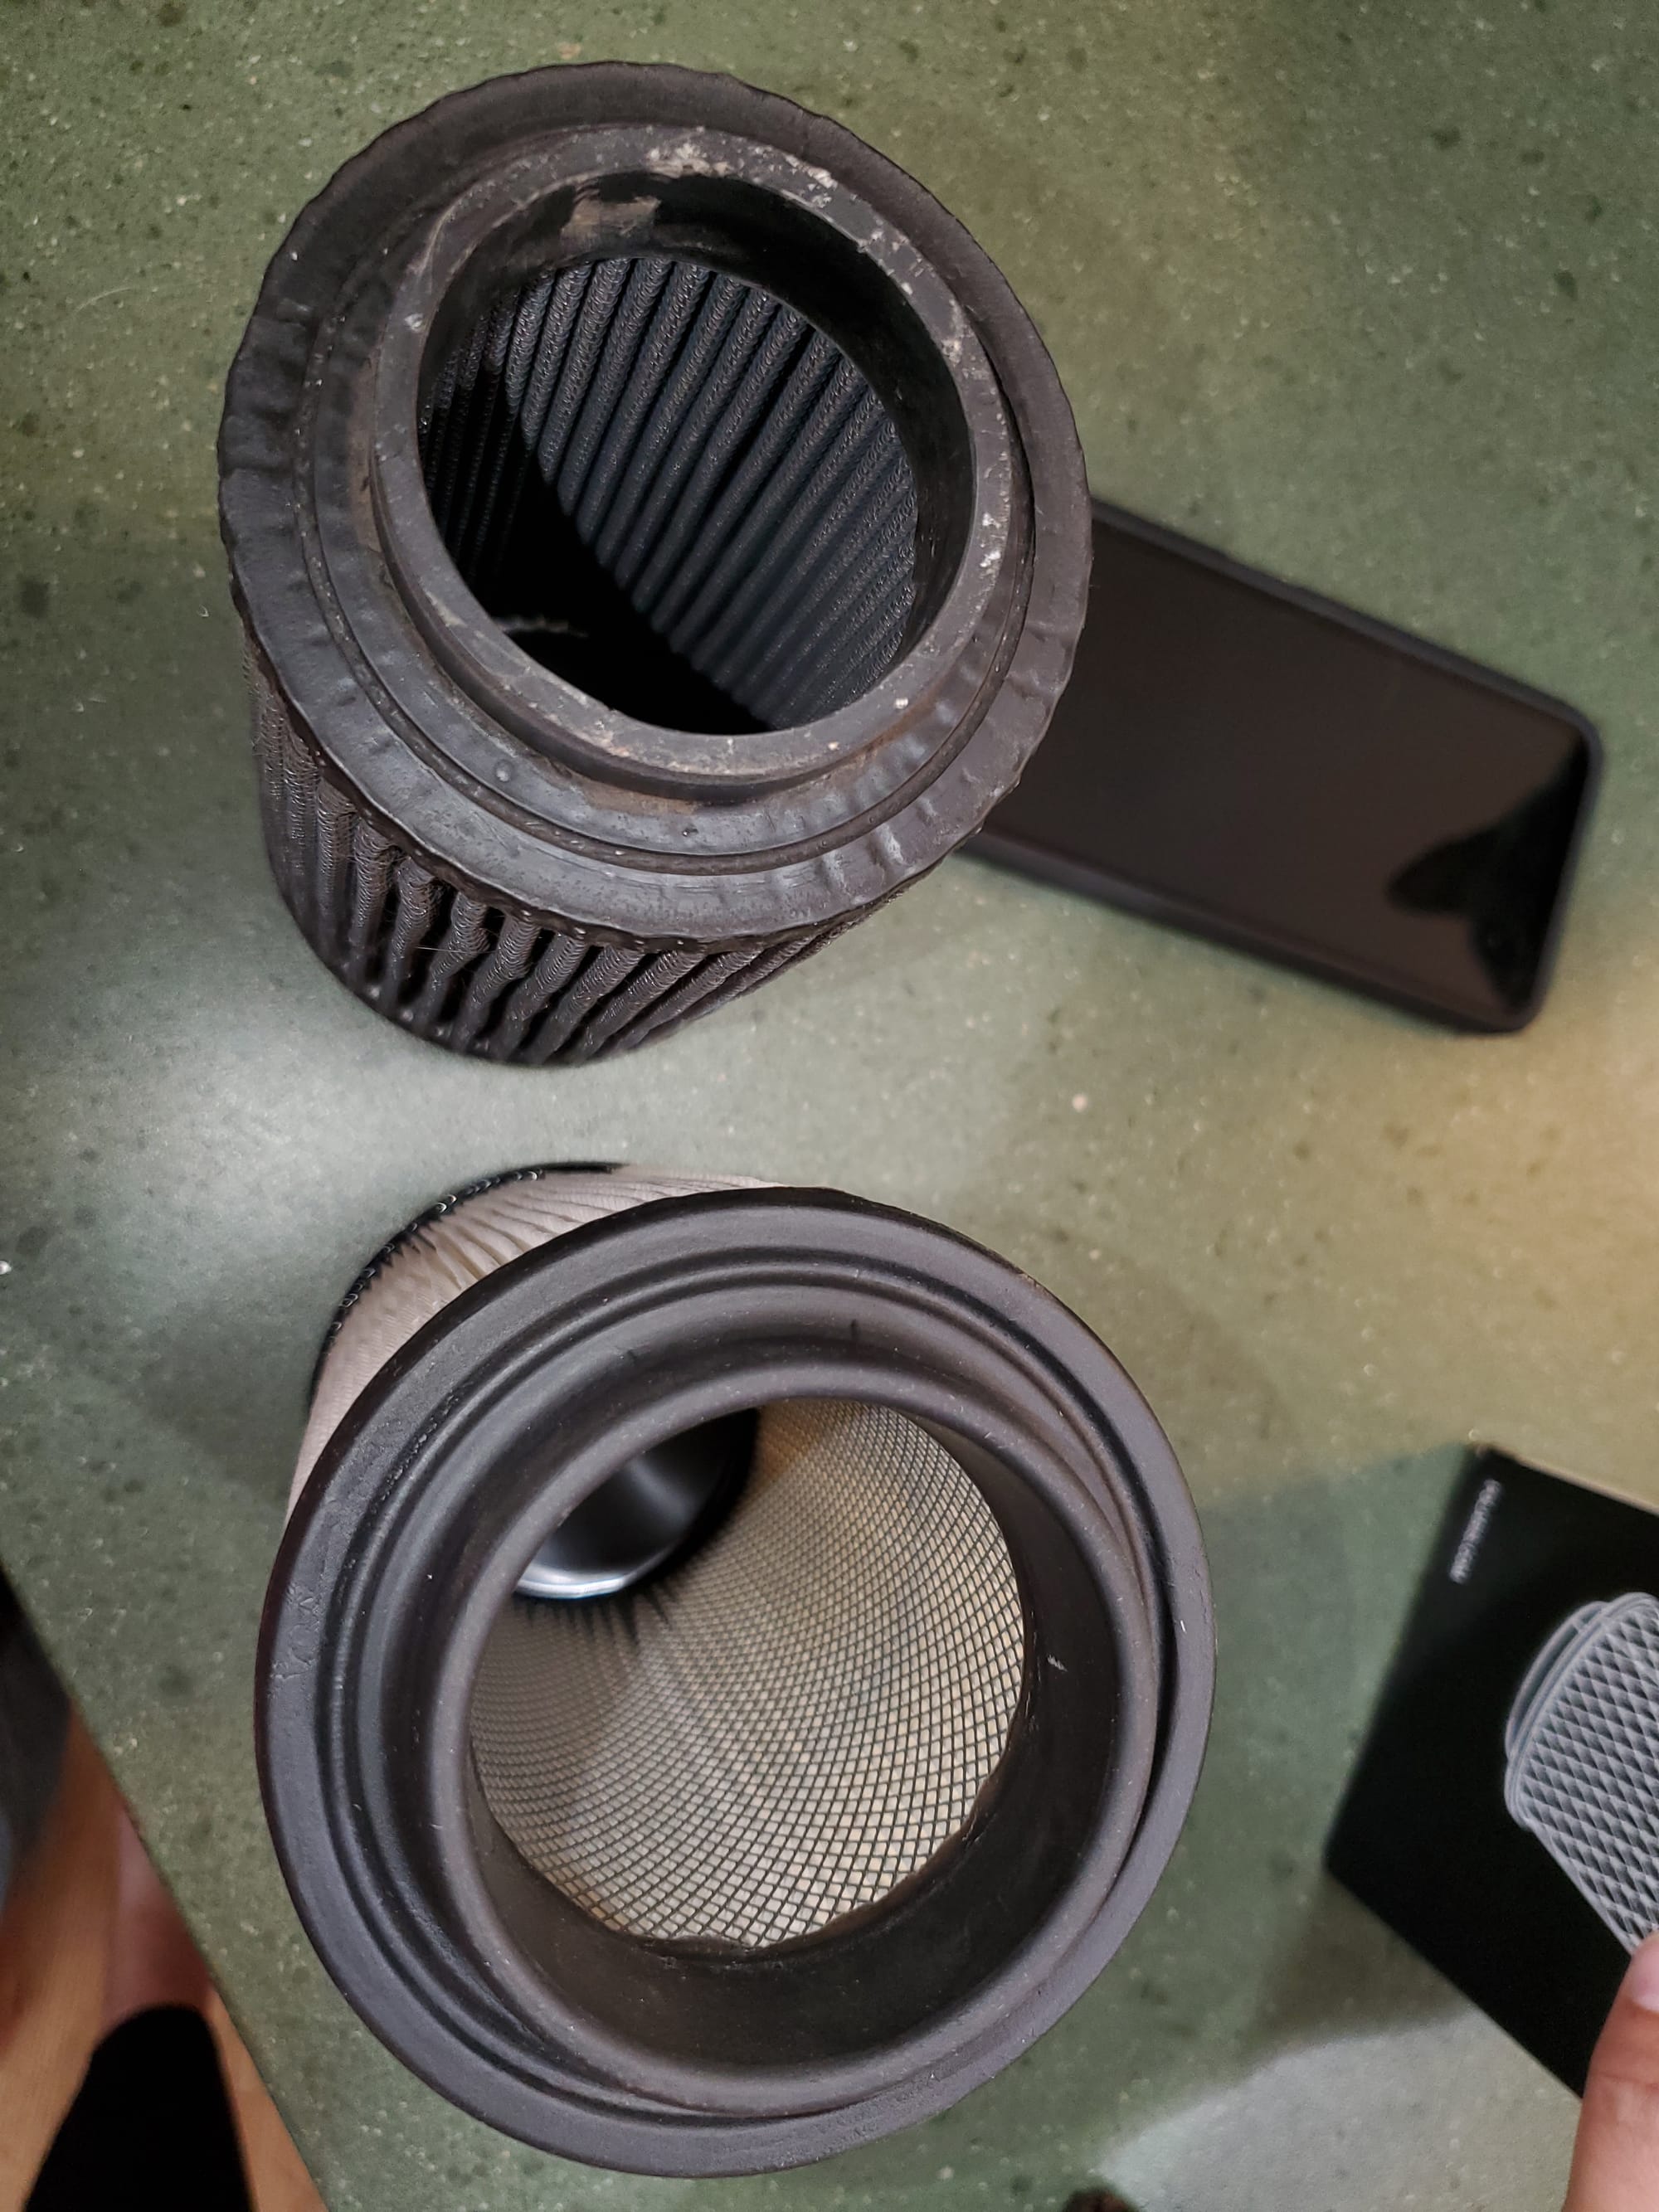
The first signs of major issues came when we popped the airbox and the aftermarket KN filter all but fell out. It seemed like the end that should form a tight fit on the air intake was too small - there was a significant gap. I saw dirt and dust all down the air intake tube. I dropped by a local dealer and picked up the OEM filter - sure enough, it had a much larger rubber seal area on the end. I was immediately concerned about engine health, seeing as it had been sucking effectively unfiltered air/mud/dirt for who knows how long.
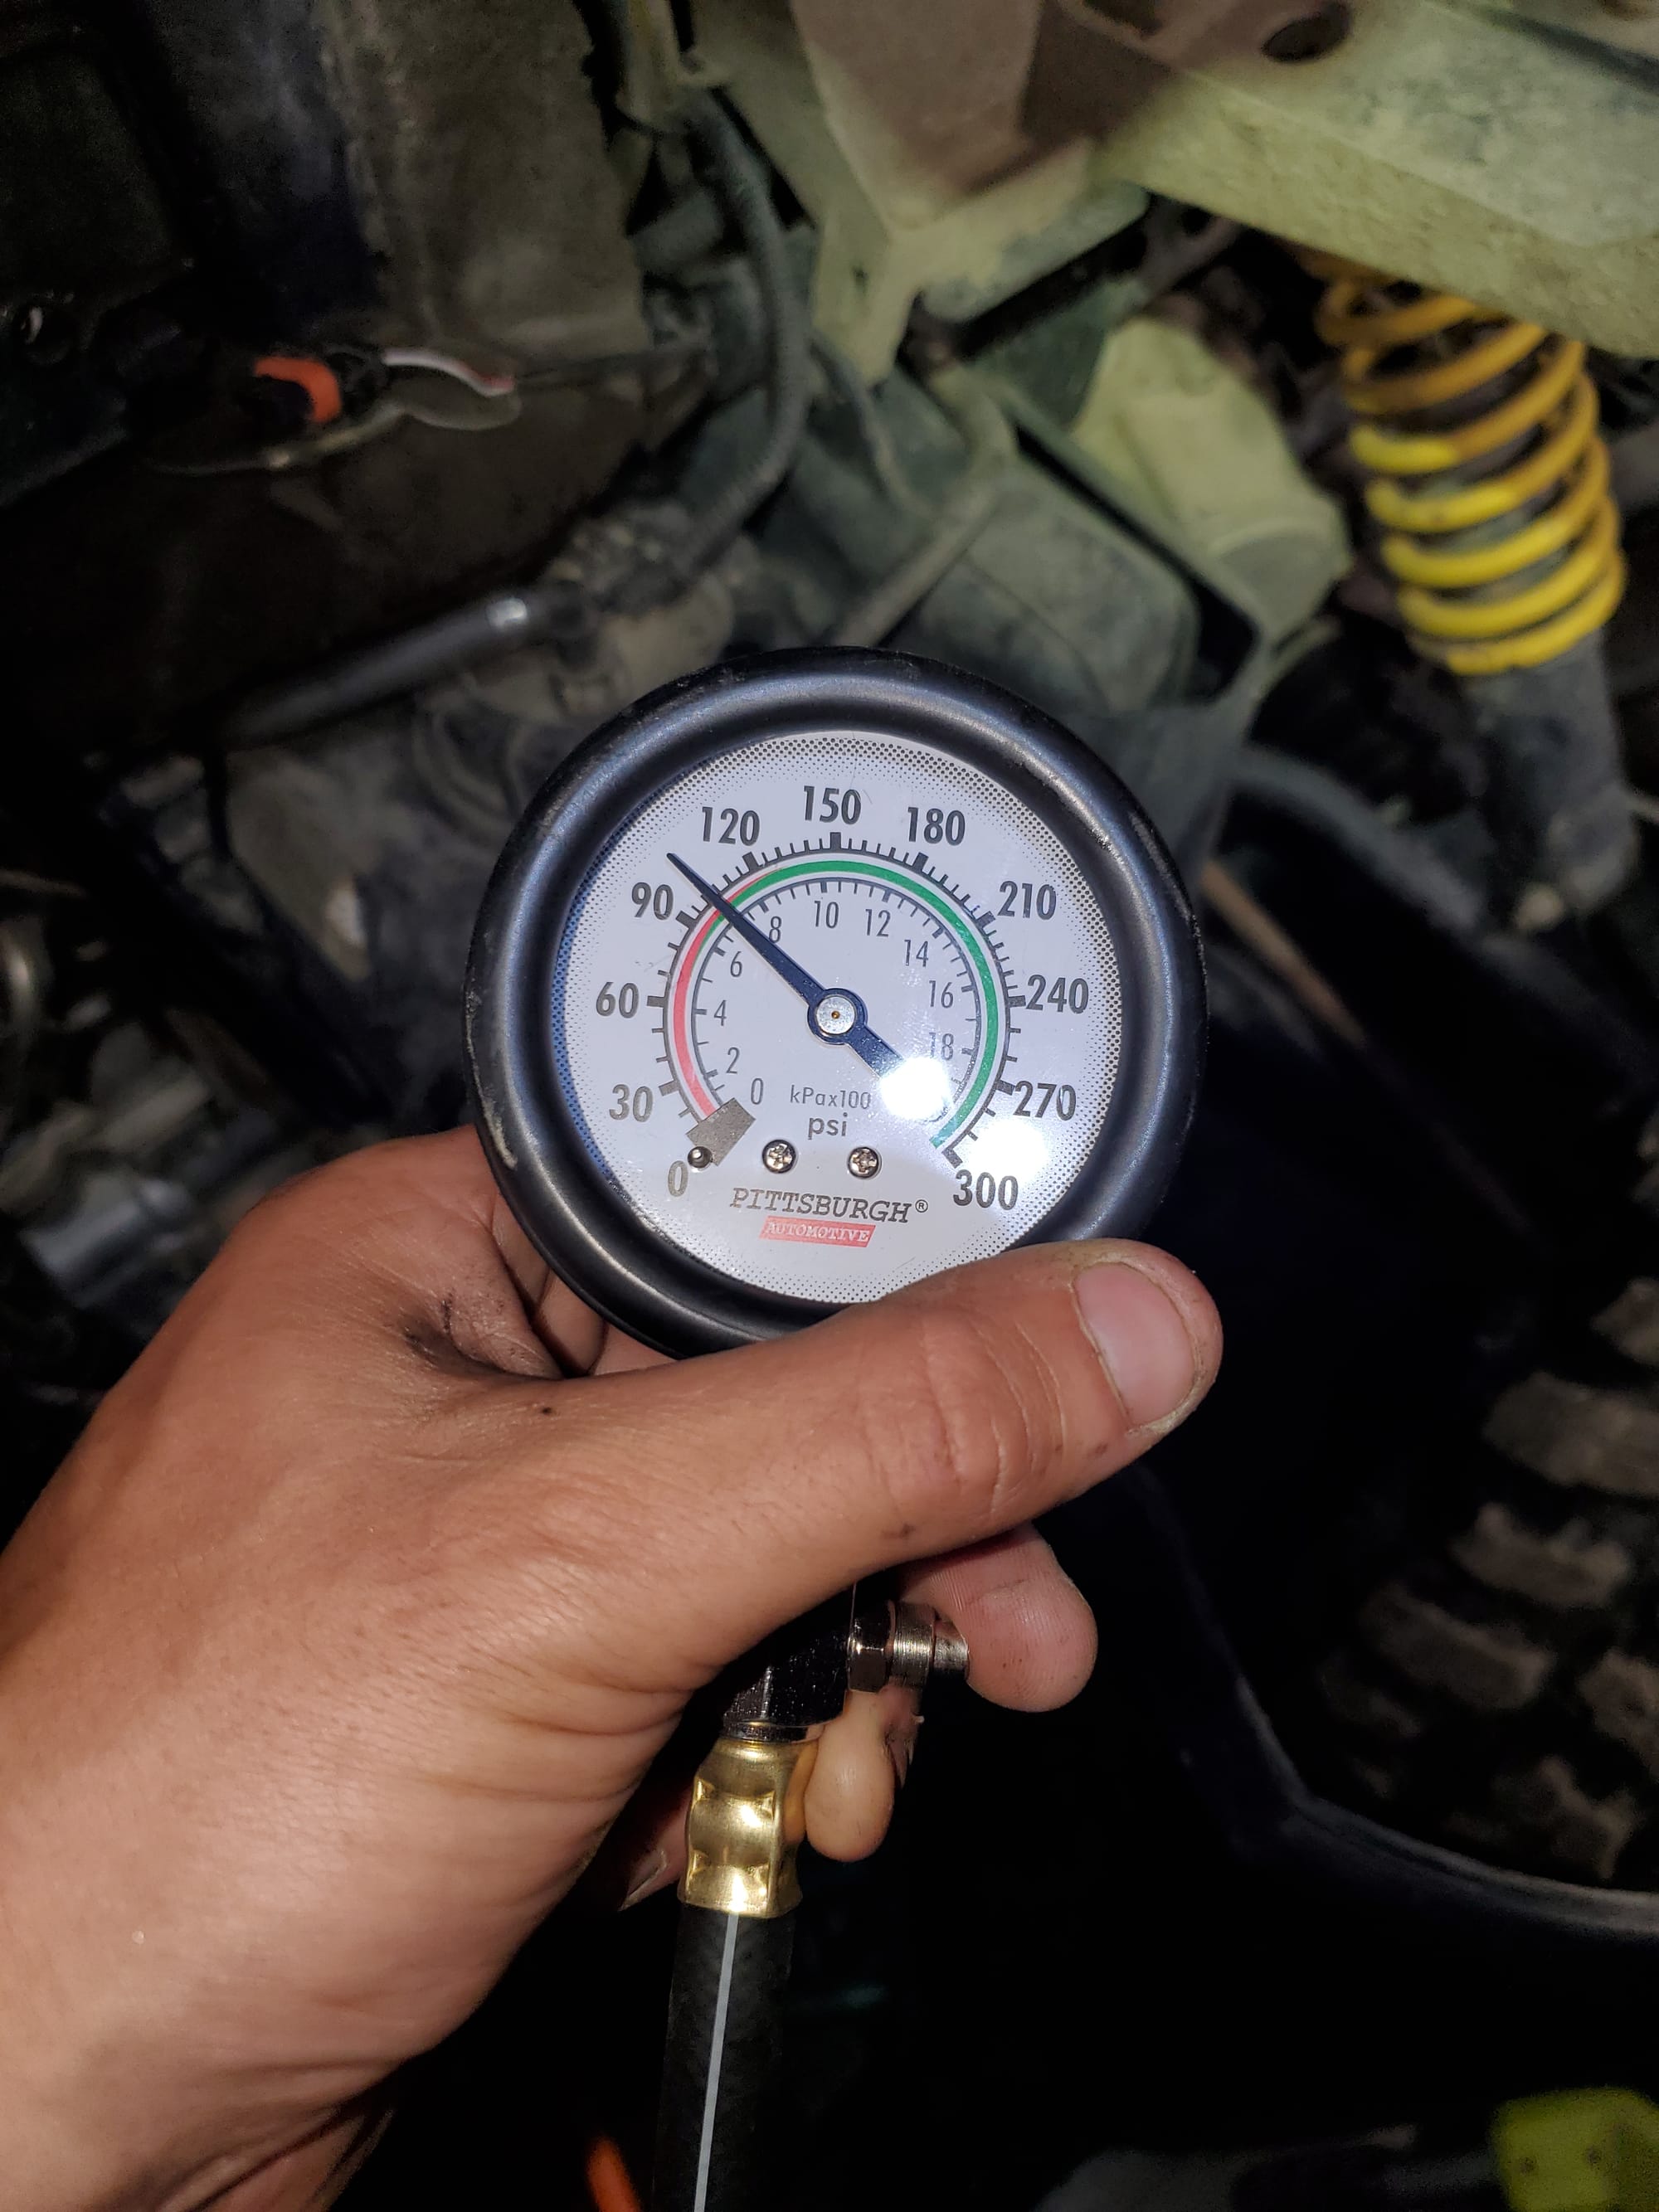
With engine health now in major question, the next logical step was to do a compression test. I snagged a harbor freight tester, disconnected the spark plugs wires, pulled the plugs, screwed the tester in, and turned the engine over 6 or 7 times (making sure I had a charged battery). Both cylinders were even, but abysmal. Spec for a new 850 motor is 200+ psi, and ours read about 100psi. I couldn't believe it ran at all!
In between all this testing, I did some digging online. Between 2009 and 2013, Polaris used a pressed on timing gear on the end of the crankshaft. I found numerous threads about these timing gears spinning the crank, causing timing to be way off and potentially resulting in poor performance/engine damage. In 2014, Polaris switched to a keyway in the gear/shaft but then returned to a pressed on style with some sort of adhesive in 2015+ models. Fearing the worst, I popped the valve cover and turned the engine over by hand until the timing marks on the timing gear and crankshaft were visible. Sure enough, the timing gear had slipped from its factory position.

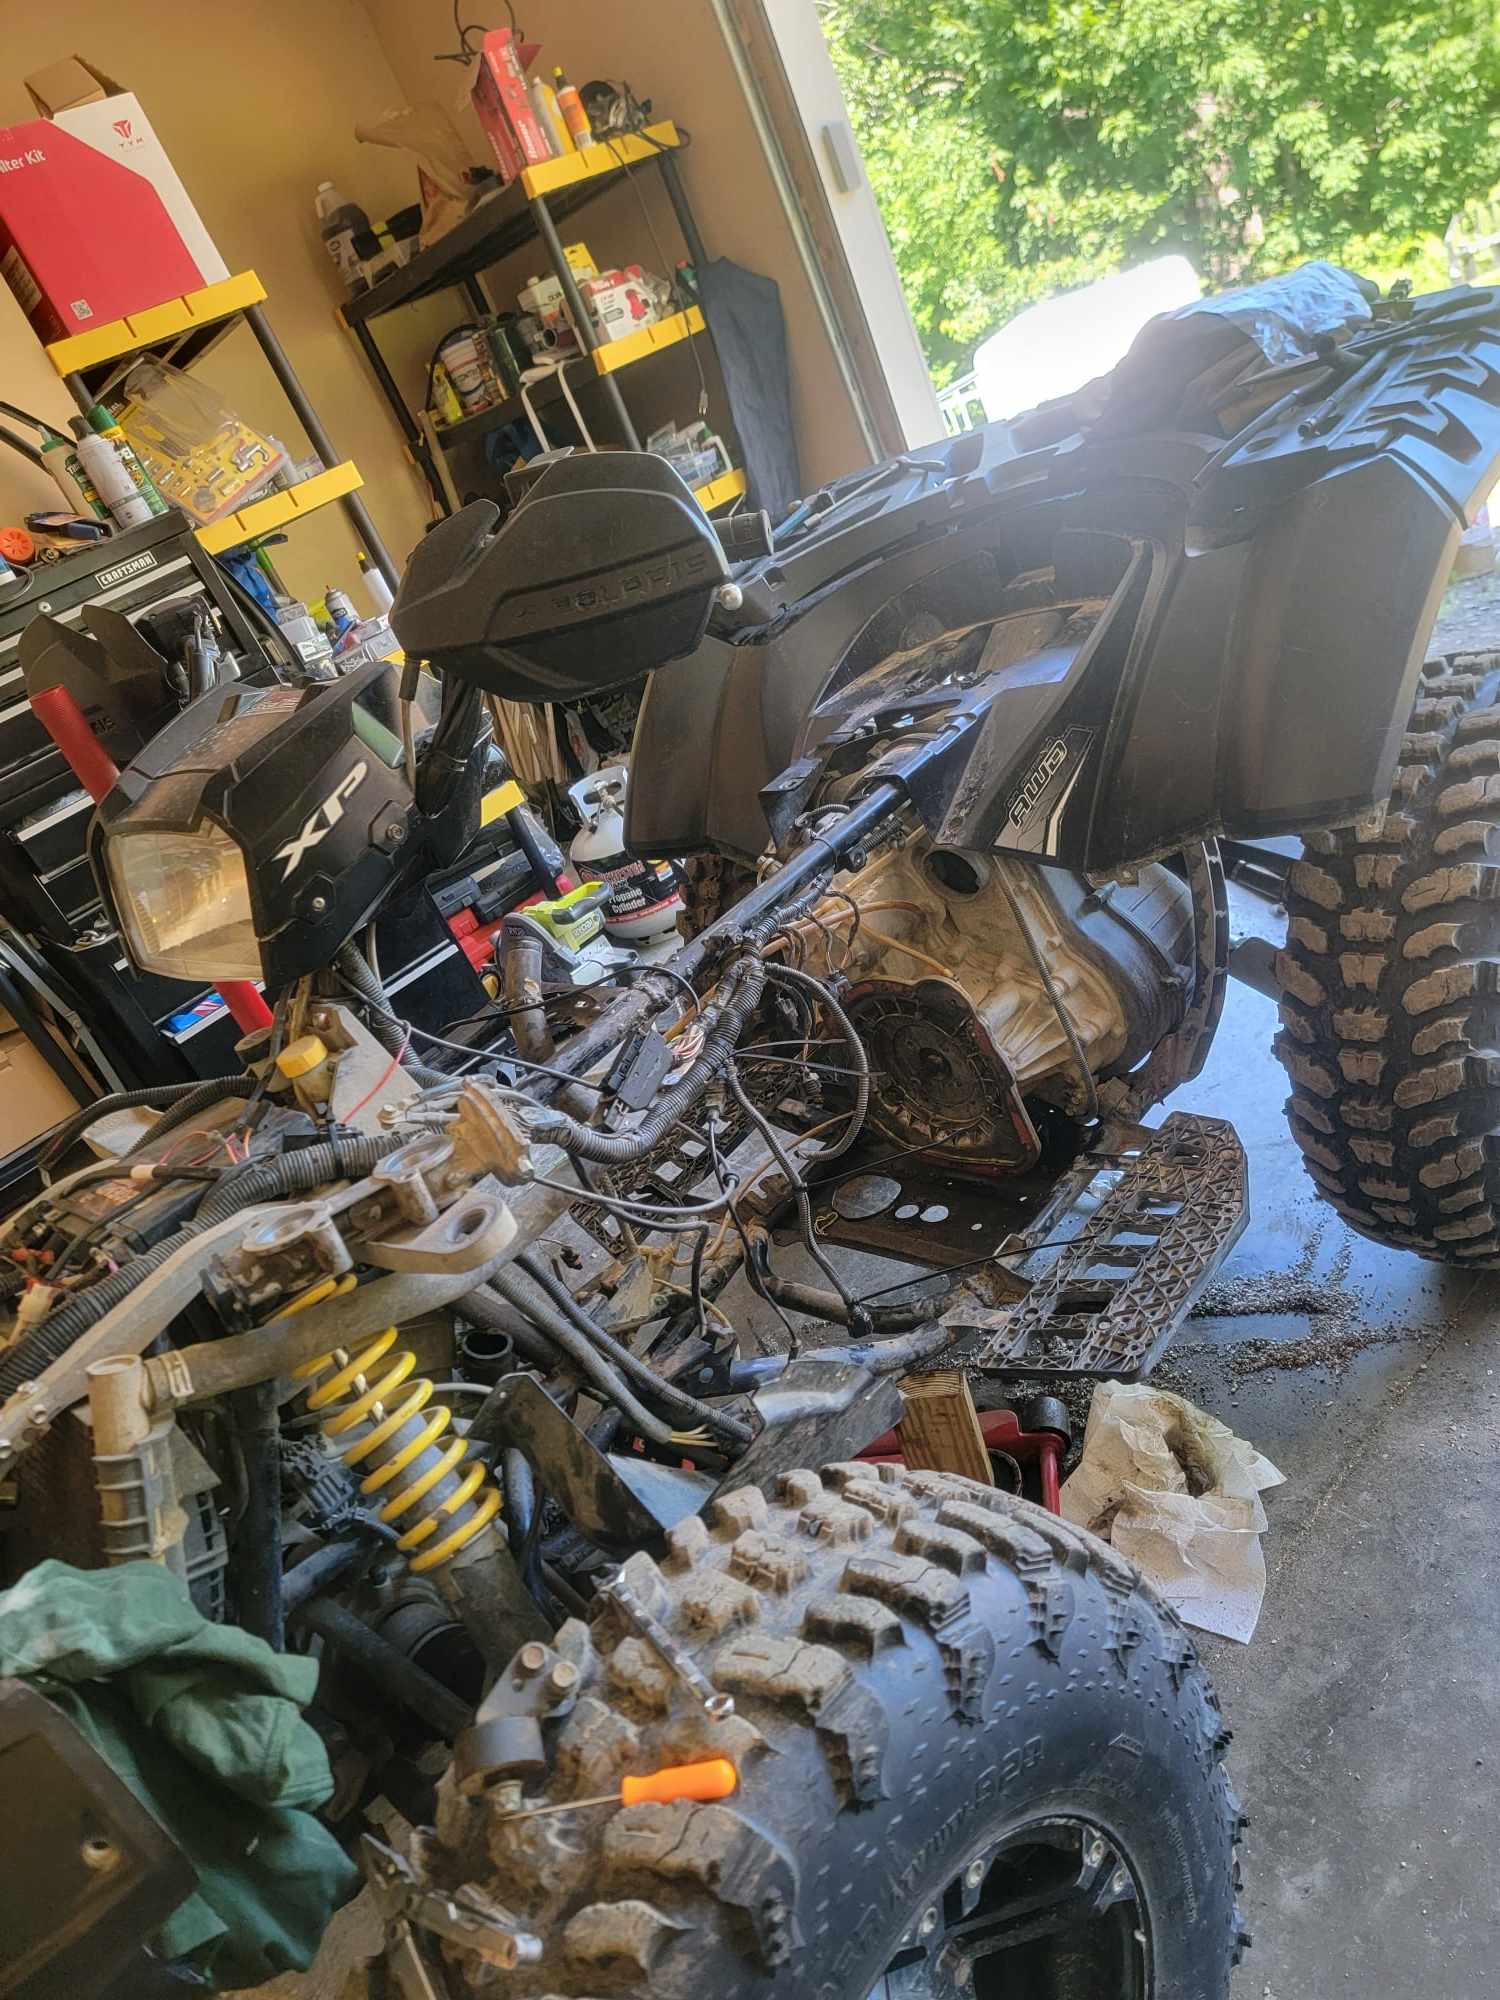
Dejected, but not defeated, Brittany and I began tearing the engine down to evaluate its' ails. As luck would have it, Partzilla had an entire 5 part series on disssasembly and total engine rebuild for exactly our model year 850. We followed part 1 to a tee. A few hours later, we had the engine pulled.
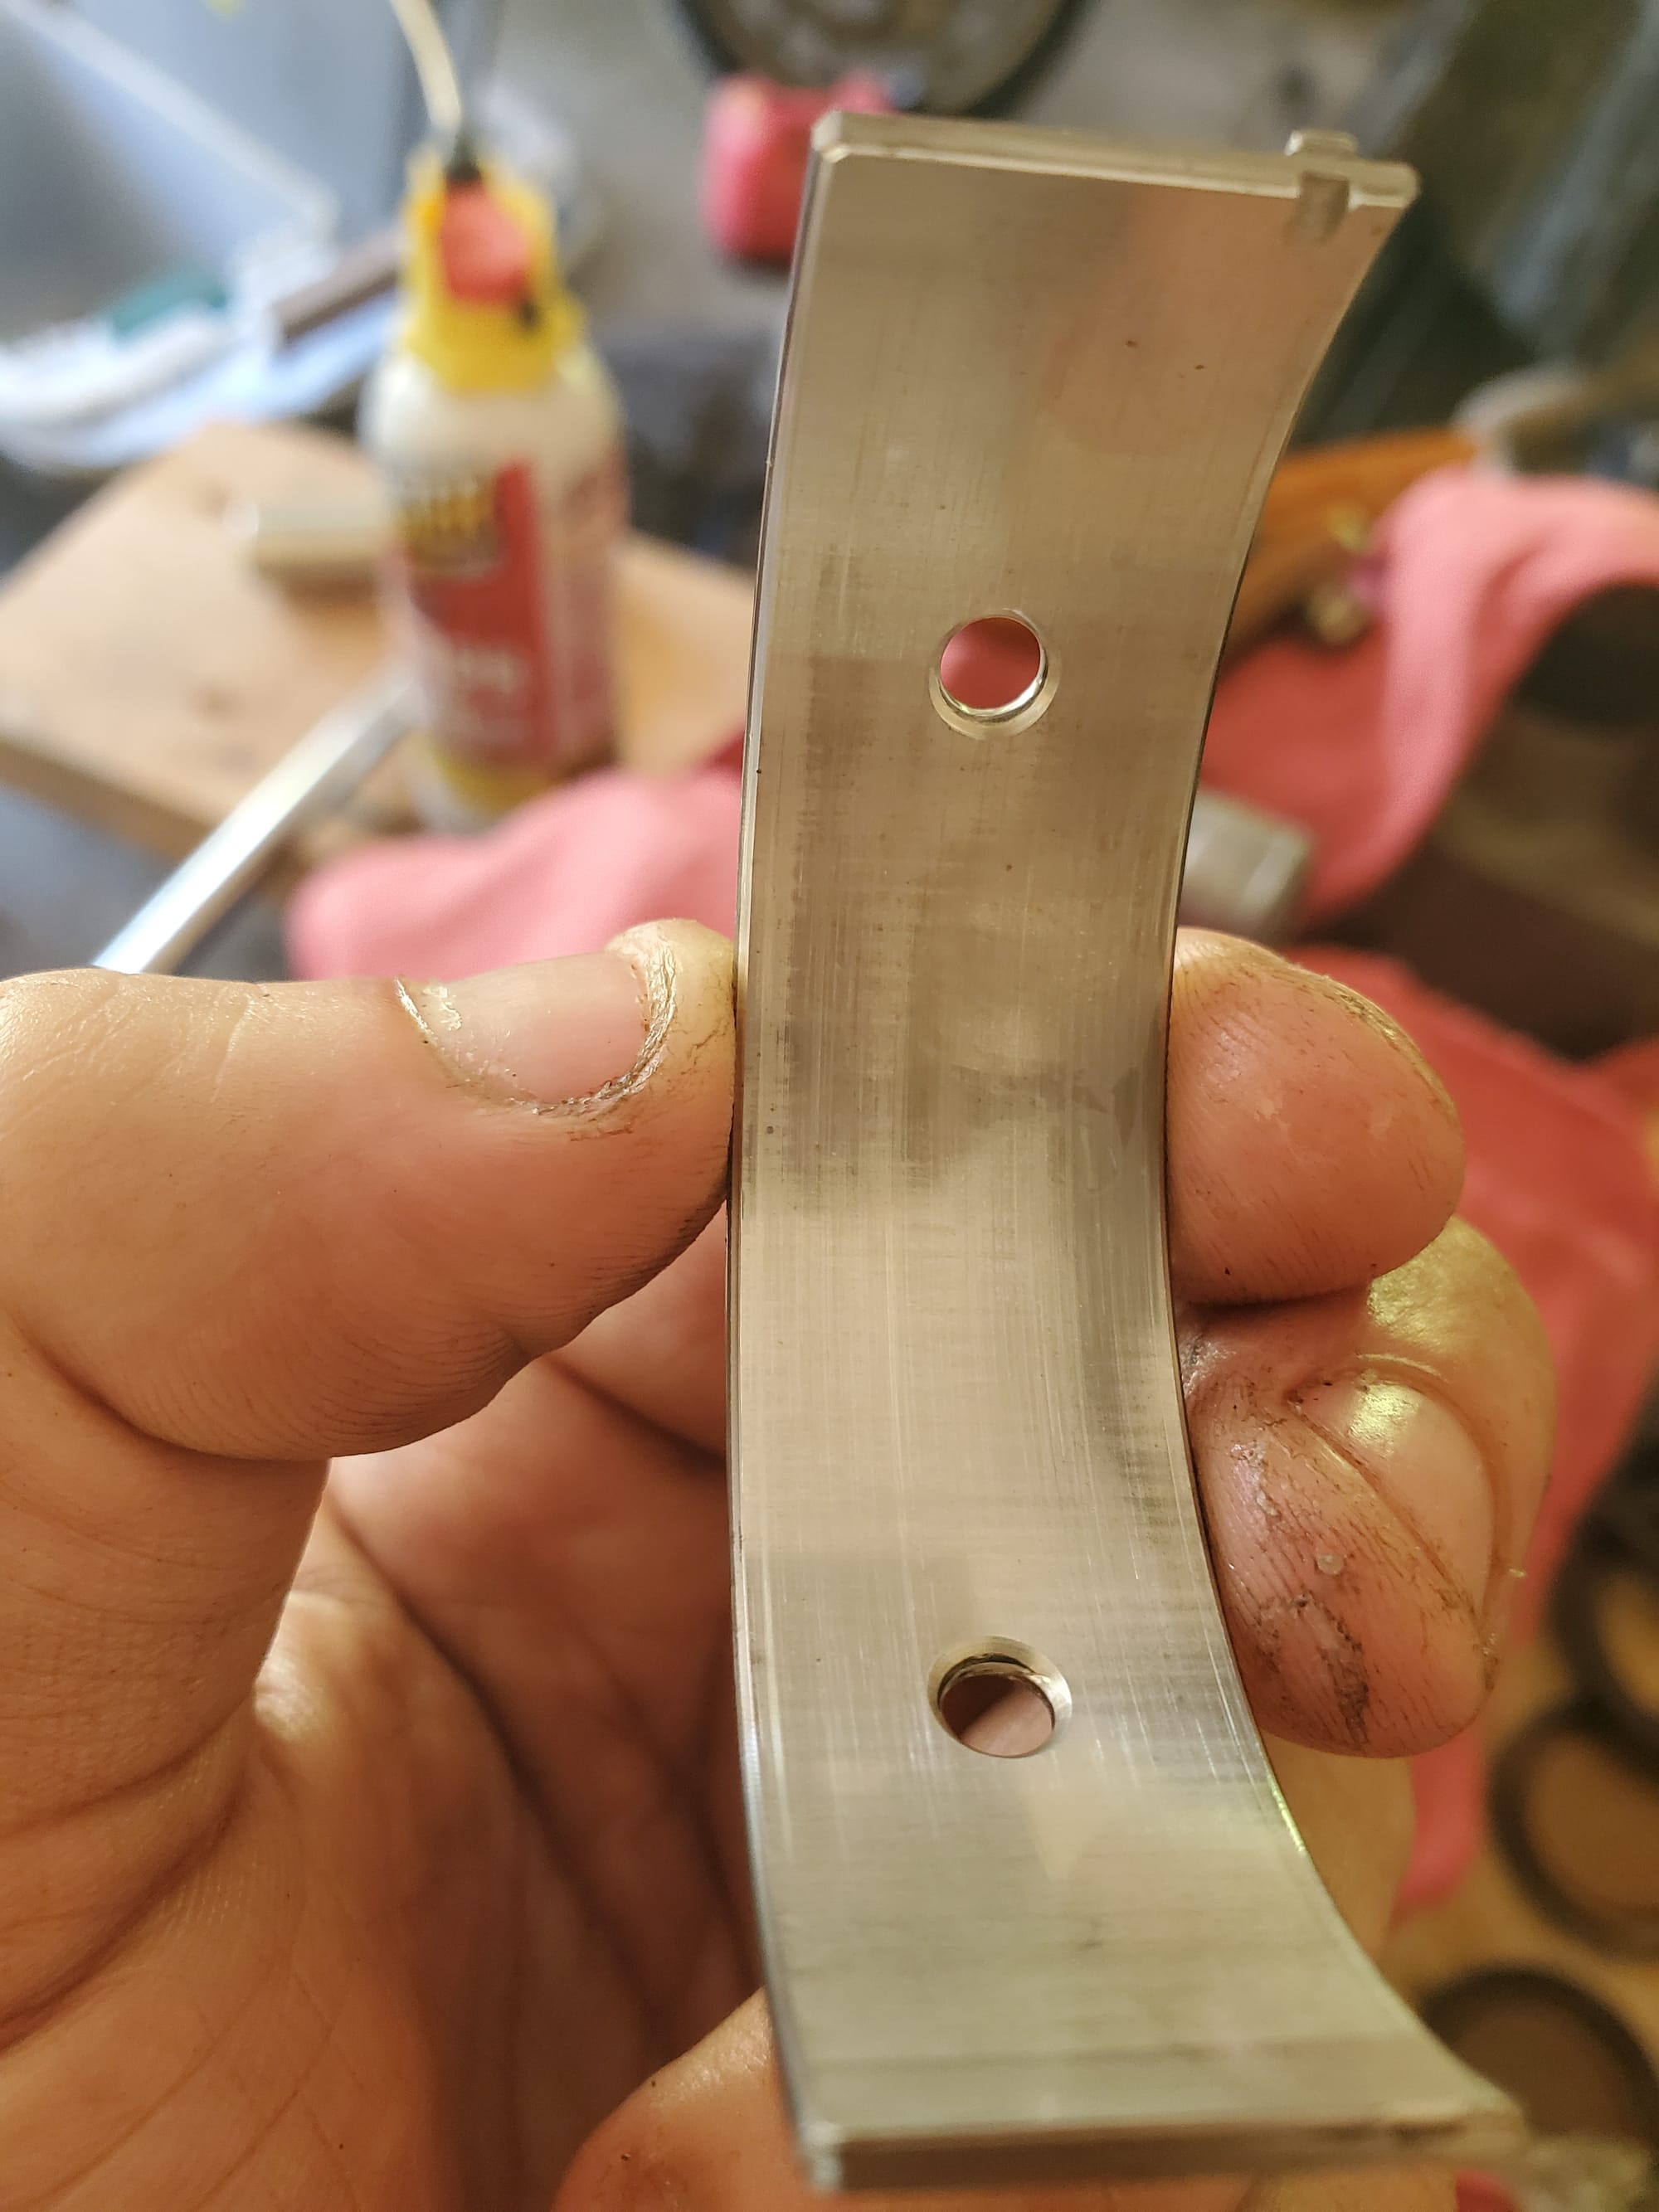
With the engine out, we began following part 2. After removing the head, damage was immediately apparent - thanks to the incorrect timing, the valves had hit the pistons. From the top, the cylinder bore looked good (could still see factory cross hatching, no gouging, and both piston bores measured perfectly round with a micrometer). I started shopping for parts - per the partzilla guide, I ordered a valve spring compressor and a top end rebuild kit from Rev6 - this included new pistons, valves, rings, wrist pins, valve guides and gaskets. I also ordered a piston ring compressor and a cylinder honing tool for installation later. For good measure, I also ordered a new timing chain and new head bolts (appear to be one time use stretch bolts).

On to part 3! I had to order a handful of specialty tools to continue disassembly - a left hand thread flywheel puller and a universal pulley holder in place of the recommended polaris holder that seemed impossible to find. I skipped the water pump pulley removal tool recommended in the partzilla guide and instead removed it by tapping lightly with a hammer and punch. After the case was split, I removed the connecting rods and pushed the pistons out. The bore looked good from the bottom too. Per the Partzilla guide, the connecting rod bolts are one time use stretch bolts and absurdly priced at $35 each (you need 4 of them!!) - I found and ordered these hotshot alternatives after some digging for about half the price of the OEM bolts.
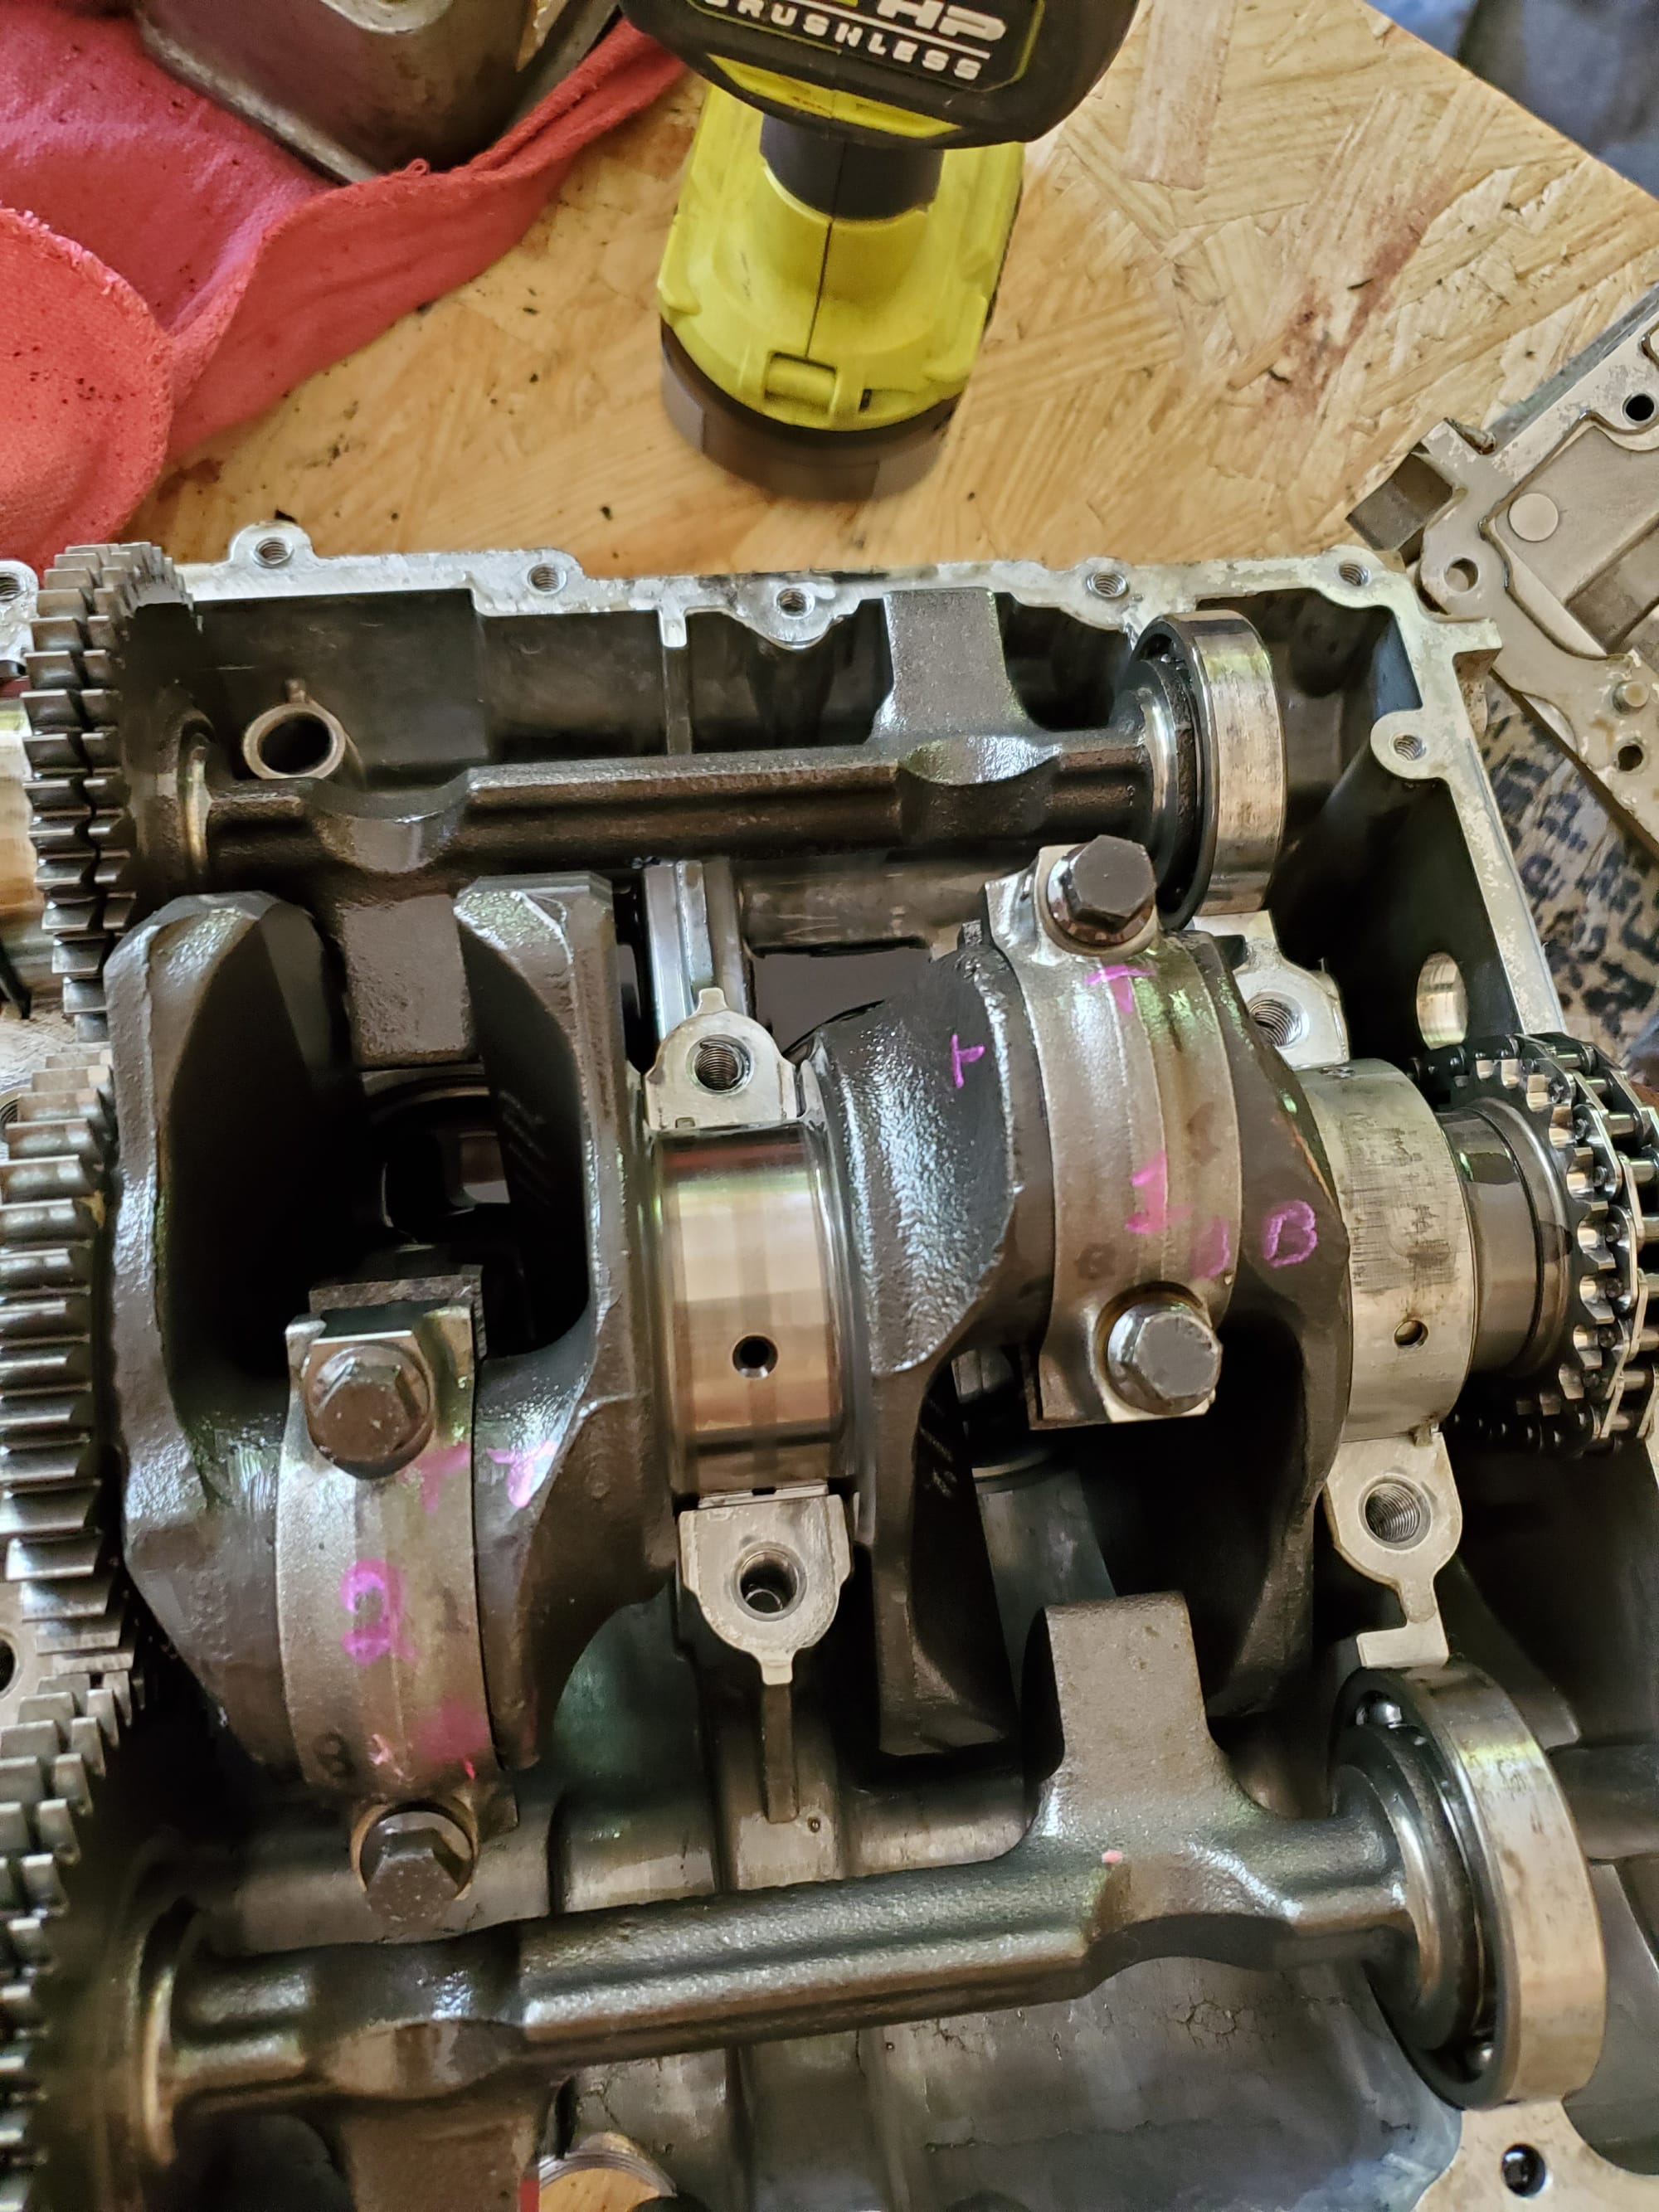
The crank itself looked to be in good condition and the crank bearings all looked re-usable (smooth to the touch, no gouging). I marked their orientation carefully with a paint pen and removed them.
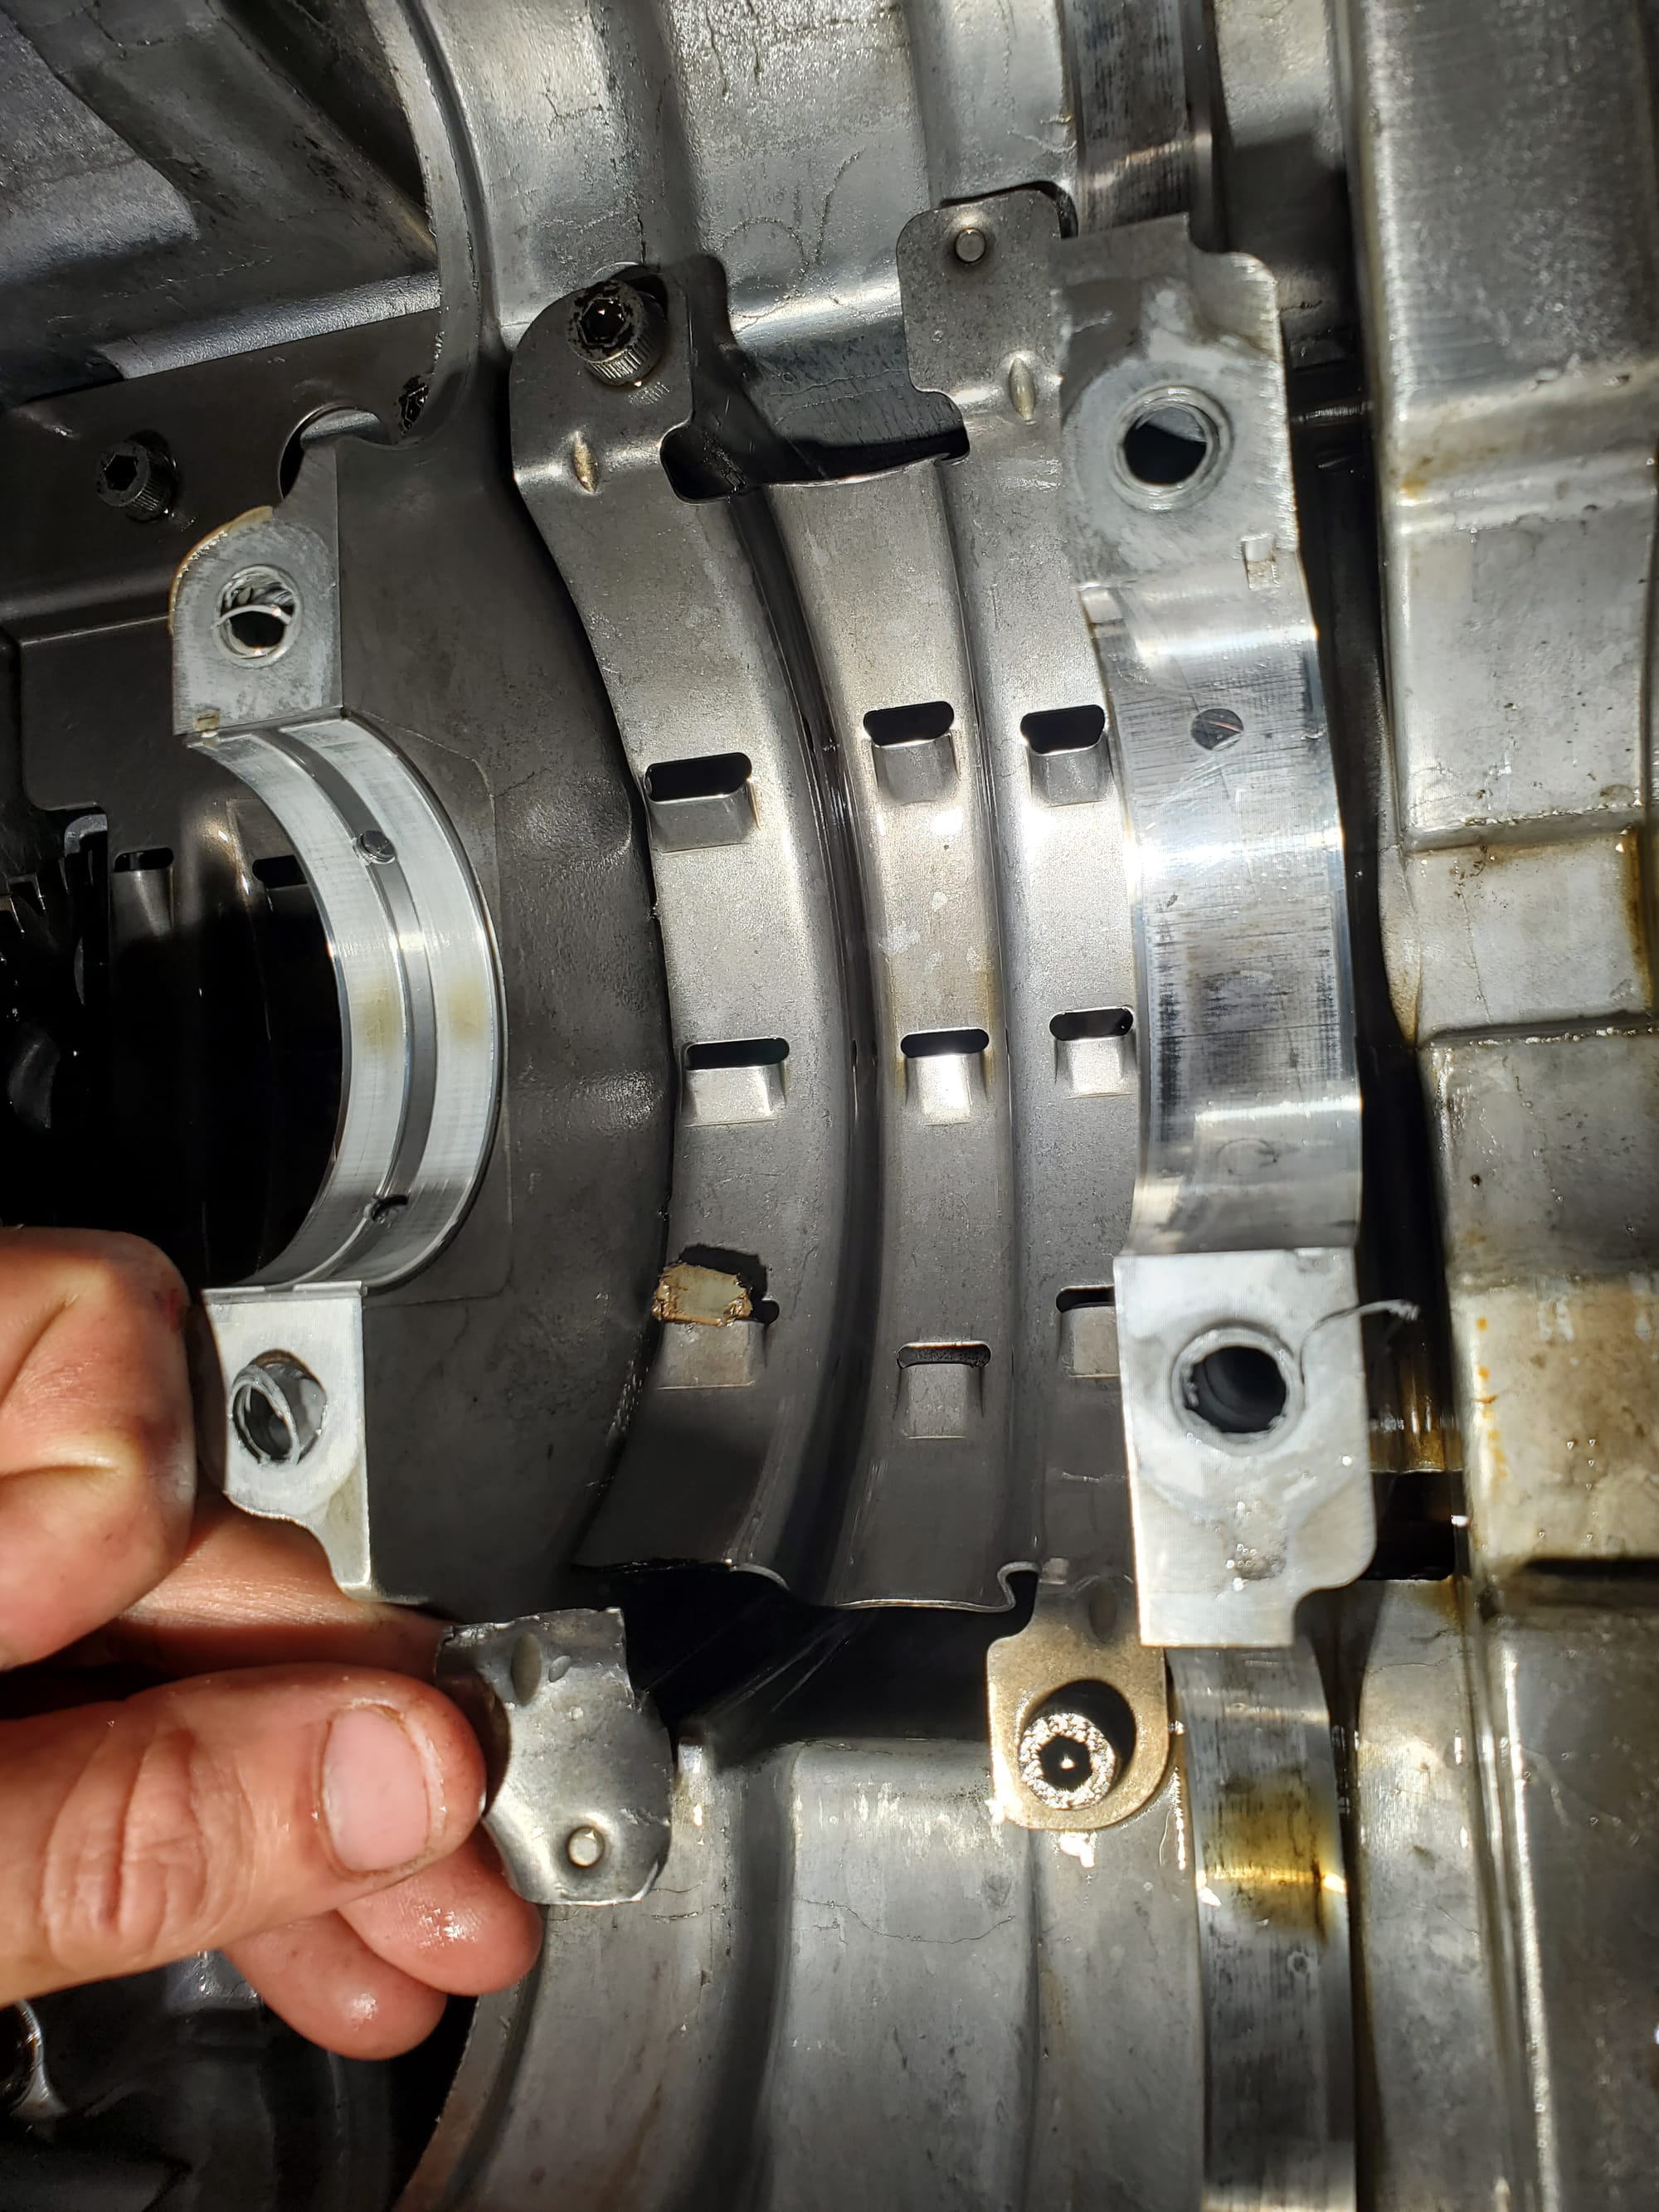
I marked each counterbalance shaft and noted its orientation with respect to the crankshaft - there are pairs of dots that line up as shown in the picture below. I lifted and removed both counterbalance shafts and then the crankshaft.

Much to my surprise, I found a sizeable piece of metal underneath the crankshaft sitting loose in the engine. This turned out to be a piece of one of the oil baffles. I figured I could go without it but found the baffle to be cracked on the opposite side too around where the bolt holds it down, so replacement was in order. This ended up being Polaris #5250397. The broken piece wasn't chewed up and I found no shavings/other metal in the oil sump area after removing both baffles. I did find 3 plastic pieces of an old dip stick (how does that happen?) and removed them. For all that this project had gone wrong, the lack of damage as a result of these failures was a major stroke of luck.
With pieces ordered for the few remaining issues on the bottom end (seal kit from rev6 and new baffle), I moved on to resolving the timing gear position issue. I used a 3 jaw pulley puller to slightly pull the timing gear off the end of the crankshaft. I applied some flame wrench and then carefully tapped the timing gear back into place with a punch and hammer. Finally, I used a large axle nut impact socket to beat timing gear back flush with the end of the crank.
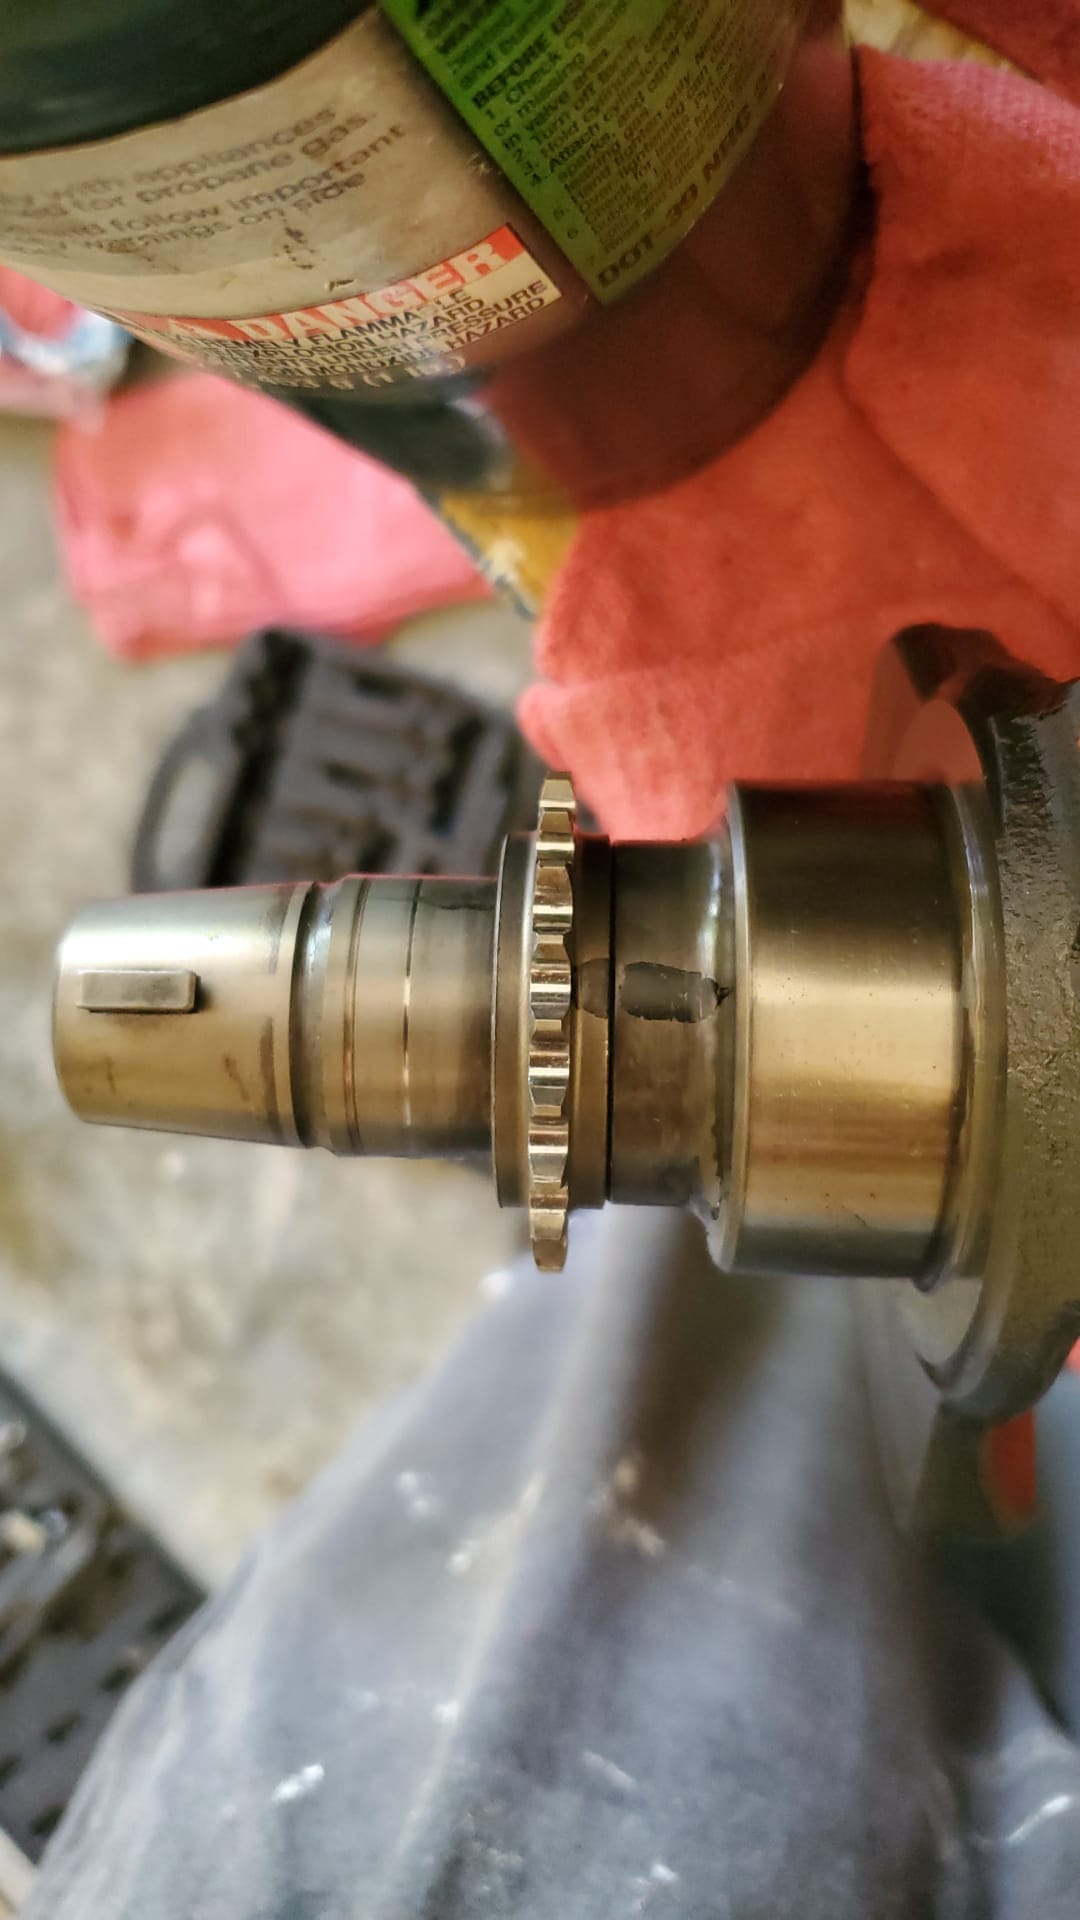
With the timing gear back in the correct orientation, I had to make sure it'd stay there. Per polaris atv forums, most people seem to fix this by tig welding the crank to the timing gear in 2 or 3 spots, ideally opposite or equidistant from each other. I had a cheap MIG welder on hand, but the repair has to be tig so as to not add or remove material, retaining as close to the original balance as possible. While we wait for the last few parts to arrive, we'll be taking the crank to a local welding shop and having them tig it together.
Part 2 will be later this this week and include reassembly.