Camper Renovations + Beginnings of Smart Camping
Brittany and I bought a used 2013 Viking 15RB last month. We've been doing quite a bit of remote camping with family this summer and wanted a safer place to stash our dogs primarily, but sleeping off the ground and having less to pack/unpack was a huge comfort upgrade too. This model is light (easy on our F250 and easily towable with the X5 in a pinch), and at 16' it's relatively easy to drive in tight places. It features an open main living space and pop out style sleeping space. The previous owner had just had the roof resealed and the price was right.
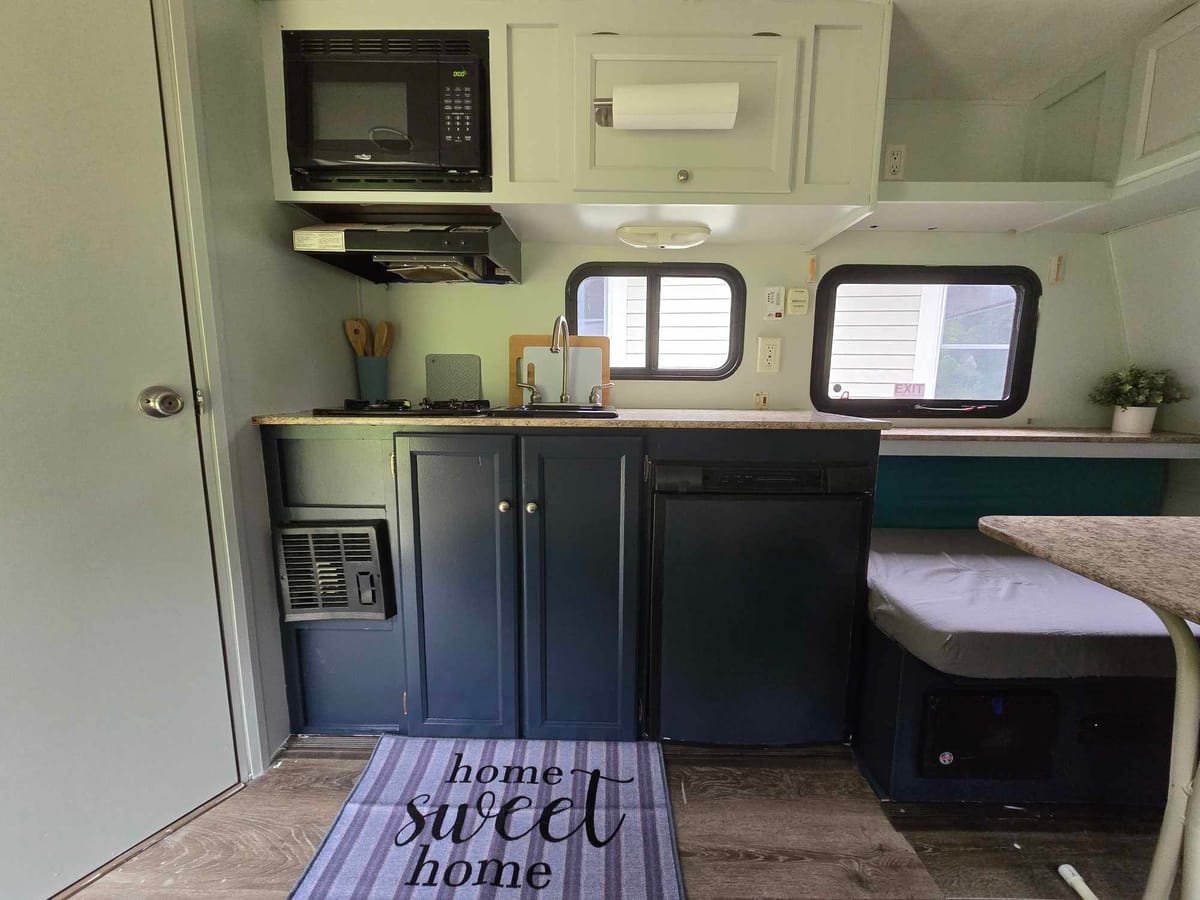
Despite being a 2013, the interior was relatively dated and somewhat grungy. This is what we started with:
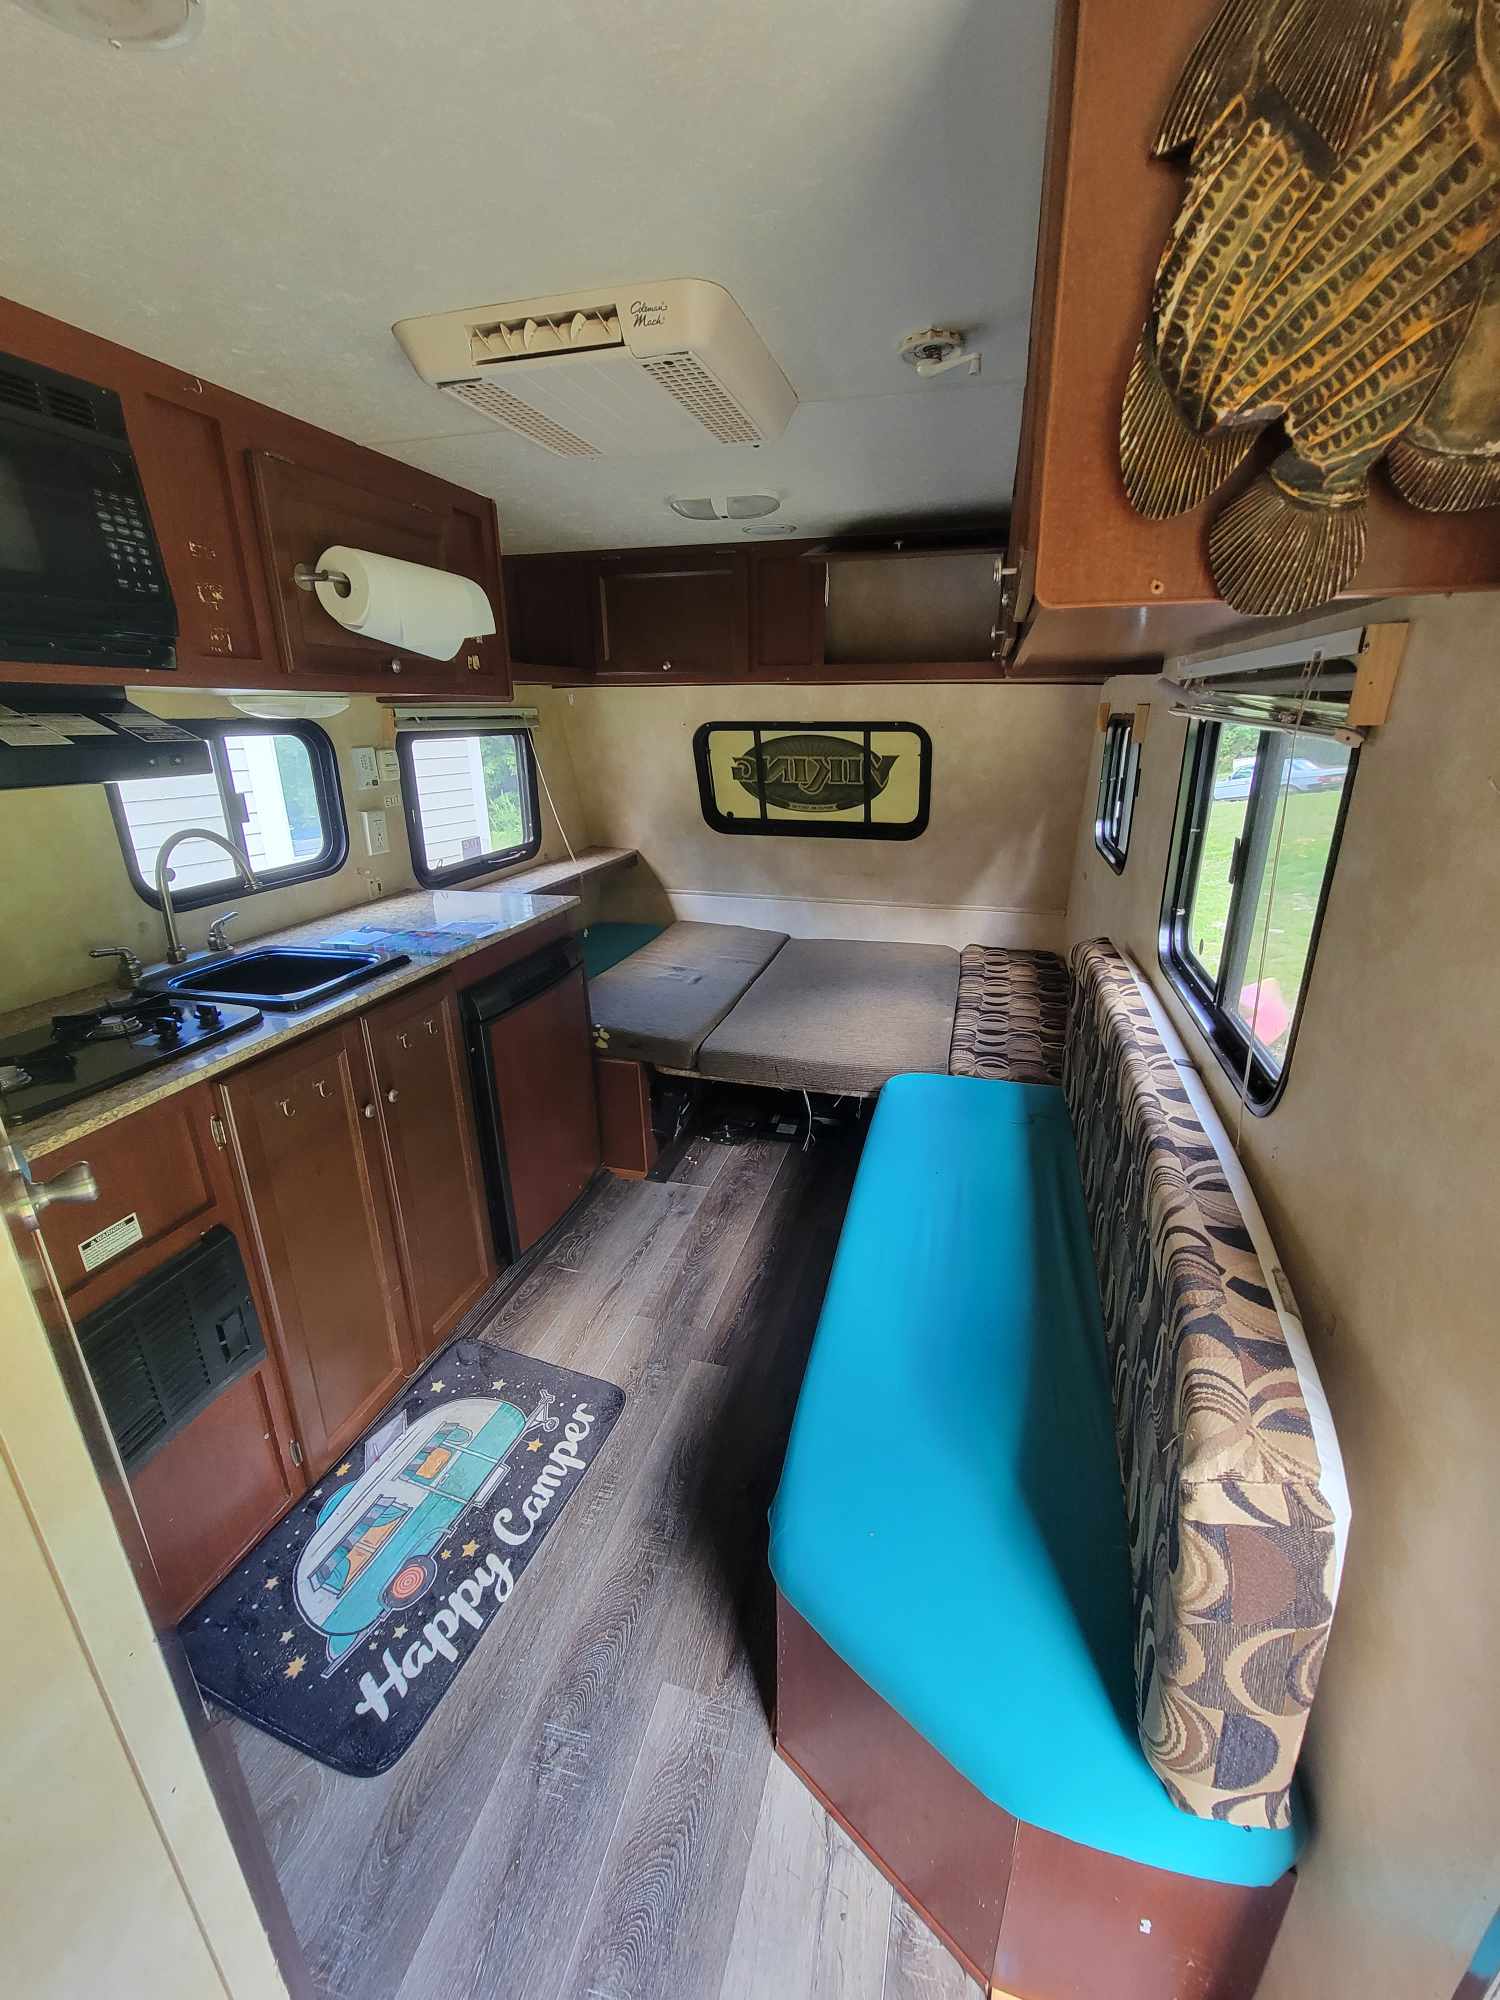
We spent last weekend refreshing the interior. We removed all of the cabinet doors, laid down a lot of masking tape, and then primed over the old wallpaper with Kilz 3. After priming, we painted the lower cabinets in a navy semi gloss Behr Urethane Alkyd paint, the walls and upper cabinets in satin grey tinted Behr Alkyd, and the ceiling in a matte white Behr marquee. This paint takes a while to cure to full hardness but adhesion and coverage appears excellent. We rolled the interior and sprayed the doors with a cheap airless HVLP sprayer. We ordered all new 4" foam to replace the seat cushions Brittany is mid way through sewing new cushion covers. We also purchased a 6" full memory foam mattress - the existing mattress was an "RV 3/4" size at 75x48 and at 4 inches thick. The new full mattress is 75x54 so we plan on cutting it down a few inches to fit with an electric carving knife.

We found on our first trip that the old 12v battery was wired backwards and completely flat. Our fridge was unusable (propane but no pilot light without battery) and the lights didn't work. I'd read a lot about LifePO4 batteries in solar installs and began investigating them for the camper. There's a lot to like about LifePO4 batteries. Due to the much flatter discharge curve, a 100Ah lithium battery serves up 12v for significantly longer than a lead acid. In practice, this means a 100Ah lead acid can only be safely discharged 50-60%, whereas a lithium ion can be discharged over 90%. At identical Ah ratings, a lithium battery will safely last almost twice as long. They can also be charged much faster. Most lead acid battery manufacturers rate their batteries at a charge rate of 0.3C, whereas it is common to see a 1C+ charge rate on LifePO4 batteries.

There used to be a massive price difference between the two, but LifePO4 batteries with onboard BMS are now competitive with lead acid batteries. I opted to buy a DC House 12v 100AH LifePO4 battery. At $160, it was one of the cheapest on the market. I watched tons of tear down videos of various brands and this one seemed to use relatively quality components on the inside. The on board BMS protects against basic dangerous conditions (overcharge, overcurrent, etc). I read and watched positive tear downs of both LiTime and Vatrer batteries of the same size, but the DC House was slightly cheaper at time of purchase. They probably all come out of the same factory.
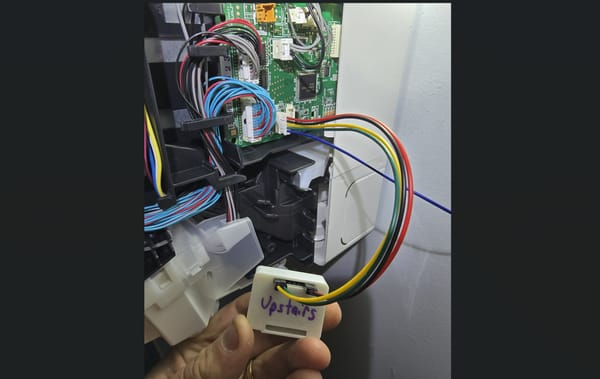
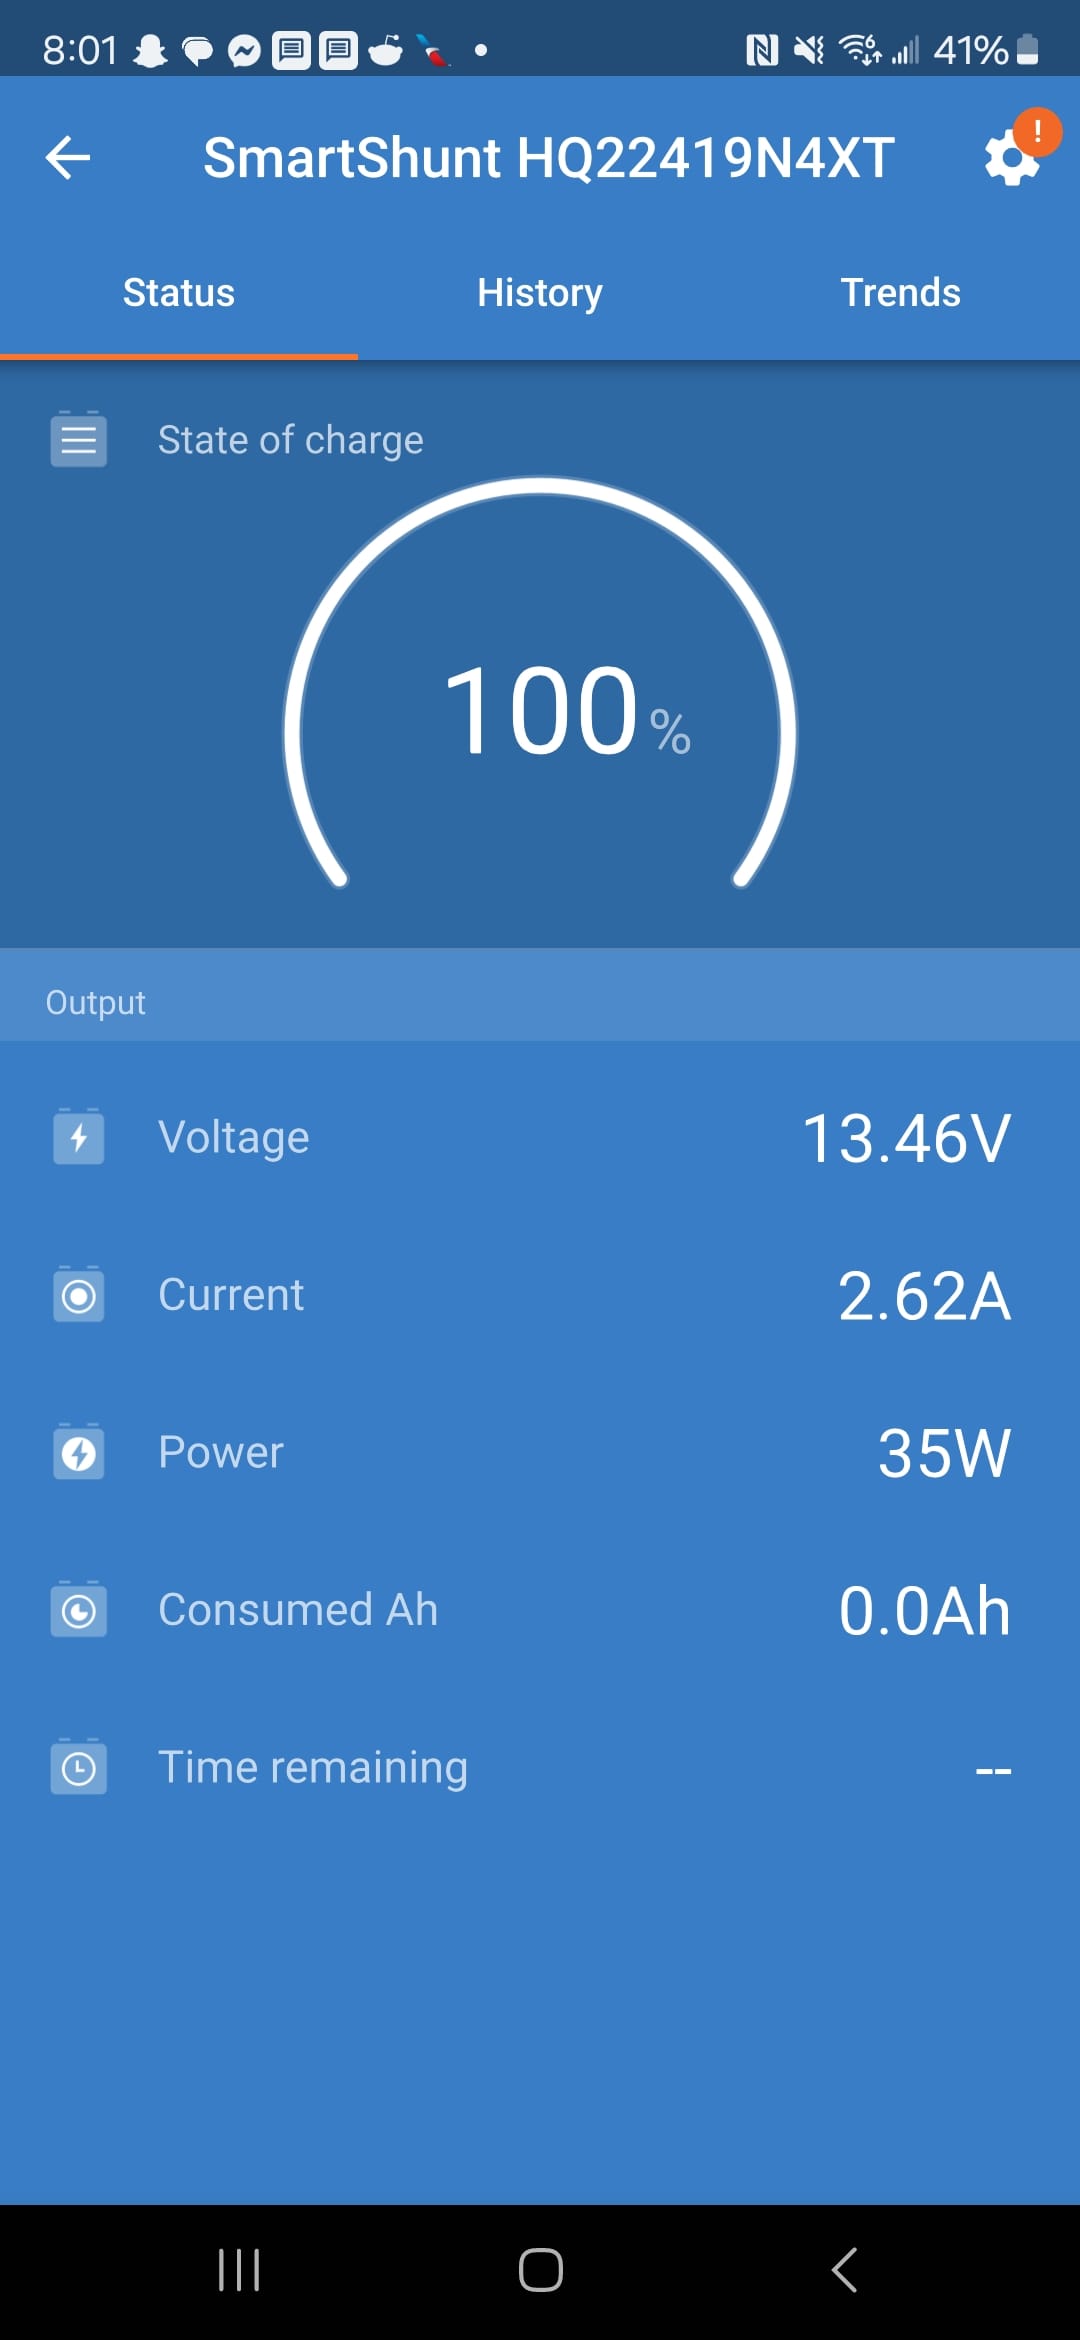
I considered purchasing a 12v battery with a bluetooth BMS to keep tabs on battery health, but they offered limited metrics and were significantly more expensive with reputable brands starting at $250 for a 100AH model. Instead, I opted to buy a Victron Smart Shunt. This goes between the battery and the camper, offering real time discharge rates, voltage, etc all on your phone. I velcro'ed it directly to the battery in the battery box on the tongue of the camper. When I replace the battery, I can opt to go for a cheap non-bluetooth BMS again and transfer the smart shunt over. It can also monitor two batteries - I plan on adding a second LifePO4 after seeing how long the one holds up this weekend. To maximize run time, I replaced all of the original incandescent light bulbs with LED 921 bulbs from amazon.
Even more importantly, several people have connected ESP8266 boards to the victron smart shunt, reading live data over serial and relaying it to home assistant over wifi. I plan on adding a small home assistant instance in the camper, likely on a raspberry pi or other low powered board, to control lights, connect to the dogs Fi smart collars, and monitor things like propane tank capacity. A strong 12v system is step one.
The onboard power center, a WFCO 8735P, is not designed to charge LifePO4 batteries. It will charge to 80% at a reasonable rate, but won't charge quickly to full capacity. For now, I bought a 35A Vevor smart charger. I plan on plugging it directly into my generator and putting the terminals on the battery. Eventually I will integrate this cleanly into the RV interior behind the WFCO unit, disabling the built in charging circuit. I'll have to add a 120v outlet and run new cables from the charger to the battery. At $70, it was significantly cheaper than replacing the WFCO unit with one capable of charging LifePO4 batteries and can charge at a faster rate.
We'll see how it all fairs this weekend at cowens cove!